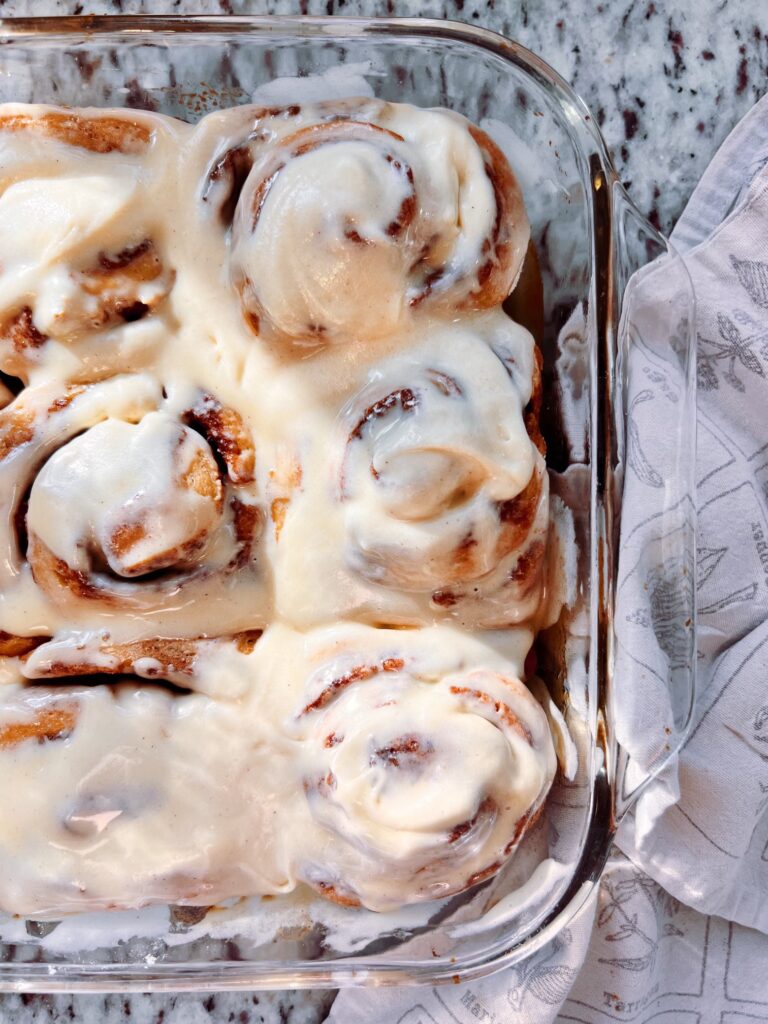
Oh-So-Soft, Ultimate Gluten Free Cinnamon Rolls
This recipe will yield the softest, yummiest cinnamon rolls with the quintessential cinnamon sugar goodness, and no one will ever think they are GLUTEN FREE! They are perfect for special occasions, like Christmas morning, or a slow paced Saturday morning. I have also included a “make-ahead” option so you don’t have to get up at the crack of dawn, unless you want to! Darn I say, this is the BEST gluten free cinnamon rolls you will ever make and one the whole family will love!
Oh man, oh man how I have baked and tested and trialed and errored my fair share of gluten free cinnamon roll recipes! And my oven has produced everything from biscuit-like to gooey to crumbly cinnamon rolls. For Christmas morning this last year, I finally made a batch that made the heavens sing!
Why this Recipe Works?
The integration of psyllium husk into gluten free bread baking started with America’s Test Kitchen, when the science of gluten free baking was really studied. Now you will see this ingredient used in recipes everywhere! My mom had purchased the first America’s Test Kitchen gluten free cookbook for me, the summer after I graduated college. I had moved back home to save money while teaching and that season holds so many sweet memories – many revolving around cooking in the kitchen. I had always loved cooking and baking, but when diagnosed with celiac disease, the options were limited and horrible. This first cookbook of America’s Test Kitchen really opened that love for me again.

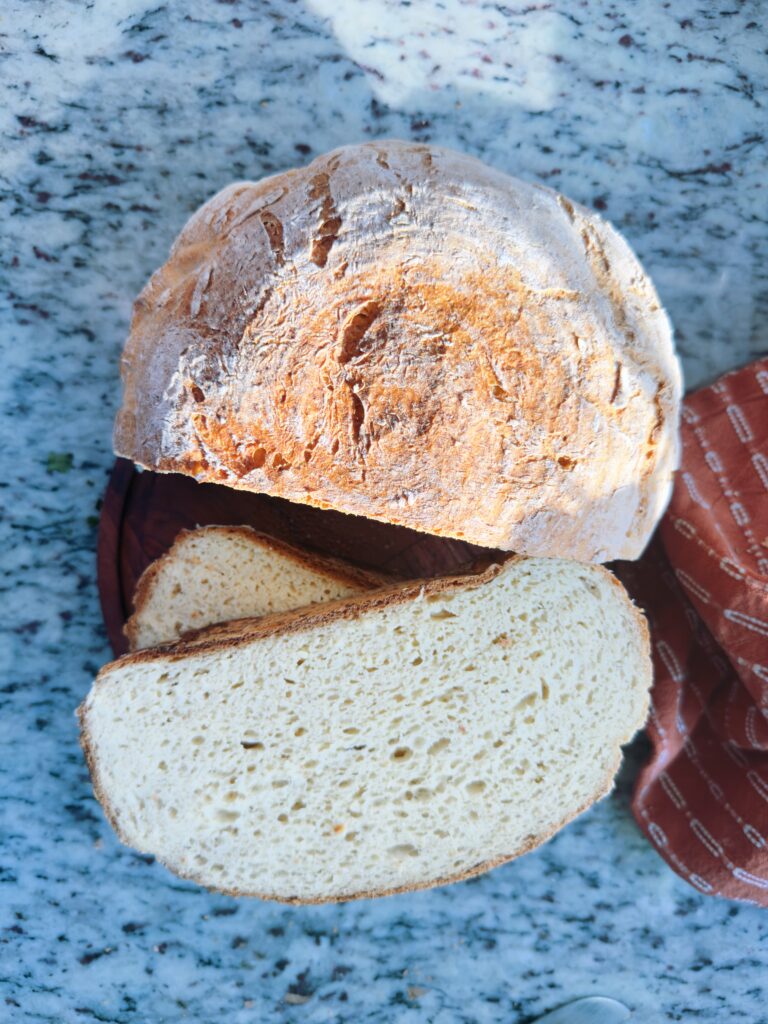
The other piece to the puzzle is using a bread flour. For best results when baking gluten free yeast breads (and sourdough – but that will be covered in another blog post), it all starts with a good gluten free bread flour blend. A lot of recipes use an all-purpose gluten free flour blend, but I have found to really develop a texture of bread that hits home, the ratios of starches needs to be different than that of an all purpose blend. This blend is a combination of tapioca starch/flour, sorghum flour and millet flour.
Okay onto the reason we are here – THE ULTIMATE GLUTEN-FREE CINNAMON ROLLS!
Ingredients Needed:
Dough (yields 12 cinnamon rolls)
- Bread flour: 4 1/2 cups – about 530 grams (ensure it’s gluten-free bread flour if needed, as it will provide structure and a chewy texture to the rolls) – You can find my recipe HERE or you could use King Arthur’s Gluten Free Bread Flour Blend or another bread flour, though I haven’t tested this recipe with other blends
- Salt: 2 teaspoons (enhances flavor and balances sweetness)
- Baking powder: 3 teaspoons (gives an extra rise and soft texture to the rolls)
- Xanthan Gum: 3 teaspoons
- Whole Psyllium husk: 4 tablespoons (helps mimic gluten by creating elasticity and adding moisture to the dough) NOT psyllium husk powder
- Water: 1/2 cup, lukewarm (aids in yeast activation and hydrates the dough)
- Milk: 2 cups, lukewarm (adds moisture, flavor, and tenderness; use a dairy-free option if needed)
- Sugar: 1/3 cup (feeds the yeast and adds sweetness to the dough – sometimes I like using honey)
- Rapid rise yeast: 2 3/4 teaspoons (acts as the leavening agent, providing rise and airy texture). You could use 4 tsp of active dry yeast.
- Eggs: 1 whole + 1 egg white, at room temperature (adds richness, moisture, and structure to the dough)
- Butter: 8 tablespoons (adds richness, tenderness, and flavor to the rolls; substitute with a dairy-free alternative if desired)
Filling
- Brown sugar: 1/2 cup, packed (adds a deep, caramelized sweetness with a molasses undertone, which enhances the classic cinnamon roll flavor)
- Coconut sugar: 1/2 cup (offers a subtle caramel flavor with a lower glycemic index than regular sugar, plus a hint of natural richness)
- Cinnamon: 1 tablespoon cinnamon
- Melted butter: 6 tablespoons (helps create a moist filling that melts into the dough as it bakes, infusing it with flavor; substitute with melted coconut oil for a dairy-free option)
Cream Cheese Frosting
- Cream cheese: 4 ounces, softened (adds a tangy richness that balances the sweetness of the rolls; use dairy-free cream cheese if needed)
- Butter: 6 tablespoons, softened (provides a creamy texture and adds richness; you can substitute with a plant-based butter for a dairy-free version)
- Powdered sugar: 2/3 cup (sweetens the frosting without any graininess and helps it achieve a smooth, spreadable consistency)
- Cinnamon: a sprinkle (brings warmth and a hint of spice that pairs beautifully with the rolls)
- Vanilla extract: 1 teaspoon (adds warmth and depth to the frosting, enhancing the flavor)
Cinnamon Frosting
- Powdered sugar: 2 cups (adds sweetness and a smooth texture to the frosting)
- Butter: 1/2 stick, softened (creates a creamy, rich base; substitute with dairy-free butter if needed)
- Heavy cream: 2 tablespoons (adds a silky, luxurious consistency to the frosting; use coconut cream as a dairy-free alternative)
- Vanilla extract: 2 teaspoons (adds depth of flavor and warmth to balance the sweetness)
- Cinnamon: a sprinkle (brings warmth and a hint of spice that pairs beautifully with the rolls)

Instructions:
Step 1: Activate the Yeast and Psyllium Husk
- Warm the Liquid Mixture: In a small saucepan, combine the milk, sugar, and water. Warm over medium heat until it reaches 115°F. Remove from heat, pour the mixture into a bowl, and sprinkle the active dry yeast over the top. Stir gently and let it sit for 5–10 minutes until foamy. This indicates the yeast is active. You could use instant yeast, but you would skip this step and add the yeast to the dry ingredients, then add the wet ingredients with the other wet ingredients.
- Thicken the Psyllium Husk: In a small bowl, stir together the water and psyllium husk and let thicken for 5 minutes.
Step 2: Prepare the Dry Ingredients
- Mix Dry Ingredients: In the large bowl of a stand mixer, add the bread flour, salt, xanthan gum and baking powder. Use the paddle attachment on low speed to mix until well combined.
Step 3: Combine Wet and Dry Ingredients
- Add Yeast and Psyllium Mixture and Eggs: With the mixer running on low speed, slowly pour in the activated yeast mixture and psyllium mixture. Add the eggs and continue mixing until the dough begins to come together.
- Add Butter and Knead: Gradually add the butter, one tablespoon at a time. Increase the mixer speed to medium and knead the dough for about 5 minutes, or until it’s smooth and well combined. The dough should be slightly sticky but elastic.
Step 4: Chill the Dough
- Refrigerate the Dough: Cover the mixing bowl with plastic wrap and refrigerate for 20 minutes to make the dough easier to handle.
Step 5: Roll Out the Dough
- Prepare the Filling: While the dough is chilling, prepare your filling by mixing the brown sugar, coconut sugar, cinnamon and melted butter in a small bowl.
- Roll the Dough: Lightly dust a clean surface with flour. Roll out the chilled dough into a rectangle, approximately 1/4-inch thick. You can use a floured rolling pin or your hands, the dough will be very soft and easy to work with.
Step 6: Add the Filling
- Spread the Butter and Sugar Mixture: Brush the melted butter evenly over the top of the dough, leaving a slight border around the edges. Sprinkle the cinnamon-sugar mixture over the buttered dough, pressing gently to adhere it.
Step 6: Add the Filling
- Spread the Butter and Sugar Mixture: Sprinkle the cinnamon sugar evenly over the top of the dough, leaving a slight border around the edges. Pressing gently to adhere it.
Step 8: Final Rise
- Let the Rolls Rise: Arrange the rolls in a greased baking dish, leaving a bit of space between each roll. Cover with a cloth and let them rise in a warm place for 30–45 minutes, or until doubled in size.
Step 9: Bake the Rolls
- Bake: Preheat your oven to 350°F. Bake the rolls for 25–30 minutes, or until golden brown.
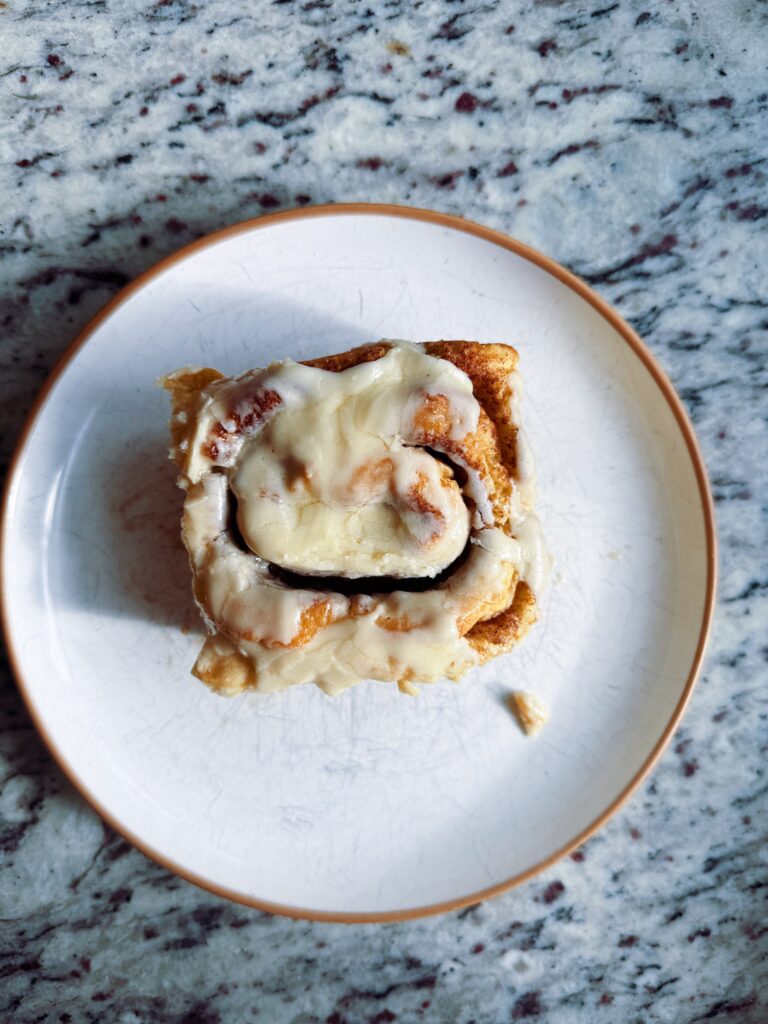
Step 10: Frost and Serve
- Frost: While the rolls are warm, spread the prepared frosting generously over the top. Allow the frosting to melt slightly into the rolls before serving.

Tips and Tricks:
- When baking, it is always best when ingredients are room temperature.
- I have not tried this recipe with other flour blends. For best results, use my bread flour blend, which you can find here!
- It is VERY helpful to have a kitchen scale for the gram measurements – it makes all the difference!
- If you are looking for lower glycemic, you can substitute the brown sugar with coconut sugar, or do half and half.
- Don’t like the cream cheese icing?You can make a powdered sugar frosting with butter, milk and powdered sugar!
- In a stand mixer combine 2 cups of powdered sugar and 1/2 stick of butter, softened. Using a paddle, beat the mixture for one minute until creamy.
- To the mixture, add 2 tablespoons heavy cream and 2 teaspoons vanilla. Turn the mixer to medium for 4-5 minutes to create a light and fluffy frosting!
Why You Will Love This Recipe:
- It is EASY!
- It truly replicates regular cinnamon rolls made with wheat flour – so soft!
- The dough is easy to work with!
- You can make it ahead of time!
Make-Ahead/Overnight Option:
- Option 1 is to prepare the cinnamon rolls to the step previous to the dough rise/rising. Once you have prepared the dough, rolled it out, added the filling and created the rolls, place them in the pie pan and cover with plastic wrap. In the morning, take them out of the refrigerator and let them rise for 2 hours in a warm spot, covered with a damp dish cloth. When they have doubled in size-ish (they will continue to rise in the oven), you are ready to bake!
- Option 2 is to prepare the dough the night before so that in the morning you are simply rolling out the dough, letting it rise, then baking. To do so, store the dough in an airtight container overnight.
Storage:
Of course these darlings are best when eaten warm and fresh from the oven! But because of the bread flour and the psyllium husk, they miraculously stay soft and fluffy! They can be storage in an airtight container for up to 2 days. It’s best to warm them slightly in the microwave before enjoying.
Check out the recipe card below to make this great recipe, perfect for holidays or special occasions! Happy baking!

The Ultimate Gluten Free Cinnamon Roll Recipe
Ingredients
Dough (yields 12 rolls)
- 4 tablespoons whole psyllium husk
- 1/2 cup water
- 4 1/2 cups or 530 grams gluten free bread flour You can find my recipe HERE or you could use King Arthur's Gluten Free Bread Flour Blend or another bread flour, though I haven't tested this recipe with other blends
- 1 tbsp xanthan gum Omit if your flour blend has a binder
- 1 tbsp baking powder
- 2 3/4 tsp instant or rapid rise yeast
- 2 tsp salt
- 2 cups whole milk
- 1/3 cup sugar
- 1 egg room temperature
- 1 egg white room temperature
- 1 tsp apple cider vinegar
- 8 tablespoons softened butter
Filling
- 1/2 cup brown sugar
- 1/2 cup coconut sugar
- 1 1/2 tbsp cinnamon
- 6-8 tablespoons softened butter
Cream Cheese Frosting
- 4 ounces cream cheese softened
- 6 tablespoons butter softened
- 2/3 cup powdered sugar
- Sprinkle of Cinnamon
- 1 teaspoon vanilla
Cinnamon Frosting
- 2 cups powdered sugar
- 1/2 stick of butter softened
- 2 tablespoons heavy cream
- 2 teaspoons vanilla
- Sprinkle of Cinnamon
Instructions
- In a small bowl, whisk together the psyllium husk and water. Set aside
- In the large bowl of a stand mixer, add the bread flour, xanthan gum, baking powder, instant yeast and salt. Use the paddle attachment on low speed to mix until well combined.
- In a small saucepan, combine the milk and sugar. Warm over medium heat until it reaches 120°F. Remove from heat.
- With the mixer running on low speed, slowly pour in the warm milk and sugar to activate the yeast and the psyllium husk. Add the eggs and ACV and continue mixing until the dough begins to come together.
- Gradually add the butter, one tablespoon at a time. Increase the mixer speed to medium and knead the dough for about 5 minutes, or until it’s smooth and well combined. The dough should be slightly sticky but elastic.
- Cover the mixing bowl with plastic wrap and refrigerate for 20 minutes to make the dough easier to handle. You can skip this step if not needed.
- While the dough is chilling, prepare your filling by mixing the brown sugar, coconut sugar, cinnamon and melted butter in a small bowl.
- Lightly dust a clean surface with flour. Roll out the chilled dough into a rectangle, approximately 1/4-inch thick. You can use a floured rolling pin or your hands, the dough will be very soft and easy to work with.
- Using a slanted spatula, spread the butter over the dough. Sprinkle the cinnamon sugar evenly over the top of the dough, leaving a slight border around the edges. Pressing gently to adhere it.
- Use a pizza cutter to slice the dough into strips (long ways). Starting from one long edge, roll the dough tightly, piece by piece.
- Arrange the rolls in a greased baking dish, leaving a bit of space between each roll. Cover with a cloth and let them rise in a warm place for 30–45 minutes, or until doubled in size.
- Bake: Preheat your oven to 350°F. Bake the rolls for 25–30 minutes, or until golden brown.
- While the rolls are warm, spread the prepared frosting generously over the top. Allow the frosting to melt slightly into the rolls before serving.
*WHY no rice flour or xanthan gum?*
I didn’t want to use rice flour due to the research and development on high arsenic levels found in rice. You can lower these levels by buying rice flour/rice from specific parts of the US (California) and by washing thoroughly. So if I do use rice flour, I make sure it is organic and grown in California. But I liked having another option to baking gluten free bread without rice flour altogether. Additionally, rice flour lacks high nutritional value, so I wanted to replace it with flours that added protein, vitamins and minerals into the bread.
As far as xanthan gum, there is quite a bit of research out there regarding its negative effects. It isn’t naturally occurring, and it can be difficult for individuals to digest. There are a loot of other findings still being researched, so again, I wanted to have options that didn’t depend on xanthan gum. This is the bread flour blend I use for all my yeast breads (and sourdough – but I’ll cover that in another post) – cinnamon rolls, dinner rolls, sandwich bread (recipe below), focaccia bread, artisan loaves, etc. I love that it is universal like all-purpose but perfectly tailored for yeast bread which requires a different ratio of starches. I like to complicate things (or better worded – I like to challenge myself) and I wanted to make cinnamon rolls with that quintessential soft texture WITHOUT using rice flour OR xanthan gum. Quite the challenge indeed!
This recipe will yield the softest, yummiest cinnamon rolls with the quintessential cinnamon sugar goodness, and no one will ever think they are GLUTEN FREE! They are perfect for special occasions, like Christmas morning, or a slow paced Saturday morning. I have also included a “make-ahead” option so you don’t have to get up at the crack of dawn, unless you want to! Darn I say, this is the BEST gluten free cinnamon rolls you will ever make!