Easy and Delicious Gluten Free Cheesecake Recipe
This blog may contain affiliate links from which I earn a small commission.
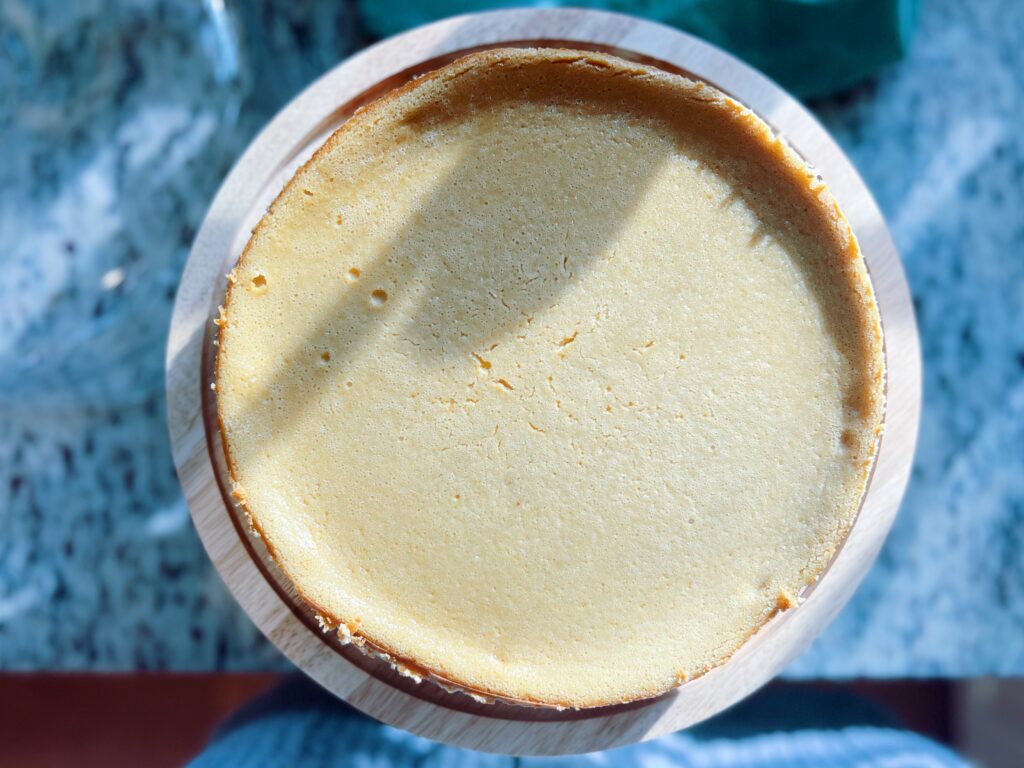
I am a big cheesecake fan – it is such an easy go-to and without being super sweet, and can, with one bite, satisfy a sweet tooth (which I have often!). Growing up my mom didn’t make cheesecake often – I think because people make a fuss about the water bath and springform pan and such. Not me. I keep things simple using my favorite Magnolia pie pan and zero water bathes and it still never disappoints. When I married Corey cheesecake was one of his favorite desserts, so it became one that I wanted to master GF style. And while all the fancy cheesecake flavors are fun, sometimes the tried and true, traditional cheesecake hits home and delicious recipe is always a crowd favorite!

Why You Will Love This Recipe:
- Sweetened with a little bit of brown sugar and maple syrup so it’s almost guilt-free
- Gluten Free but you’d never know it!
- Simple ingredients found in grocery stores!
- A perfect dessert for anytime of the year! (simply pair with a seasonal fruit!)
Ingredients:
- Cream Cheese, softened and at room temperature: Use full-fat cream cheese for the best texture and flavor. Let it sit out to soften completely, which helps avoid lumps in your batter.
- Brown Sugar: Provides a rich sweetness with a hint of molasses, adding depth to the cheesecake’s flavor.
- Vanilla: Pure vanilla extract enhances the sweetness and aroma, bringing warmth and balance to the cheesecake.
- Eggs, room temperature: Help create a smooth, creamy filling by binding the ingredients together. Let them come to room temperature for easier mixing.
- Maple Syrup, room temperature: Adds a natural sweetness and a subtle, earthy flavor. Choose pure maple syrup for the best quality.
- Heavy Cream, room temperature: Contributes to the cheesecake’s silky texture and richness. Allowing it to come to room temperature ensures smooth incorporation.

For the Crust:
- Simple Mills Graham Crackers: these crackers are gluten free, grain free and refined sugar free and they have a perfect crisp and flavor! They make a great graham cracker crust, but if you can’t find them, you can simply use a gluten free graham cracker brand.
- Melted Butter, cooled slightly: I use salted, but you could use unsalted, but I would add a dash of salt.
Instructions:
- Preheat the oven: Preheat your oven to 350°F (175°C). Position the oven rack in the center for even baking.
- Prepare the crust:
- In a small saucepan over medium heat, melt the butter until fully liquid. Remove from heat and set aside to cool slightly, so it doesn’t cook the crumbs.
- In a food processor, add gluten-free graham crackers and pulse until they reach a fine, sand-like texture. Alternatively, place the crackers in a zip-top bag and crush with a rolling pin if you don’t have a food processor.
- Transfer the graham cracker crumbs to a medium mixing bowl. Stir in the melted butter until the crumbs are evenly coated and the mixture resembles damp sand.
- Pour the crumb mixture into your prepared springform pan (lined with parchment paper for easier removal, if desired). Using the back of a spoon or the bottom of a pan, press the crumbs firmly and evenly into the bottom of the springform pan to create a compact crust. Set aside. You could also use a deep dish pie pan if you don’t want to mess with a spring form.
- Prepare the cheesecake batter:
- In the bowl of a stand mixer fitted with the paddle attachment, beat the softened cream cheese and brown sugar on medium speed until smooth and creamy, about 2–3 minutes. Scrape down the sides of the bowl with a spatula as needed to ensure everything is well combined.
- With the mixer on low speed, slowly pour in the maple syrup. Allow it to incorporate fully before adding the heavy cream and vanilla extract. Continue mixing until smooth.
- Add the eggs one at a time, beating on low speed after each addition. Be careful not to overmix, as this can introduce too much air and cause cracks in the cheesecake. Stop mixing as soon as the eggs are fully incorporated and you have a smooth filling. (you can use a hand mixer for the cream cheese filling!)
- Assemble and bake:
- Pour the cheesecake filling over the prepared crust, smoothing the top with a spatula if necessary. Gently tap the pan on the counter to release any air bubbles. Place the 9″ springform pan in a 10″ cake pan, then place that 10″ cake pan into a larger cake pan that holds the water – you could also place the 10″ cake pan in a baking dish with the water.
- Place the pan on the center rack of the preheated oven and bake for 30 minutes, or until the edges are set but the center still has a slight jiggle. DO NOT over bake! Avoid opening the oven door during baking to maintain consistent heat and to avoid the dreaded cheesecake crack.
- Cool and chill:
- Remove the cheesecake from the oven and allow it to cool to room temperature in the pan. This prevents the sudden temperature change that can cause cracks.
- Once cooled, cover the pan with plastic wrap or foil and transfer to the refrigerator. Let the cheesecake chill for at least 4 hours, or preferably overnight, to fully set and develop its flavor.
- Serve:
- Carefully release the cheesecake from the springform pan and transfer it to a serving plate. Slice with a sharp knife, wiping the blade clean between cuts for neat slices. Serve plain or with your choice of toppings.
Perfect Pairings:
Here are some perfect pairings for gluten-free cheesecake, offering a variety of flavors and textures to complement the creamy dessert:
Favorite Toppings:
- Fresh Berries: Fresh strawberries, blueberries, raspberries, or blackberries add a bright, tangy contrast to the richness of cheesecake.
- Fruit Compote: Warm or chilled fruit sauces, like cherry, blueberry, or mixed berry compote, enhance the flavor with a syrupy sweetness.
- Chocolate Ganache: A glossy layer of melted chocolate brings a decadent, indulgent touch.
- Caramel Sauce: Drizzle salted caramel sauce for a sweet and salty pairing.
- Whipped Cream: Light, fluffy whipped cream balances the dense cheesecake texture.
- Candied Nuts: Add crunch with candied pecans, almonds, or hazelnuts.
Sides:
- Coffee or Espresso: The bold, bitter notes of coffee complement the creamy and sweet cheesecake.
- Herbal Tea: Chamomile, mint, or lavender tea offers a soothing, subtle pairing.
- Wine: Pair with a sweet dessert wine like Moscato or a crisp Riesling.
Crust Pairings:
- Gluten-Free Graham Cracker Crust: A classic pairing with a buttery, crumbly base.
- Nut Crust: Almonds, pecans, or walnuts add a nutty, slightly salty contrast.
- Chocolate Crust: Crushed gluten-free chocolate cookies make a rich, indulgent base.
Seasonal Pairings:
- Pumpkin Spice (Fall): Top with a dollop of spiced whipped cream or drizzle with maple cinnamon glaze.
- Citrus (Winter): Pair with lemon curd, orange zest, or candied citrus peels for a fresh burst of flavor.
- Tropical (Summer): Add a mango or pineapple glaze for a refreshing twist.

Tips & Tricks for the Perfect Gluten-Free Cheesecake
- Use Room Temperature Ingredients:
- For a silky-smooth, lump-free filling, ensure that all your ingredients (cream cheese, eggs, heavy cream, maple syrup, etc.) are at room temperature before mixing. Cold ingredients don’t incorporate as well and can cause lumps in the batter.
- Tip: To bring ingredients to room temperature faster, leave them on the counter for 30–60 minutes. For eggs, you can place them in a bowl of warm (not hot) water for 5–10 minutes.
- Swap Foil for Layer Cake Pans When Using a Water Bath:
- Instead of wrapping your springform pan in multiple layers of foil to prevent leaks in a water bath, use a slightly larger layer cake pan to encase the springform pan. Place the springform pan inside the cake pan, then set the entire setup into your water bath. This method eliminates the risk of water seeping into the crust and keeps your cheesecake dry.
- Instructions: After assembling your cheesecake, place the springform pan inside a cake pan that’s about 1–2 inches larger in diameter. Then, set the cake pan into a roasting pan or deep baking dish and fill the dish with hot water, ensuring it reaches about halfway up the sides of the cake pan.
- Cool Gradually Before Chilling:
- Let the cheesecake cool completely to room temperature before transferring it to the fridge. Rapid temperature changes can cause cracks to form on the surface. To cool evenly, leave the cheesecake in the turned-off oven with the door slightly ajar for 15–30 minutes before removing it to cool further on the counter.
- Chill for at Least 4 Hours (or Overnight):
- Cheesecake needs ample time in the refrigerator to fully set and develop its flavor. While 4 hours is the minimum, chilling it overnight will yield the best texture and taste. Patience is key to achieving the dense yet creamy consistency that makes cheesecake irresistible.
- Avoid Overmixing the Batter:
- Mix the filling on low or medium speed and stop once the ingredients are fully incorporated. Overmixing introduces air into the batter, which can cause the cheesecake to rise unevenly or crack during baking. Mix just enough to get a smooth and creamy cheesecake batter (room temp ingredients make this easy)
- Bake Without Peeking:
- Avoid opening the oven door while the cheesecake is baking. Sudden temperature changes can cause the center to sink or the top to crack. Trust the process and only check for doneness toward the end of the baking time.
- Check for Doneness Properly:
- The edges of the cheesecake should be set, while the center should still have a slight jiggle when you gently shake the pan. The residual heat will continue to cook the center as the cheesecake cools.
- Clean Slices Every Time:
- Use a sharp knife dipped in hot water to slice the cheesecake. Wipe the blade clean with a damp cloth between cuts for picture-perfect slices.
- Gluten-Free Graham Cracker Tips:
- Not all gluten-free graham crackers are created equal. Choose a brand with a good flavor and sturdy texture. If the crumbs seem too dry after mixing with butter, add a teaspoon of water at a time until they hold together when pressed.
- Customize Your Toppings:
- Gluten-free cheesecake is a versatile canvas. Try fresh fruit, chocolate shavings, caramel sauce, or even gluten-free cookie crumbles to make it your own.
Check out the recipe card below for the full recipe for the most delicious gluten-free cheesecake recipe EVER! It’s one of my favorite gluten-free desserts – the best gluten-free cheesecake recipe!

Easy and Delicious Gluten Free Cheesecake Recipe
Ingredients
- 4 8 oz packages cream cheese, full fat
- 1/2 cup coconut sugar or brown sugar
- 1 tsp vanilla
- 4 eggs
- 1/2 cup maple syrup
- 1/2 cup heavy cream
Crust
- 1 1/2 cups Simple Mills Graham Crackers
- 8 tablespoons butter, melted
Instructions
- Preheat the oven: Preheat your oven to 350°F (175°C). Position the oven rack in the center for even baking.
- In a small saucepan over medium heat, melt the butter until fully liquid. Remove from heat and set aside to cool slightly, so it doesn’t cook the crumbs.
- In a food processor, add gluten-free graham crackers and pulse until they reach a fine, sand-like texture. Alternatively, place the crackers in a zip-top bag and crush with a rolling pin if you don’t have a food processor.
- Transfer the graham cracker crumbs to a medium mixing bowl. Stir in the melted butter until the crumbs are evenly coated and the mixture resembles damp sand.
- Pour the crumb mixture into your prepared springform pan (lined with parchment paper for easier removal, if desired). Using the back of a spoon or the bottom of a pan, press the crumbs firmly and evenly into the bottom of the springform pan to create a compact crust. Set aside. You could also use a deep dish pie pan if you don’t want to mess with a spring form.
- In the bowl of a stand mixer fitted with the paddle attachment, beat the softened cream cheese and brown sugar on medium speed until smooth and creamy, about 2–3 minutes. Scrape down the sides of the bowl with a spatula as needed to ensure everything is well combined.
- With the mixer on low speed, slowly pour in the maple syrup. Allow it to incorporate fully before adding the heavy cream and vanilla extract. Continue mixing until smooth.
- Add the eggs one at a time, beating on low speed after each addition. Be careful not to overmix, as this can introduce too much air and cause cracks in the cheesecake. Stop mixing as soon as the eggs are fully incorporated and you have a smooth filling. (you can use a hand mixer for the cream cheese filling!)
- Pour the cheesecake filling over the prepared crust, smoothing the top with a spatula if necessary. Gently tap the pan on the counter to release any air bubbles. Place the 9″ springform pan in a 10″ cake pan, then place that 10″ cake pan into a larger cake pan that holds the water – you could also place the 10″ cake pan in a baking dish with the water.
- Place the pan on the center rack of the preheated oven and bake for 30 minutes, or until the edges are set but the center still has a slight jiggle. DO NOT over bake! Avoid opening the oven door during baking to maintain consistent heat and to avoid the dreaded cheesecake crack.
- Remove the cheesecake from the oven and allow it to cool to room temperature in the pan. This prevents the sudden temperature change that can cause cracks.
- Once cooled, cover the pan with plastic wrap or foil and transfer to the refrigerator. Let the cheesecake chill for at least 4 hours, or preferably overnight, to fully set and develop its flavor.
- Carefully release the cheesecake from the springform pan and transfer it to a serving plate. Slice with a sharp knife, wiping the blade clean between cuts for neat slices. Serve plain or with your choice of toppings.