Classic No Bake Cookies | Naturally Gluten Free
This blog post may contain affiliate links from which I earn a small commission.
When I was in 5th grade I had the most magical teacher. You know, that teacher from your childhood that poured magic and wonder into every day. The teacher that truly saw you and made you feel seen. For me it was Mrs. Eben. The projects she brought into the classroom and orchestrated, made learning come alive for me, and allowed my creative thought processing to take flight. The open-ended learning and out-of-the-box thinking laid the foundation for my relationship with learning, and paved the way for how I wanted to teach. She made learning so much fun, and that 5th grade year was a pivotal turning point for me in my education.
One of the projects Mrs. Eben orchestrated was an economics unit. We learned all about supply and demand, goods and wants, inflation and currency. And the capstone experience was cumulatively creating our own class economy. We developed our name and currency, and students formed teams with whom they would create businesses and shops. I, of course, developed the business plan of a bakery, lovingly named ‘Candyland Sweets’ (our class country was named Candyland).
And every Friday, the students would get to open their shops for business, and use the currency we had earned throughout the week. Bless my parents, this meant I would spend Thursday night making and baking my treats to sell on Friday. I had a rotation of rice crispy treats, puppy chow, chocolate chip cookies and of course, these no bake cookies. And still to this day, when I eat a no bake cookie, I think of little 5th grade me, staying up way too late on Thursday nights to make my treats, and being so proud of myself for ‘selling out’ of goods every Friday.

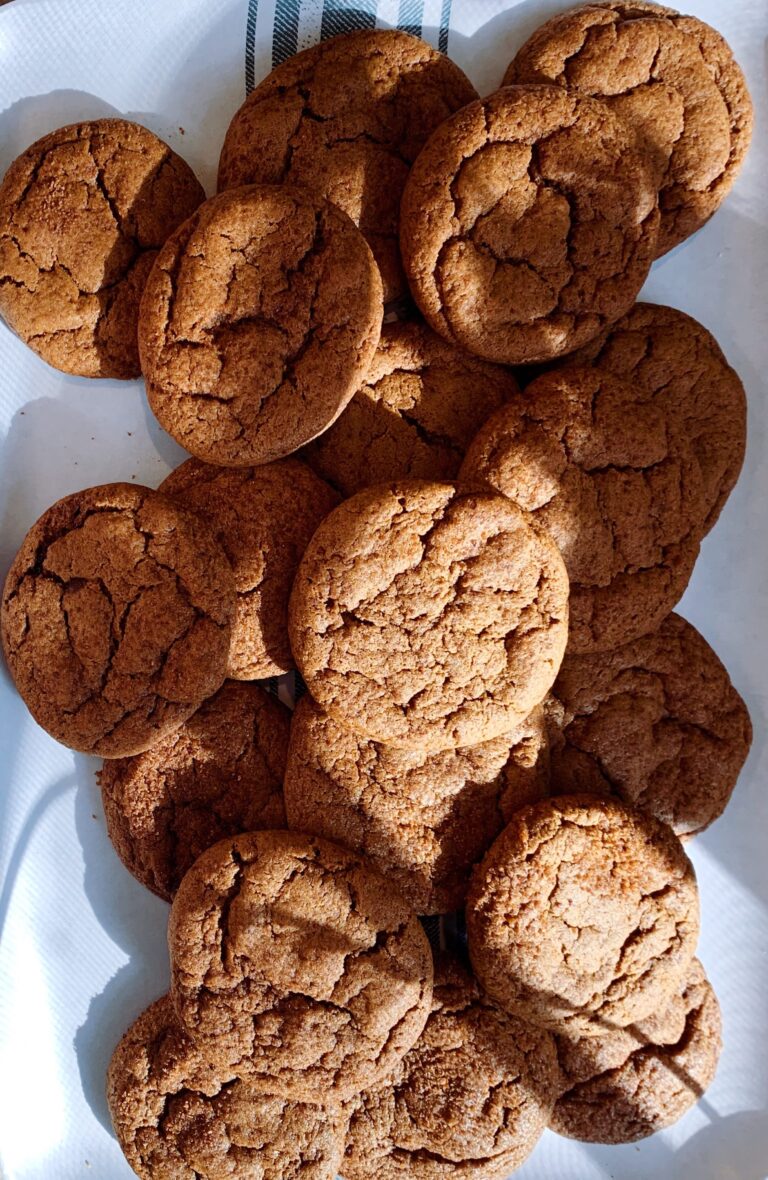
I have adapted this recipe over the years, but it is still tried and true no bake cookie nostalgia! They are the easiest cookies and one of the first recipes I ever attempted as a little, cutsy 5th grader, opening her “Candyland Sweets” store every Friday. These Gluten-Free No Bake Cookies are the easiest way to satisfy your chocolate cravings — no oven needed! They’re rich, fudgy, and loaded with peanut butter flavor, with just the right amount of chew from gluten-free oats. This recipe is a nostalgic favorite, made even better with simple, wholesome ingredients. Perfect for busy days, after-school treats, or when you just want something sweet right now.
Why You Will Love This Recipe:
- No baking required: Perfect for hot days or when you want an easy treat fast. Such a simple recipe!
- Naturally gluten-free: Made with certified gluten-free oats for safe indulgence.
- Simple Ingredients: With just a handful of ingredients these cookies come together in minutes and satisfy that sweet tooth.
- Perfect texture: Chewy, fudgy, and slightly crunchy thanks to the oats and peanut butter.
- Great for meal prep treats: Make a batch and store for easy grab-and-go treats.
- Great Recipe for Sharing: The cookies are small but sweet, so a little goes a long way. Perfect for large groups!
Ingredients:
- 1 cup white sugar: Adds sweetness and helps the cookies set with a glossy finish.
- 1 cup coconut sugar: Balances the white sugar with a deeper, caramel-like flavor that complements the cocoa. Also, my attempt to swap for some healthier ingredients.
- 1/2 cup salted butter: Provides richness and helps bind everything together. The salt in the butter enhances the chocolate flavor.
- 2 tablespoons unsweetened cocoa powder: Use a high-quality cocoa powder for the best chocolate flavor. Dutch-processed cocoa will give a darker, smoother result, while natural cocoa adds a touch of brightness.
- 1 teaspoon vanilla extract: Adds warmth and rounds out the chocolate and peanut butter flavors.
- 1/2 teaspoon salt: Balances the sweetness and highlights the cocoa and peanut butter.
- 3 cups quick oats (certified gluten-free): Or quick-cooking oats. The oats give structure and texture. Make sure to use certified gluten-free oats to keep this recipe safe for gluten-free diets. Quick oats absorb just the right amount of moisture for chewy, set cookies.
- 1/2 cup crunchy, natural peanut butter (no added sugar): The peanut butter adds creaminess and flavor depth, while the crunchy bits give each cookie a satisfying texture. Stir well before measuring if the oil has separated in the jar. You could use creamy peanut butter, but I preferred the added texture. You could substitute with another type of nut butter but it will change the overall flavor of the cookie.

Instructions:
- Prepare your workspace:
Line a baking sheet or clean countertop with parchment paper or wax paper. This is where you’ll drop the cookies once the mixture is ready—have it prepared ahead of time because the mixture sets quickly. - Combine and melt:
In a medium saucepan, add the white sugar, coconut sugar, butter, cocoa powder, vanilla, and salt. Place over medium heat and stir continually with a wooden spoon or silicone spatula.
Once you hear the first sizzle, continue to stir and cook for about 3–4 minutes, until the mixture is fully melted, glossy, and slightly thickened. Be sure to scrape the sides and bottom of the pan to prevent burning. Turn to medium low heat if needed! - Add the peanut butter:
Stir in the crunchy peanut butter while the mixture is still hot. Continue stirring for 2 more minutes, allowing the peanut butter to melt and fully incorporate into the chocolate mixture. The texture should be smooth and cohesive. For best results, you want to make sure the cookie mixture cooks long enough so the cookies set! - Add the oats:
Remove the saucepan from heat. Quickly stir in the gluten-free quick oats until they are evenly coated and no dry spots remain. The mixture will start to thicken as it cools slightly. - Scoop and shape:
Using a 1-tablespoon cookie scoop (or two spoons), drop portions of the mixture onto the prepared parchment paper. Flatten slightly with the back of the spoon if you prefer a thinner cookie. - Cool and set:
Allow the cookies to cool at room temperature for at least 30 minutes, or until firm and no longer sticky to the touch. You can speed this process up by placing the cookies in the refrigerator for about 15 minutes.
Storage Tips
- Store in an airtight container at room temperature for 3-4 days.
- For longer storage, refrigerate for up to 2 weeks or freeze for up to 3 months—just let them come to room temperature before serving.

Tips & Tricks
- For softer cookies: Reduce the cooking time of the sugar mixture by 30–45 seconds. The shorter the cook time, the softer the cookies.
- For firmer cookies: Cook the sugar mixture for an extra 30–60 seconds until slightly thicker before adding the oats.
- Make them dairy-free: Substitute the butter with vegan butter or refined coconut oil. Both work beautifully and still give a great texture.
- Try different nut butters: Almond butter or cashew butter make delicious variations. If using natural nut butter, give it a good stir before measuring.
- Add-ins for extra texture: Stir in 1/4 cup mini chocolate chips, unsweetened shredded coconut, or chopped nuts after adding the oats.
- Control the sweetness: You can reduce the total sugar by up to 1/4 cup without affecting texture too much if you prefer a less-sweet cookie.
- Mix up the flavor: Add a pinch of cinnamon, espresso powder, or a splash of maple extract for a fun twist.
Favorite Tools for this Recipe:
Perfect Pairings
These cookies are delightful on their own, but even better when paired with your favorite cozy treats:
- With coffee: Enjoy alongside a hot cup of coffee, mocha, or espresso for the ultimate afternoon pick-me-up.
- With milk: Classic and comforting—especially with a cold glass of almond, oat, or regular milk.
- With ice cream: Crumble a few cookies over vanilla or chocolate ice cream for an easy dessert upgrade.
- With hot chocolate: For chocolate lovers, these cookies double the decadence when served with a creamy mug of cocoa.
- With fruit: Balance the richness with fresh strawberries, raspberries, or banana slices on the side.
- With other gluten-free desserts: Try pairing with your Gluten-Free Zucchini Bread or Blueberry Cake for a dessert spread that feels homemade and special.

Check out the recipe card below for this delicious, classic no bake cookies! That perfect peanut butter chocolate combination sings in this easy recipe!!

Classic No Bake Cookies | Naturally Gluten Free
Ingredients
- 1 cup white sugar
- 1 cup coconut sugar
- 1/2 cup salted butter
- 2 tablespoons unsweetened cocoa powder
- 1 teaspoon vanilla extract
- 1/2 teaspoon salt
- 3 cups quick oats, certified gluten-free
- 1/2 cup crunchy natural peanut butter (no added sugar)
Instructions
- Prepare your workspace:
- Line a baking sheet or clean countertop with parchment paper or wax paper. This is where you’ll drop the cookies once the mixture is ready—have it prepared ahead of time because the mixture sets quickly.
- Combine and melt:
- In a medium saucepan, add the white sugar, coconut sugar, butter, cocoa powder, vanilla, and salt. Place over medium heat and stir continually with a wooden spoon or silicone spatula.
- Once you hear the first sizzle, continue to stir and cook for about 3–4 minutes, until the mixture is fully melted, glossy, and slightly thickened. Be sure to scrape the sides and bottom of the pan to prevent burning. Turn to medium low heat if needed!
- Add the peanut butter:
- Stir in the crunchy peanut butter while the mixture is still hot. Continue stirring for 2 more minutes, allowing the peanut butter to melt and fully incorporate into the chocolate mixture. The texture should be smooth and cohesive. For best results, you want to make sure the cookie mixture cooks long enough so the cookies set!
- Add the oats:
- Remove the saucepan from heat. Quickly stir in the gluten-free quick oats until they are evenly coated and no dry spots remain. The mixture will start to thicken as it cools slightly.
- Scoop and shape:
- Using a 1-tablespoon cookie scoop (or two spoons), drop portions of the mixture onto the prepared parchment paper. Flatten slightly with the back of the spoon if you prefer a thinner cookie.
- Cool and set:
- Allow the cookies to cool at room temperature for at least 30 minutes, or until firm and no longer sticky to the touch. You can speed this process up by placing the cookies in the refrigerator for about 15 minutes.