High Protein Cheesecake Bites | Gluten Free
This blog post may contain affiliate links from which I earn a small commission.
When I was asked to step in and teach the 4th grade class at my sons’ school (midyear) one of the first things I did was create a few “after school pick-me-up” recipes. Geared towards high-protein and perfectly indulgent, to help those after school crashes and keep everyone full until dinner. This recipe was one of those treats and my kids still love it! It could easily be used as a “regular” dessert, but one that is guilt free!

If you’ve ever wished cheesecake could be a little more guilt-free, this recipe is for you. These gluten-free protein cheesecakes have all the luscious flavor and creamy texture of a traditional cheesecake, but with a wholesome twist—extra protein, no gluten, and naturally sweetened with maple syrup. The almond meal crust adds a subtle nutty crunch that pairs perfectly with the silky filling. Best of all? They bake in just 10 minutes and store beautifully, making them perfect for weekly meal prep, an easy dessert, or a grab-and-go snack. Whether you top them with berries, chocolate drizzle, or enjoy them plain and chilled, these mini cheesecakes are a simple way to treat yourself and still feel good about it.
Why You’ll Love This Recipe
- Creamy and indulgent: All the rich flavor of classic cheesecake, but with a lighter, more nourishing twist.
- High in protein: A satisfying, balanced treat made with yogurt and protein powder to keep you feeling full longer.
- Gluten-free and naturally sweetened: Made with almond meal and pure maple syrup—no refined sugars or gluten needed.
- Quick and easy: No complicated steps or water bath—these mini cheesecakes bake in just 10 minutes!
- Perfect for meal prep: Store beautifully in the fridge or freezer for a ready-to-go snack or dessert anytime.
- Customizable: Top with berries, drizzle with chocolate, or swirl in nut butter for endless flavor variations.
- Healthy, Simple Ingredients: A dessert you can feel good about!

Ingredients For Mini Protein Cheesecakes:
- For the Crust:
- 1 cup almond flour (or finely ground almonds): This gives a nutty, slightly sweet flavor and serves as a gluten-free base. If your almond meal isn’t super fine, pulse it a few times in a food processor for a smoother crust texture.
- 3 tablespoons unsalted butter, melted: Helps bind the crust together and adds richness. You can substitute coconut oil if you prefer a dairy-free option.
- For the Filling:
- 8 oz full fat cream cheese, softened: Let it sit at room temperature for about 30 minutes before mixing to avoid lumps. Use full-fat cream cheese for a classic, creamy texture, or reduced-fat if you want a lighter version.
- 2/3 cup plain yogurt: Greek yogurt works best for extra protein and a thicker, tangier filling. If using regular yogurt, drain off excess liquid first to keep the texture dense. I have also used whole milk yogurt and sour cream and both work great!
- 1/4 cup vanilla protein powder: Choose a clean-tasting brand with minimal aftertaste—this adds both flavor and extra protein. Whey, casein, or plant-based powders all work; just note that plant-based powders can make the batter slightly thicker.
- 4 tablespoons pure maple syrup: Naturally sweetens the cheesecake without refined sugar. You can adjust slightly depending on your sweetness preference or replace with honey or agave syrup.You could substitute coconut sugar.
- 1 teaspoon pure vanilla extract: Enhances the flavor and rounds out the tang from the yogurt.
Instructions For High Protein Cheesecakes:
- Prepare the Pan and Oven
Line a 12-cup muffin tin with paper liners (or silicone baking cups for easy removal). Preheat the oven to 350°F (175°C). This smaller, individual format helps the cheesecakes bake evenly and chill quickly later on. - Make the Crust
In a medium mixing bowl, combine the almond meal and melted butter. Use a fork to mix until the texture resembles slightly damp sand and the crumbs begin to clump together.
Evenly divide the crust mixture among the 12 muffin liners—about 1 to 1½ tablespoons per cup. Use the back of a spoon or the bottom of a small glass to firmly press the crust down into a compact, even layer. This helps it hold together once baked. - Prepare the Filling
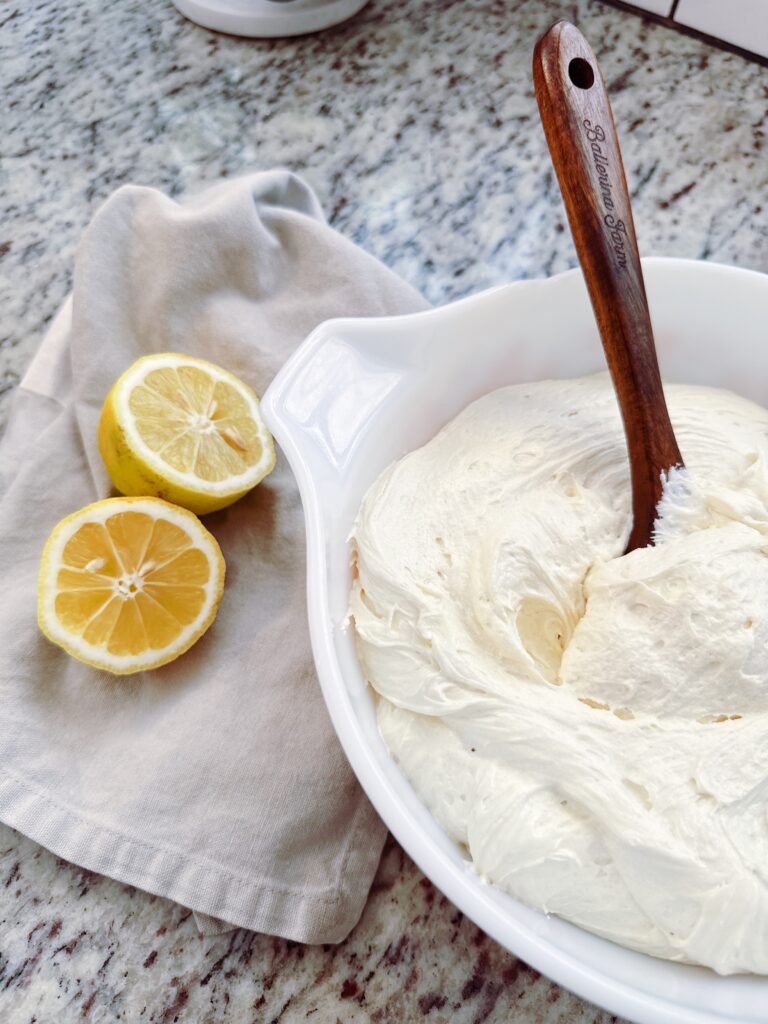
In a large bowl, whisk together the softened cream cheese, plain yogurt, vanilla protein powder, maple syrup, and vanilla extract until smooth and creamy. Scrape down the sides of the bowl as needed to make sure no lumps remain.
Tip: For the silkiest texture, make sure the cream cheese is fully softened before mixing—cold cream cheese can cause a grainy filling. - Fill the Cups
Use a muffin scoop or spoon to evenly divide the cheesecake filling between the liners, filling each about ¾ full. Smooth the tops gently with the back of a spoon or an offset spatula so they bake evenly. - Bake
Bake for 10 minutes, or until the edges are just set but the centers still have a slight jiggle. Avoid overbaking—mini cheesecakes will continue to firm up as they cool. - Cool and Chill
Remove the pan from the oven and let the cheesecakes cool in the pan for 15–20 minutes. Then transfer them to a wire rack to cool completely. Once cooled, place them in the refrigerator for at least 2 hours (or overnight) to set and develop flavor. - Store and Serve
Store the cheesecakes in an airtight container in the refrigerator for up to 5 days. For longer storage, freeze them individually wrapped and thaw overnight in the fridge before serving.

Kitchen Tools:
Helpful Hints:
- Use room temperature ingredients = creamy texture. Cold cream cheese or yogurt can make the filling lumpy, so for best results let them sit out for about 30 minutes before mixing to create a creamy cheesecake.
- Don’t overmix. Once the filling is a smooth texture and creamy, stop whisking—overmixing adds air bubbles, which can cause cracks as the cheesecakes bake.
- Watch the bake time closely. Mini cheesecakes bake fast! Pull them out when the edges are just set and the centers have a slight jiggle. They’ll firm up as they cool.
- Line the pan. Paper or silicone liners make for easy removal and a prettier presentation.
- Cool completely before chilling. This helps prevent condensation from forming, keeping your cheesecakes smooth on top.
Perfect Pairings:
- Fresh Berries or Fresh Fruit: Top with sliced fresh strawberries, raspberries, or blueberries for a burst of freshness.
- Fruit Compote: A warm spoonful of berry, cherry, or peach compote over a chilled cheesecake cup is absolutely dreamy.
- Chocolate Drizzle: Melt dark or semi-sweet chocolate and drizzle lightly before serving.
- Nut Butter Swirl: Add a spoonful of almond or peanut butter on top and swirl gently with a toothpick before baking for a protein-packed twist.
- Whipped Cream + Maple Dusting: A dollop of whipped cream and a drizzle of maple syrup make a lovely, light dessert finish.
Estimated Nutrition per Serving (1 mini cheesecake)
| Nutrient | Amount |
|---|---|
| Calories | 140 kcal |
| Protein | 6 g |
| Carbohydrates | 6 g |
| Total Fat | 11 g |
| Saturated Fat | 4.5 g |
| Cholesterol | 25 mg |
| Fiber | 1 g |
| Sugar | 4 g |
| Sodium | 70 mg |
| Calcium | 6% DV |
Check out the recipe card below for these high protein mini cheesecake bites! This is one of my favorite baked desserts because it is clean eats to a T but feels completely indulgent!

High Protein Cheesecake Bites | Gluten Free
Ingredients
For the Crust
- 1 cup almond flour
- 3 tablespoons unsalted butter melted
For the Filling
- 8 oz full fat cream cheese softened
- 2/3 cup plain yogurt
- 1/4 cup vanilla protein powder
- 4 tablespoons pure maple syrup
- 1 teaspoon pure vanilla extract:
Instructions
- Line a 12-cup muffin tin with paper liners (or silicone baking cups for easy removal). Preheat the oven to 350°F (175°C). This smaller, individual format helps the cheesecakes bake evenly and chill quickly later on.
- In a medium mixing bowl, combine the almond meal and melted butter. Use a fork to mix until the texture resembles slightly damp sand and the crumbs begin to clump together.
- Evenly divide the crust mixture among the 12 muffin liners—about 1 to 1½ tablespoons per cup. Use the back of a spoon or the bottom of a small glass to firmly press the crust down into a compact, even layer. This helps it hold together once baked.
- In a large bowl, whisk together the softened cream cheese, plain yogurt, vanilla protein powder, maple syrup, and vanilla extract until smooth and creamy. Scrape down the sides of the bowl as needed to make sure no lumps remain.
- Tip: For the silkiest texture, make sure the cream cheese is fully softened before mixing—cold cream cheese can cause a grainy filling.
- Use a muffin scoop or spoon to evenly divide the cheesecake filling between the liners, filling each about ¾ full. Smooth the tops gently with the back of a spoon or an offset spatula so they bake evenly.
- Bake for 10 minutes, or until the edges are just set but the centers still have a slight jiggle. Avoid overbaking—mini cheesecakes will continue to firm up as they cool.
- Remove the pan from the oven and let the cheesecakes cool in the pan for 15–20 minutes. Then transfer them to a wire rack to cool completely. Once cooled, place them in the refrigerator for at least 2 hours (or overnight) to set and develop flavor.
- Store the cheesecakes in an airtight container in the refrigerator for up to 5 days. For longer storage, freeze them individually wrapped and thaw overnight in the fridge before serving.