Easy & Homemade Gluten Free Viral Dot Cake Recipe
This blog may contain affiliate links from which I earn a small commission.
Okay. So these are viral on social media, which means everyoneee has seen them, but I swear this recipe is the best because it’s made with the best GF vanilla cake and the best vanilla buttercream! No, seriously, I promise, they are THE BEST recipes. The gluten-free vanilla cake is soft and moist, while holding it’s structure and shape beautifully, and the vanilla frosting is that quintessential, classic American buttercream that will have you swooning. The perfect duo for making this viral dot cake recipe gluten-free!
I ventured out to make the viral dot cakes for the 4th of July and well, now I am hooked! I am determined to make them a core memory in my boys’ childhood. And of course these can be made to match the season, but this vanilla recipe is perfect for summer, with sprinkles to match the holiday!
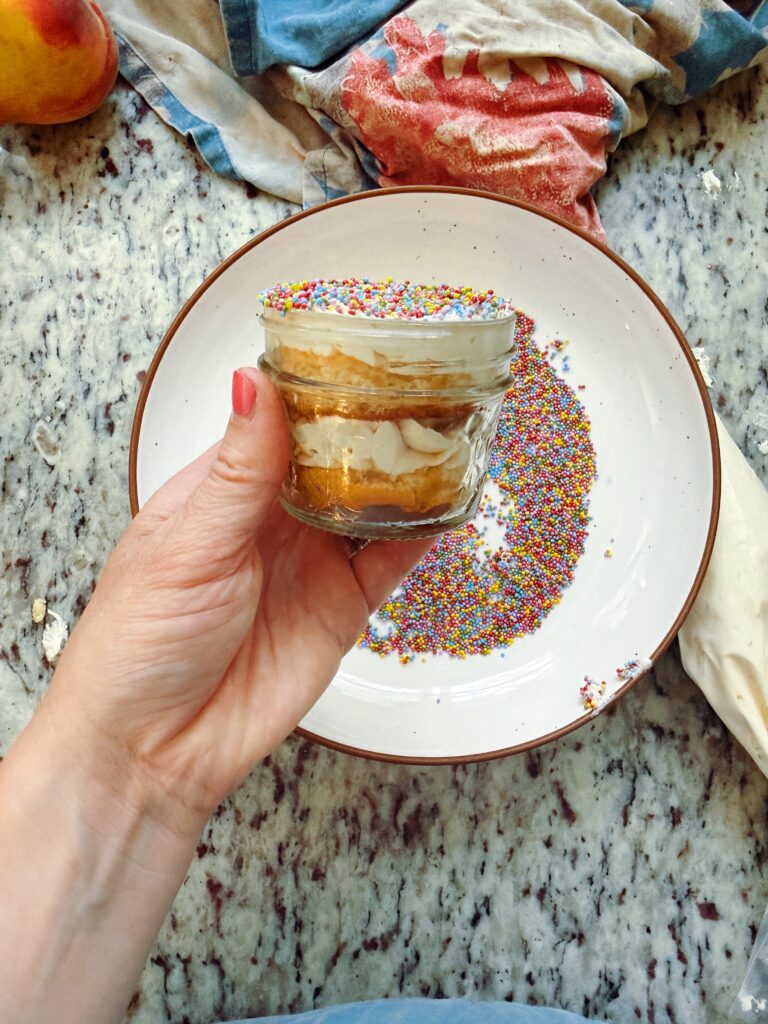
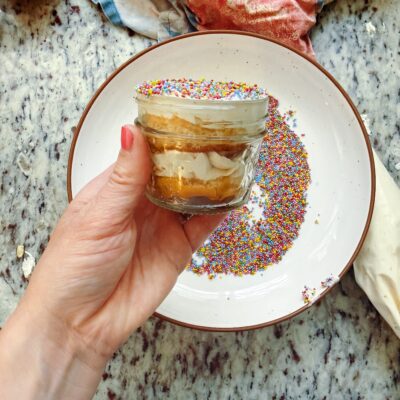
Homemade dot cakes for the win – a fun sweet treat for any occasion or season!
Why You’ll Love These Gluten-Free Vanilla Dot Cake Cups:
- Perfectly soft and fluffy. These gluten-free vanilla cakes have a light, tender crumb that no one will guess is gluten free, and it bakes perfectly as a sheet cake.
- Beautiful bakery-style presentation. Layered in mason jars and topped with colorful sprinkles, these cake cups are as stunning as they are delicious.
- Made completely gluten free. Every layer is crafted with gluten-free ingredients, making them perfect for those with celiac disease or gluten sensitivity.
- Rich vanilla flavor. Both the cake and buttercream are packed with real vanilla, creating a classic dessert everyone loves.
- Easy to customize. Change the sprinkle colors for birthdays, holidays, baby showers, weddings, graduations, or any special occasion.
- Perfect for parties. Individual servings make entertaining easy with no slicing or serving required.
- Great for gifting. Mason jars make these cakes easy to transport and create an adorable homemade gift.
- Make-ahead friendly. Prepare the cake and frosting in advance, then assemble when you’re ready to serve.
- Kid-approved and fun to make. Little helpers will love cutting cake rounds, piping frosting, and decorating with sprinkles.
- Stays moist for days. The sour cream keeps the cake incredibly soft, while the mason jars help lock in moisture.
Ingredients:
For the Cake
- 2 ¼ cups granulated sugar – Sweetens the cake while helping create a soft, tender crumb.
- 15 tablespoons unsalted butter, softened – Bring the butter to room temperature so it creams properly with the sugar, creating a light and fluffy batter.
- 1 ½ cups full-fat sour cream, room temperature – Adds moisture, richness, and a slight tang while keeping the cakes incredibly tender.
- ½ cup whole milk, room temperature – Helps create a smooth batter and prevents the cold ingredients from causing the butter to seize.
- 2 large eggs, room temperature – Provide structure, richness, and moisture.
- 6 large egg whites, room temperature – Whipped into the batter for a light, fluffy texture and a bright white vanilla cake.
- 3 teaspoons pure vanilla extract – Use a high-quality vanilla extract for the best flavor since vanilla is the star of this recipe.
- 3 cups gluten-free all-purpose flour blend – Use a high-quality cup-for-cup gluten-free flour blend. If your blend already contains xanthan gum or guar gum, omit the additional guar gum listed below.
- 9 tablespoons potato starch – Lightens the flour blend and creates a soft, bakery-style crumb that’s perfect for dot cakes.
- 1 tablespoon guar gum – Improves cake structure and elasticity in gluten-free baking. Omit if your flour blend already includes a binder such as xanthan gum or guar gum.
- 1 tablespoon baking powder – Gives the cakes their lift and fluffy texture. Make sure your baking powder is fresh for the best rise.
- ¾ teaspoon baking soda – Works with the sour cream to create a tender crumb and additional rise.
- 1 teaspoon fine sea salt – Balances the sweetness and enhances the vanilla flavor throughout the cake.
For the Buttercream
- 3 sticks (1½ cups) salted butter, softened – Use room-temperature butter so it whips into a smooth, light, and creamy buttercream. The butter should be soft enough to press with your finger but not melted.
- 2 pounds powdered sugar (about 8 cups), sifted if lumpy – Sweetens and stabilizes the frosting while creating a silky texture. Sifting is optional but helps prevent lumps and creates an ultra-smooth buttercream.
- 1 tablespoon pure vanilla extract – Since vanilla is the primary flavor, use a high-quality pure vanilla extract for the richest taste.
- 3 tablespoons heavy cream – Adds richness and helps create a light, fluffy consistency. Add a little more or less as needed to reach your desired piping or spreading consistency.
- ½ teaspoon fine sea salt – Balances the sweetness of the powdered sugar and enhances the buttery vanilla flavor. If you prefer a slightly saltier buttercream, you can add an extra pinch to taste.
|Timeout… A Moments for my Fav Kitchen Loves for this Recipe:|
- 4 ounce Mason Jars – these little darlings are perfect for dot cups. Plus they are oh-so-cute and travel well because you can put the lid on!
- Disposable Piping Bags – make the job so much easier!
- Sheet Pan – all time queen of sheet pans!
- Biscuit Cutter Set – The two middle sizes are PERFECT for fitting the mason jars.
- Dye Free Sprinkles – you can choose the classic rainbow sprinkles, or pick to match the holiday!
Instructions:
For the Cake
- Preheat the oven. Preheat your oven to 350°F (175°C). Grease a half-sheet pan (approximately 13 x 18 inches) with nonstick baking spray or line it with parchment paper for easy removal.
- Cream the butter and sugar. In the bowl of a stand mixer fitted with the paddle attachment, beat the softened butter and granulated sugar on medium-high speed for 3–5 minutes, until the mixture is pale, light, and fluffy. Stop about halfway through to scrape down the sides and bottom of the bowl to ensure everything is evenly incorporated. This step incorporates air into the batter, giving the cake a lighter texture.
- Combine the wet ingredients. In a medium mixing bowl, whisk together the eggs, egg whites, sour cream, milk, and vanilla extract until smooth and fully combined. Using room-temperature ingredients helps create a smooth batter and encourages even baking.
- Whisk the dry ingredients. In a separate bowl, whisk together the gluten-free flour blend, potato starch, baking powder, baking soda, guar gum (if using), and salt. Whisking thoroughly ensures the leavening agents are evenly distributed throughout the batter.
- Mix the cake batter. With the mixer on medium-low speed, alternate adding the wet and dry ingredients to the creamed butter mixture, beginning and ending with the wet ingredients. Mix just until each addition is incorporated before adding the next. Avoid overmixing, as this can make gluten-free cakes dense.
- Finish the batter. Once everything is combined, stop the mixer and scrape down the bowl one final time. Give the batter a few gentle folds with a rubber spatula to make sure no dry flour remains. The finished batter should be thick, smooth, and creamy.
- Spread the batter. Pour the batter into the prepared sheet pan. Using an angled offset spatula, spread it into an even layer, making sure the batter reaches all four corners. A level batter ensures evenly sized cake rounds later.
- Bake. Bake for 20–25 minutes, or until the top is lightly golden, springs back when gently pressed, and a toothpick inserted into the center comes out with just a few moist crumbs attached. Avoid overbaking, as gluten-free cakes dry out more quickly than traditional cakes.
- Cool completely. Allow the cake to cool in the pan for about 30 minutes. Once cooled enough to handle, use two round biscuit cutters to cut out the cake circles. I use the two middle-sized cutters from my biscuit cutter set to create perfectly layered dot cakes. Cut an equal number of large and small circles.
- Finish cooling. Carefully transfer the cake rounds to a wire cooling rack and allow them to cool completely before assembling. Completely cooled cake is essential for clean layers and prevents the buttercream from melting.
For the Fluffy Buttercream Frosting
- Beat the butter. In the bowl of a stand mixer fitted with the paddle attachment, beat the softened butter on medium-high speed for about 2 minutes, until it becomes smooth, creamy, and noticeably lighter in color. Scrape down the sides and bottom of the bowl to ensure the butter is evenly whipped.
- Add the powdered sugar. Reduce the mixer to low speed and gradually add the powdered sugar, 1 cup at a time, mixing until each addition is incorporated before adding the next. This helps prevent clouds of powdered sugar and creates a smoother buttercream. Pause occasionally to scrape down the bowl.
- Add the remaining ingredients. Pour in the heavy cream, vanilla extract, and salt. Mix on low speed until everything is incorporated.
- Whip until fluffy. Increase the mixer speed to medium-high and whip the buttercream for 5 minutes. The frosting will become light, airy, silky smooth, and nearly white in color. This extended whipping time creates a bakery-style buttercream that’s perfect for piping.
- Adjust the consistency if needed.
- If the buttercream is too thick, add additional heavy cream, 1 tablespoon at a time, until it reaches your desired consistency.
- If it’s too soft, beat in a few tablespoons of powdered sugar until it becomes thick enough to hold its shape.
- Prepare for decorating. Transfer the finished buttercream to a piping bag fitted with your favorite piping tip (or simply snip the end of the bag for a clean, round opening). Twist the top of the bag closed to keep the frosting from escaping, and you’re ready to assemble your gluten-free vanilla dot cake cups.
For Assembly
Once your cake rounds have been cut and cooled for at least 30 minutes, you’re ready to assemble the cake cups. Make sure the cake is completely cool before frosting to prevent the buttercream from melting.
- Cut the cake rounds. Using a serrated bread knife, carefully slice each cake round in half horizontally, creating one thinner and one thicker cake layer. This gives each jar two layers of cake with frosting in between.
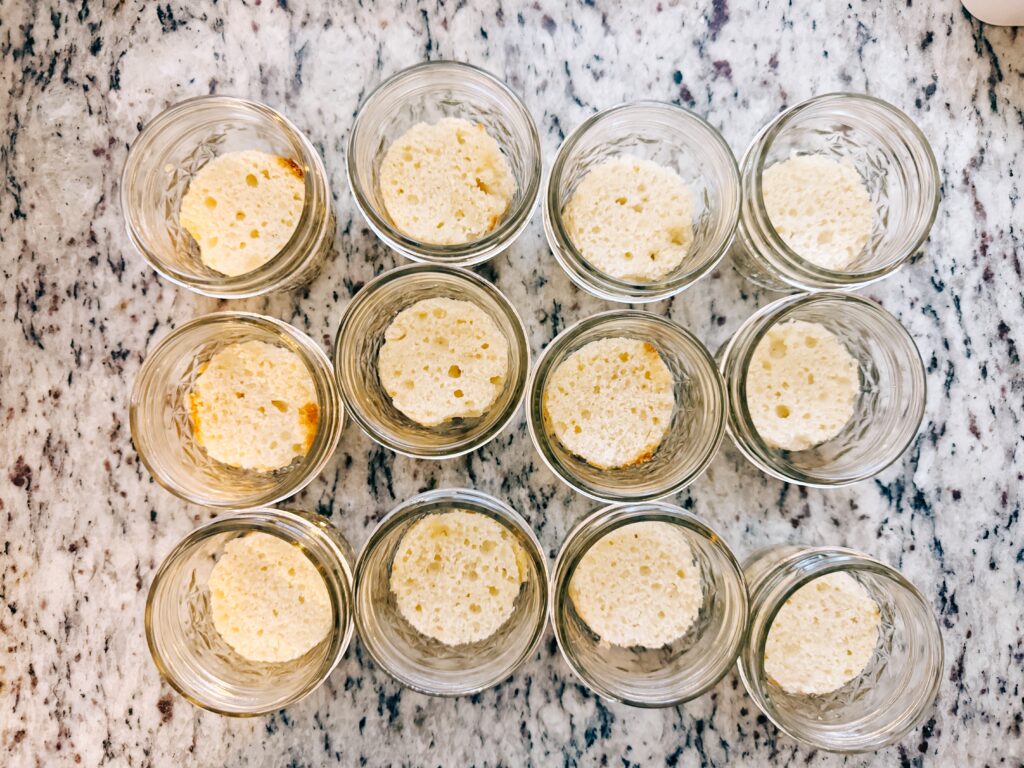
- Add the first cake layer. Place the smaller cake round into the bottom of a clean mason jar, gently pressing it down so it sits flat. If needed, trim the edges slightly so it fits snugly.
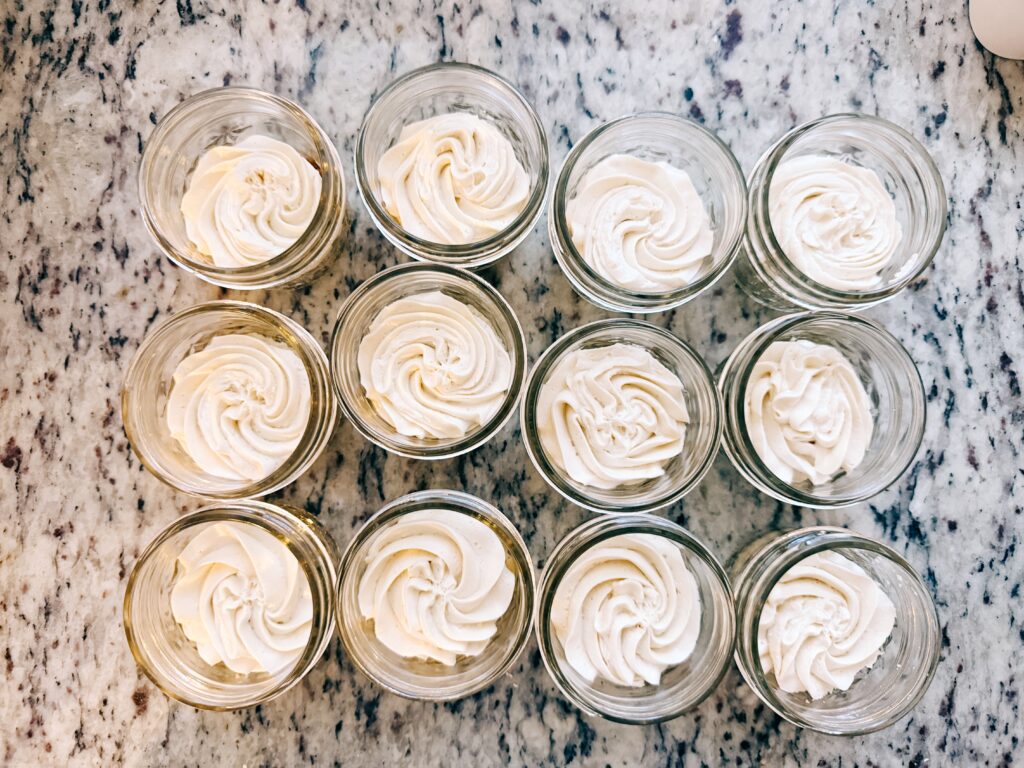
- Pipe the first layer of frosting. Transfer the vanilla buttercream to a piping bag (or a zip-top bag with the corner snipped off) and pipe an even layer of frosting over the cake, making sure it reaches the edges of the jar for a polished look.
- Add the second cake layer. Place the larger cake round on top of the frosting, gently pressing just enough to secure it without squeezing the frosting out the sides.
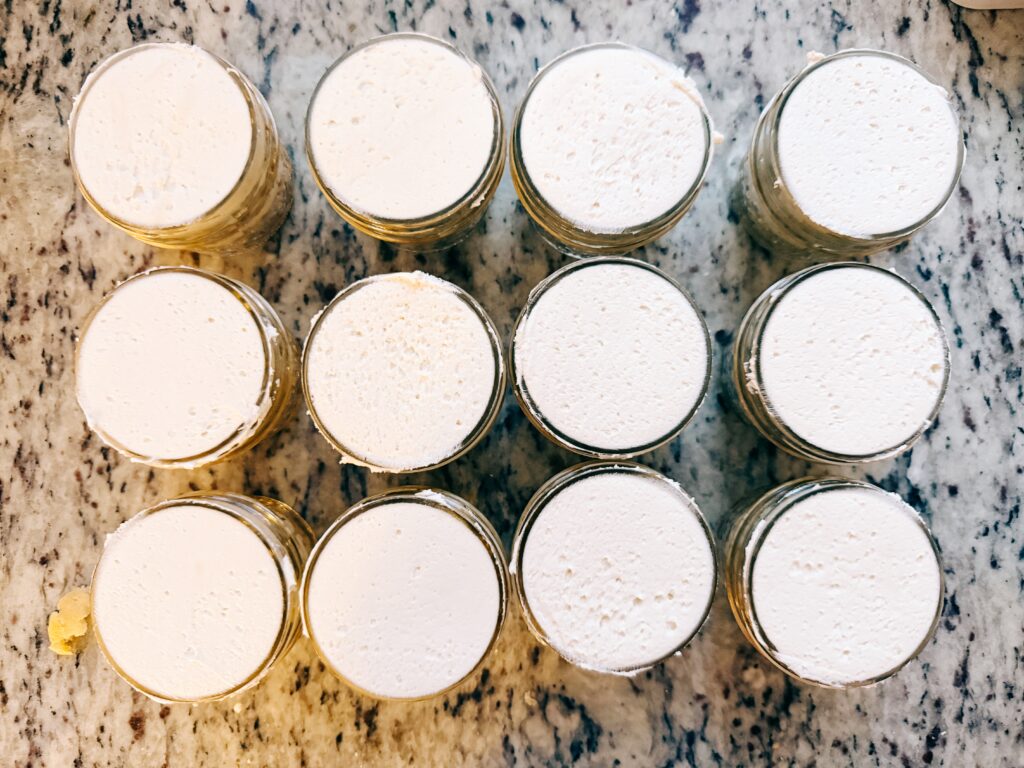
- Finish with frosting. Pipe another generous swirl of buttercream over the top cake layer. Use a small offset spatula or the back of a spoon to smooth the frosting into an even, flat layer that reaches the edges of the jar.
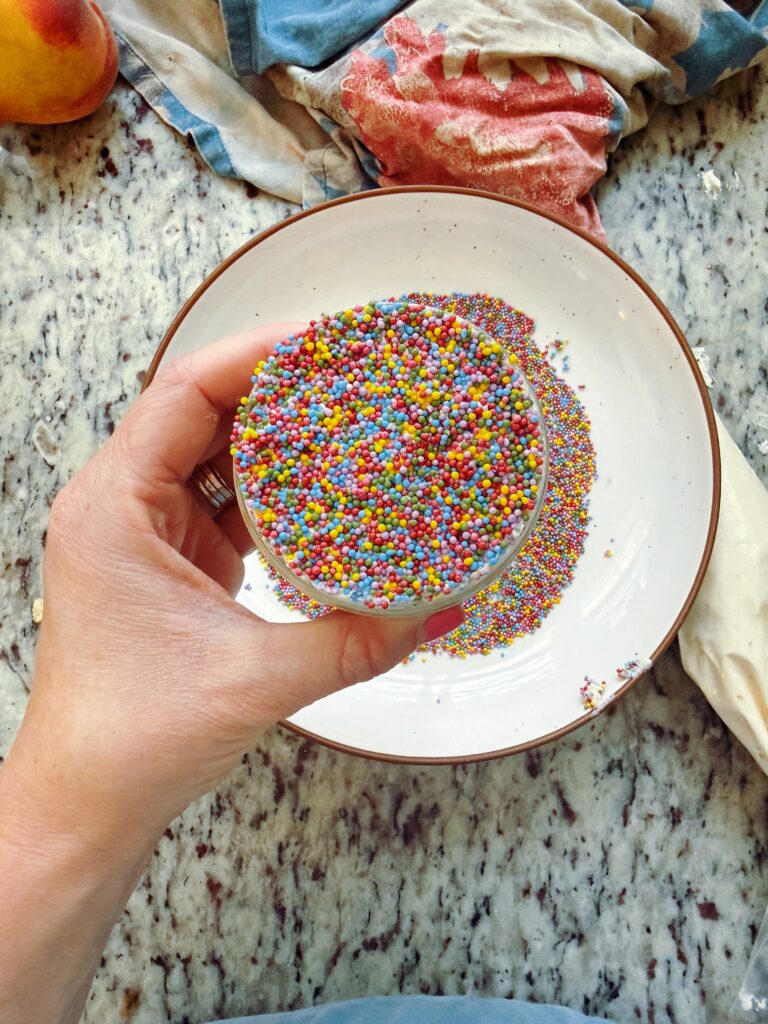
- Decorate with sprinkles. Pour your favorite sprinkles into a small, shallow bowl. Carefully invert the mason jar and gently press the frosted top into the sprinkles. Lift straight up to reveal a beautifully coated layer of sprinkles. This method creates the signature “dot cake” look with minimal mess.
- Seal and serve. Add the mason jar lid and band if you’re storing or gifting the cake cups, or leave them uncovered if serving immediately. Refrigerate until ready to enjoy.
Tips and Tricks:
- Use a kitchen scale. Measuring your gluten-free flour by weight provides the most consistent results every time.
- Bring ingredients to room temperature. Room-temperature butter, eggs, egg whites, sour cream, and milk combine more easily and create a smoother batter.
- Don’t skip the potato starch. It helps create the light, tender crumb that gives these cakes their bakery-quality texture.
- Know your flour blend. If your gluten-free flour blend already contains xanthan gum or guar gum, omit the additional guar gum in the recipe.
- Cream the butter and sugar well. Mixing for the full 3–5 minutes incorporates air into the batter, resulting in a lighter cake.
- Avoid overmixing. Mix only until the ingredients are combined to keep the cake tender.
- Spread the batter evenly. Using an offset spatula ensures an even cake thickness, making your cake rounds uniform.
- Don’t overbake. Remove the cake when a toothpick comes out with a few moist crumbs. Overbaked gluten-free cake can become dry.
- Cool completely before cutting. Warm cake is more likely to tear when using biscuit cutters.
- Chill the cake rounds. Refrigerating the rounds for 15–20 minutes before assembling makes them easier to handle and creates cleaner layers.
- Whip the buttercream long enough. Beating it for the full 5 minutes creates a light, silky frosting that pipes beautifully.
- Use a piping bag. Piping the frosting instead of spreading it inside the jars creates cleaner, more professional-looking layers.
- Decorate immediately. Add the sprinkles right after smoothing the top layer of frosting so they stick easily.
- Change up the decorations. Swap the sprinkles to match birthdays, baby showers, weddings, holidays, sports teams, or seasonal celebrations.
- Store covered. Keep the jars tightly sealed in the refrigerator to maintain freshness and prevent the buttercream from drying out.
These Gluten-Free Vanilla Dot Cake Cups are a fun, trendy dessert that’s every bit as delicious as it is beautiful. Made with soft, fluffy gluten-free vanilla cake, rich homemade vanilla buttercream, and festive sprinkles, they’re layered inside mason jars for an eye-catching presentation that’s perfect for birthdays, showers, weddings, holidays, and celebrations of all kinds.
The individual portions make serving effortless, while the mason jars keep each cake incredibly moist and fresh. Whether you’re making them for a party, gifting them to friends, or simply jumping on the viral dot cake trend, this recipe delivers bakery-quality results with simple ingredients and easy-to-follow instructions. Even better, no one will ever guess they’re completely gluten free. They’re a show-stopping dessert that’s guaranteed to impress both gluten-free and gluten-loving guests alike.
Stay tuned! Because I am obsessed and will be making a batch of these cuties to match EVERY season!
Happy Baking!
Easy & Homemade Gluten Free Viral Dot Cake Recipe
Ingredients
For the Cake
- 2 1/4 cup sugar
- 15 tablespoons butter softened
- 1 1/2 cups sour cream
- 1/2 cup milk
- 2 eggs room temp
- 6 egg whites room temp
- 3 tsp vanilla
- 3 cups gluten free all purpose flour blend
- 9 tablespoons potato starch
- 1 tbsp guar gum omit if blend already has a binder
- 1 tbsp baking powder
- 3/4 tsp baking soda
- 1 tsp salt
For the Frosting
- 3 sticks salted butter softened
- 2 pounds powdered sugar
- 1 tbsp vanilla
- 3 tbsp heavy cream
- 1/2 tsp salt
Topping
- 1 jar sprinkles of choice!
Instructions
For the Cake
- Preheat the oven to 350 degrees.
- In a standing mixer, whisk butter and sugar until light and airy. Approximately 3-5 minutes, stopping at 2 minutes to scrap down the sides.
- In a separate bowl, whisk together the egg, egg whites, sour cream, milk and vanilla.
- In a third bowl, whisk together the GF flour, baking powder, baking soda, potato starch, guar gum and salt.
- Set the mixer to medium/low speed, and alternate adding the wet and dry ingredients to the butter and sugar mixture, starting and ending with the wet ingredients.
- Once combined, turn off the mixer. The batter will be smooth and thick.
- Use the angled icing spatula to smooth the batter into a flat layer in the sheet cake pan.
- Pop the sheet pan into the oven and prep your frosting while you wait for this beauty to bake! Bake for 20-25 minutes. When the cake is a golden brown, and you can insert a toothpick into the middle with only crumbs sticking to it – they are ready!
- Let cakes cool for 30 minutes before using the biscuit cutters to make the rounds. I use the two middle sizes in this biscuit cutter set. Cut out an even amount of each size. Place the rounds on a cooling rack. They must be completely cool before adding to mason jars!
For the Frosting
- In a stand mixer fitted with the paddle attachment, beat the softened butter on medium-high speed for about 2 minutes, until pale, smooth, and creamy.
- Gradually add the powdered sugar, 1 cup at a time, beating on low after each addition to prevent it from puffing out of the bowl. Scrape down the sides as needed.
- Add the heavy cream, vanilla extract, and salt, and mix on low until incorporated.
- Increase the mixer speed to medium-high and beat for 5 minutes until the buttercream is light, fluffy, and almost white in color.
- If the frosting is too thick, add more cream, 1 tablespoon at a time.
- If it’s too soft, add a few extra tablespoons of powdered sugar until it reaches your desired consistency.
- Prepare your piping bag and put the first round of frosting in the bag!
For Assembly
- Once all of your cake rounds have been cut and have cooled for 30 minutes, you are ready to assemble!
- Cut each round in half using a bread knife.
- Place the smaller round in the bottom of the mason jar.
- Pipe a layer of frosting.
- Place the larger round on top of the frosting.
- Pipe another layer of frosting and use an offset spatula to smooth the frosting flat.
- Pour your desired sprinkles into a bowl and flip the mason jar so the sprinkles get stuck to the top layer of frosting.
- Top with lids or leave as is!


