
Gluten-Free Little Debbie Christmas Tree Cakes
This blog may contain affiliate links from which I earn a small commission.
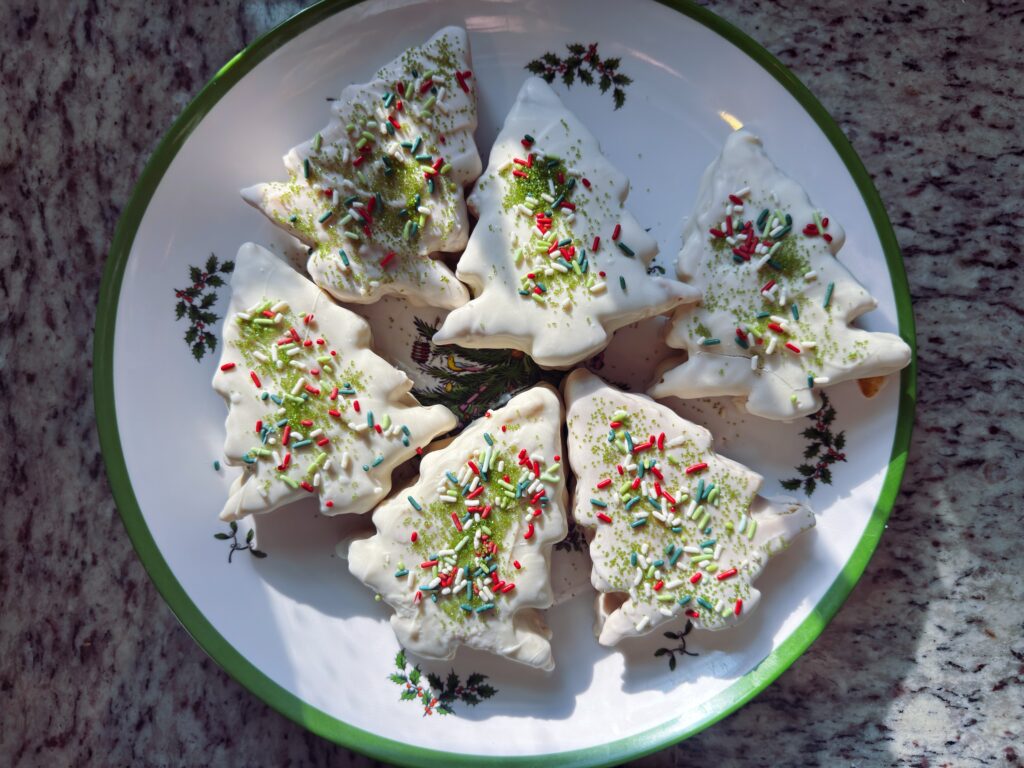
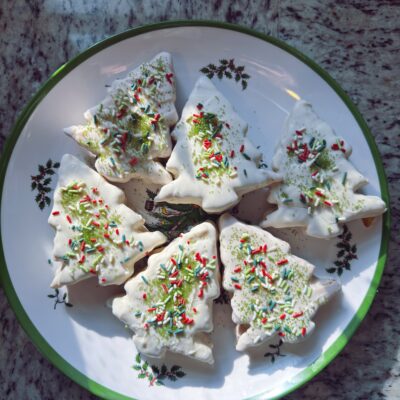
Last Christmas was the debut of my making these adorable and nostalgic gluten free Christmas tree cakes and they were a hit! My only critique was the size of my Christmas tree cookie cutter – it was way too big! So I have absolutely updated mine for this year!
For this recipe I use my tried and true yellow cake recipe that bakes beautifully in sheet pans. We replicate the childhood remembered filling, and after a little bit of chill time, we dunk these trees in a lake of white chocolate. Topping each off with a dash of sprinkles – my boys favorite part (aside from taste testing). So next time you want to jazz up the dessert table at a holiday gathering, make these little darlings and you are sure to have delighted everyone with some sweet memories!
Why You Will Love This Recipe:
- A nostalgic holiday favorite: These homemade Christmas Tree Cakes bring back all the memories of the classic Little Debbie holiday treats, with a delicious gluten-free twist.
- Soft and fluffy vanilla cake: The homemade cake has a tender, buttery texture with plenty of vanilla flavor. You would never guess it’s gluten-free!
- Creamy buttercream filling: Each cake has a generous layer of sweet, fluffy buttercream sandwiched between two layers of vanilla cake. It’s the perfect complement to the soft cake and white chocolate coating.
- A delicious white chocolate shell: Dipping each Christmas tree in melted white chocolate creates that signature sweet outer coating that makes these treats so special.
- Perfect for holiday celebrations: The festive Christmas tree shape and colorful sprinkles make these cakes a beautiful addition to Christmas dessert tables, holiday parties, and cookie exchanges.
- A fun holiday baking project: From cutting out the cake shapes to piping the buttercream and dipping them in white chocolate, this is such a fun recipe to make during the Christmas season.
- Completely gluten-free: You can enjoy all the nostalgic flavors and textures of this childhood favorite without the gluten. They are a wonderful treat to share with family and friends during the holidays.
Equipment Needed:
- Christmas Tree Cookie Cutter
- Baking Sheets
- Christmas sprinkles
Ingredients:
A homemade gluten-free version of the classic Little Debbie Christmas Tree Cakes! These ingredients come together to create a soft, fluffy vanilla cake with a creamy buttercream filling, all coated in a sweet white chocolate shell and finished with festive holiday sprinkles.
For the Cake
- 2 1/4 cups granulated sugar: Adds sweetness to the cake while helping create a soft, tender crumb. The sugar also helps cream with the butter, incorporating air into the batter.
- 15 tablespoons softened butter: Use unsalted or salted butter that has softened to room temperature. Softened butter creams more easily with the sugar, creating a light and fluffy cake texture.
- 1 1/2 cups sour cream: Adds moisture, richness, and a slight tanginess to balance the sweetness. Sour cream also helps keep gluten-free cakes soft rather than dry or crumbly.
- 1/2 cup milk: Adds moisture to the batter and helps create a smooth, pourable consistency. Whole milk is preferred for the best flavor and texture.
- 2 large eggs, room temperature: Add structure, richness, and moisture to the cake. Room-temperature eggs incorporate more evenly into the batter.
- 6 large egg whites, room temperature: Help create a light, fluffy, and tender cake. Using additional egg whites gives the cake structure without adding too much heaviness from the yolks.
- 3 teaspoons vanilla extract: Provides the classic sweet vanilla flavor that makes these cakes taste like the nostalgic holiday treat.
- 3 cups gluten-free all-purpose flour blend: Forms the base of the cake. Choose a high-quality gluten-free flour blend designed for baking. Measure by weight when possible for the most consistent results.
- 9 tablespoons potato starch: Helps create a soft, delicate texture and light crumb. Potato starch is especially helpful in gluten-free baking because it prevents the cake from becoming too dense.
- 1 tablespoon guar gum: Helps bind the ingredients together and provides structure and elasticity in place of gluten. Omit this ingredient if your gluten-free flour blend already contains a binder such as xanthan gum or guar gum.
- 1 tablespoon baking powder: Provides the lift needed to create a light and fluffy cake.
- 3/4 teaspoon baking soda: Works with the acidity in the sour cream to help the cake rise while contributing to a tender crumb.
- 1 teaspoon salt: Balances the sweetness and enhances the vanilla and buttery flavors throughout the cake.
For the Filling
- 2 sticks salted butter, softened: Creates the rich, creamy base of the buttercream filling. Allow the butter to soften to room temperature so it whips smoothly without leaving lumps.
- 1 cup marshmallow fluff: This is KEY in recreating that nostalgic Little Debbie’s Christmas Tree treat!
- 3-4 cups powdered sugar: Sweetens and thickens the buttercream while creating the classic fluffy filling found in Little Debbie Christmas Tree Cakes. Sift if needed to remove any lumps.
- 1 tablespoon vanilla extract: Adds warm vanilla flavor to the filling and complements the vanilla cake.
- 1 tablespoons heavy cream: Helps thin the buttercream to a smooth, spreadable consistency while adding richness. Add a little at a time until you reach your desired texture.
- 1/2 teaspoon salt: Balances the sweetness of the powdered sugar and enhances the buttery flavor.
For the Coating
- 24 ounces white chocolate chips: Creates the sweet outer coating that gives these Christmas tree cakes their signature look. Use good-quality white chocolate or white chocolate melting wafers for a smooth coating.
- 2 tablespoons coconut oil: Helps thin the melted white chocolate, making it easier to dip or pour over the cakes. It also helps create a smooth, even coating.
- Sprinkles of choice: Add festive holiday sprinkles while the white chocolate is still wet. Red and green sprinkles are perfect for recreating the classic Christmas tree cake appearance.
A gluten-free baking tip: Make sure your gluten-free flour blend, potato starch, baking powder, sprinkles, and white chocolate are all certified gluten-free or verified gluten-free by the manufacturer. Cross-contact can be a concern with specialty baking ingredients.
Instructions:
For the Cake
- Preheat the oven: Preheat your oven to 350°F. Prepare a rimmed sheet cake pan by lightly greasing it or lining it with parchment paper. Leave a little parchment overhang to make removing the cake easier.
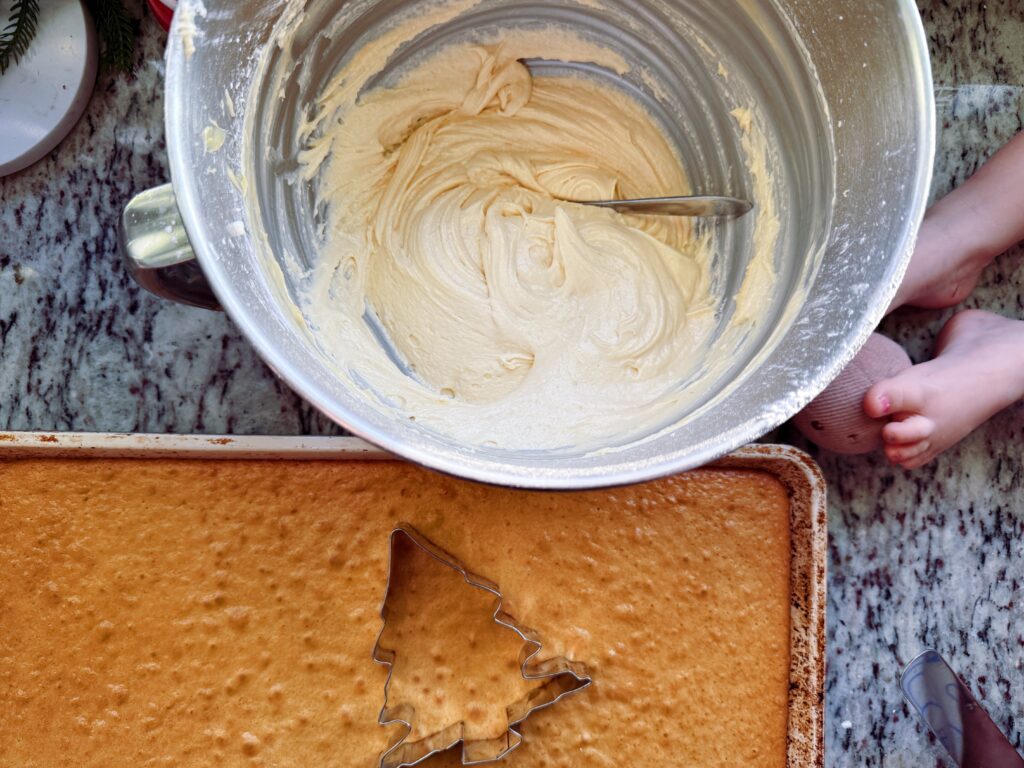
- Cream the butter and sugar: In the bowl of a stand mixer fitted with the whisk or paddle attachment, beat the softened butter and granulated sugar on medium speed for approximately 3–5 minutes. Stop around the 2-minute mark to scrape down the sides and bottom of the bowl. Continue mixing until the butter and sugar are light, fluffy, and pale in color. This step incorporates air into the batter, helping create a soft cake.
- Combine the wet ingredients: In a separate medium-sized bowl, whisk together the eggs, egg whites, sour cream, milk, and vanilla extract until smooth and fully incorporated. Make sure the ingredients are at room temperature so they blend easily into the batter.
- Combine the dry ingredients: In a third bowl, whisk together the gluten-free all-purpose flour, baking powder, baking soda, potato starch, guar gum, and salt. Whisk thoroughly to distribute the leavening agents and starch evenly throughout the flour mixture. This helps prevent pockets of baking powder or guar gum in the finished cake.
- Alternate the wet and dry ingredients: With the stand mixer running on medium-low speed, gradually add the wet and dry ingredients to the butter and sugar mixture. Alternate between the two, beginning and ending with the wet ingredients. I like to add the dry ingredients in three additions and the wet ingredients in two additions. Mix just until everything is combined, scraping down the sides of the bowl as needed. Avoid overmixing, as this can make gluten-free cake dense.
- Prepare the sheet cake pan: Turn off the mixer once the batter is combined. The batter should be smooth, thick, and spreadable. Transfer the batter to your prepared baking sheets. Using an angled icing spatula, gently spread the batter into an even, flat layer, making sure to reach all the corners. Try to keep the thickness consistent so the cake bakes evenly.
- Bake the cake: Place the sheet pan in the preheated oven and bake for 20–25 minutes. While the cake bakes, you can prepare your buttercream frosting! The cake is ready when the top is lightly golden brown, the center springs back when gently touched, and a toothpick inserted into the middle comes out with just a few moist crumbs. Be careful not to overbake, as gluten-free cakes can dry out quickly.
- Cool the cake: Remove the sheet pan from the oven and allow the cake to cool in the pan for approximately 30 minutes. The cake needs time to set before cutting so the trees hold their shape.
- Cut out the cake trees: Using Christmas tree cookie cutters, cut out an even number of trees. Gently transfer the cake rounds to a cooling rack. You can use whatever size tree you want. HERE is the one I use!
- Cool completely: Allow the cake to cool completely before assembling. This is especially important because warm cake will soften the buttercream and make the layers difficult to stack. Once completely cool, they are ready for assembly!
For the Frosting
- Beat the butter: In a stand mixer fitted with the paddle attachment, beat the softened salted butter on medium-high speed for approximately 2 minutes. The butter should become pale, smooth, and creamy. Add in the marshmallow fluff and continue to combine. Scrape down the sides and bottom of the bowl to ensure everything is evenly incorporated.
- Add the powdered sugar: Gradually add the powdered sugar, approximately 1 cup at a time, mixing on low speed after each addition. Adding it slowly helps prevent a cloud of powdered sugar from escaping the bowl. Stop occasionally to scrape down the sides.
- Add the remaining ingredients: Add the heavy cream, vanilla extract, and salt. Mix on low speed until the ingredients are incorporated and the frosting begins to come together.
- Whip the buttercream: Increase the mixer speed to medium-high and beat for approximately 5 minutes. This incorporates air into the buttercream, creating a light, fluffy texture. The frosting should become almost white in color and smooth enough to pipe easily.
- Adjust the consistency: If the frosting is too thick, add additional heavy cream, 1 tablespoon at a time, until it reaches a smooth, pipeable consistency. If it is too soft, add a few tablespoons of powdered sugar until it holds its shape.
- Prepare your piping bag: Fit a piping bag with your preferred round piping tip or simply snip the end of the bag. Fill the bag with the buttercream, being careful not to overfill it. Twist the top of the bag to keep the frosting from squeezing out while piping. Set aside until you are ready to assemble!
For the Assembly
- Layer the cakes and frosting:Take one Christmas tree cake and pipe an even layer of buttercream frosting over the flat side. Place a second matching Christmas tree cake on top, gently pressing the layers together to secure the frosting filling. The buttercream should reach close to the edges without squeezing out too much.
- Continue assembling: Repeat the process with the remaining Christmas tree cakes, layering buttercream between each pair and frosting the outside of each cake until all the cakes have been used.
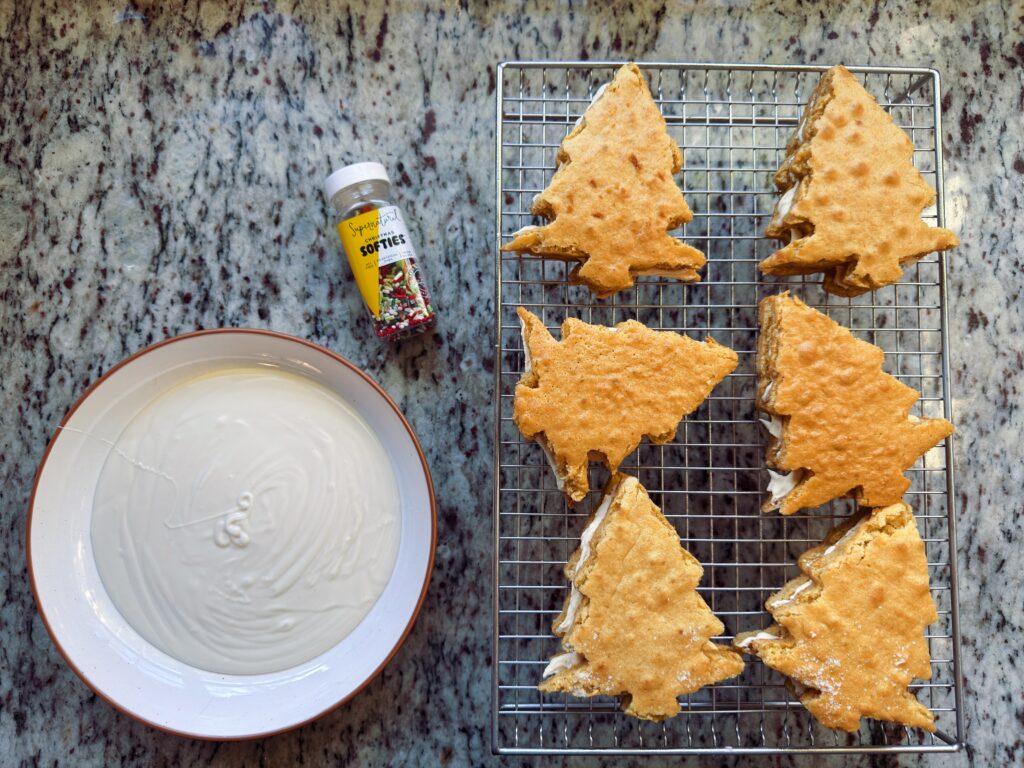
- Chill the cakes: Carefully place the assembled Christmas trees onto a cooling rack set over a parchment-lined baking sheet. Transfer the rack to the freezer for approximately 45 minutes, or until the buttercream is firm. Chilling helps the cakes hold their shape and makes dipping them into the melted white chocolate much easier.
Prepare the White Chocolate Coating
- Melt the white chocolate: Add the white chocolate and coconut oil to a microwave-safe bowl. Microwave in 30-second increments, stirring thoroughly between each interval, until the chocolate is completely melted and smooth. Be careful not to overheat the chocolate, as white chocolate can burn or become thick if exposed to too much heat.
- Alternative melting method: You can also melt the white chocolate and coconut oil together using a double boiler. Add a little water to a saucepan and bring it to a gentle simmer. Place a heat-safe bowl over the saucepan, making sure the bottom of the bowl doesn’t touch the water. Add the chocolate and coconut oil, stirring frequently until smooth and melted.
- Prepare for dipping: Once melted, pour the white chocolate into a shallow bowl that is wide enough to accommodate the Christmas tree cakes. A shallow bowl makes it easier to dip the cakes evenly and ensures the coating reaches the sides.
Dip and Decorate
- Prepare the cakes: Remove the Christmas trees from the freezer and allow them to sit for approximately 10 minutes before dipping. You want the buttercream to remain firm while allowing the cakes to lose some of their extreme chill. If the frosting becomes too soft, return them to the freezer briefly.
- Dip the Christmas trees: Carefully lower each Christmas tree into the melted white chocolate, making sure the top and sides are completely covered. Use two forks or a dipping tool to gently lift the cake out of the chocolate. Allow the excess chocolate to drip back into the bowl before transferring the cake to a parchment-lined cooling rack or baking sheet.
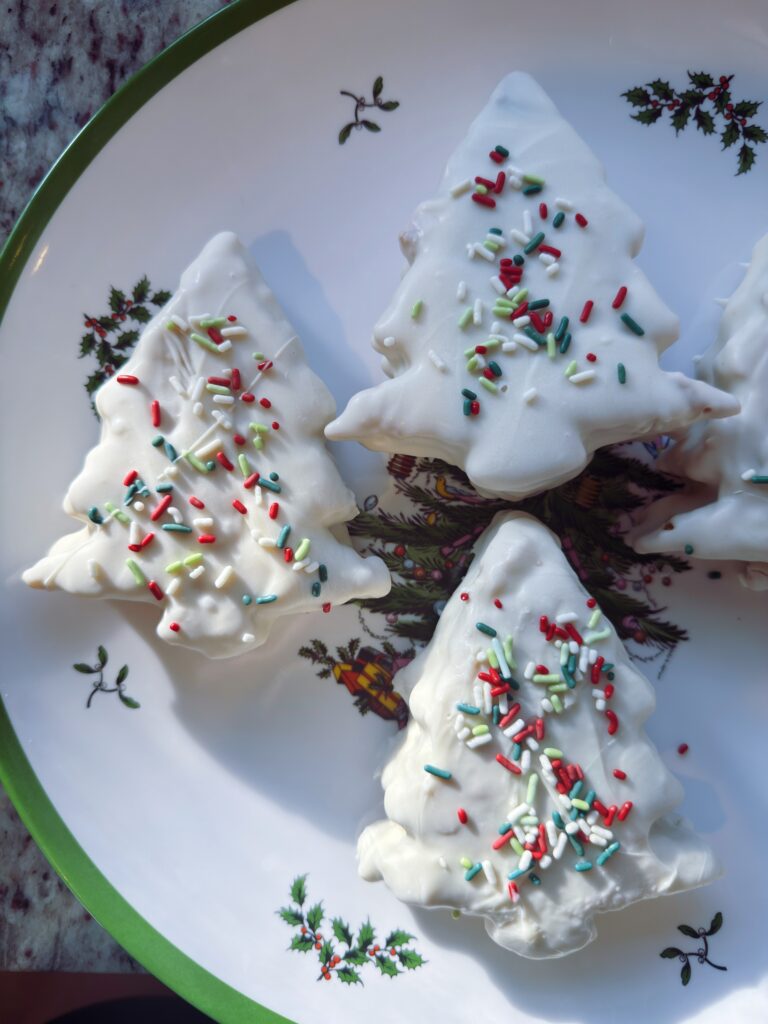
- Add the sprinkles: While the white chocolate is still wet, immediately decorate each Christmas tree with your favorite holiday sprinkles. The chocolate sets fairly quickly, so don’t wait until you’ve dipped all the cakes to start decorating.
- Let the coating set: Allow the Christmas trees to sit until the white chocolate has completely hardened. You can place them in the refrigerator for 10–15 minutes to speed up the process.
- Store and serve: Once the chocolate coating has set, carefully remove the cakes from the rack and transfer them to an airtight container. Store in the refrigerator until ready to serve. Allow them to sit at room temperature for 15–20 minutes before enjoying!
Helpful tip: If your white chocolate starts getting too thick while dipping, gently rewarm it in the microwave for 10–15 seconds and stir well. Keeping the coating smooth and fluid will help create that beautiful, even white chocolate shell!
A few helpful tips:
- Work with completely cooled cake to prevent the buttercream from melting.
- If the cake is particularly soft, refrigerate the cut rounds for 15–20 minutes before assembling.
- Use a light hand when pressing the cake layers together. Gluten-free cake can be more delicate than traditional cake.
- For the prettiest presentation, use a piping bag to create an even frosting layer rather than spreading it with a knife.
- Allow refrigerated cakes to sit at room temperature for about 15–20 minutes before serving for the softest cake texture.
- The cake scraps make great snacking or cake pops!
- If you are not wanting to make a cake from scratch, you can totally bake up a box cake mix! I like the King Arthur’s Gluten-Free Yellow Cake mix.
Summary:
These Gluten-Free Little Debbie’s Christmas Tree Cakes are a homemade version of the nostalgic holiday treat we all know and love! Made with a soft, fluffy vanilla cake, a sweet and creamy buttercream filling, and a smooth white chocolate coating, these little cakes are just as festive as they are delicious. Each cake is layered with homemade buttercream, shaped into a Christmas tree, dipped in melted white chocolate, and finished with colorful holiday sprinkles. They are the perfect gluten-free holiday dessert to make for Christmas parties, cookie exchanges, holiday gatherings, or simply to enjoy at home. You’ll love having a homemade version of this childhood favorite that everyone can enjoy!
Check out the recipe card below to make this gluten-free treat that makes Christmas even more magical!
Happy baking!

Gluten-Free Little Debbie Christmas Tree Cakes
Ingredients
For the Cake
- 2 1/4 cups granulated sugar
- 15 tablespoons butter softened
- 1 1/2 cups sour cream
- 1/2 cup milk
- 2 large eggs room temperature
- 6 large egg whites room temperature
- 3 teaspoons vanilla extract
- 3 cups gluten-free all-purpose flour blend
- 9 tablespoons potato starch
- 1 tablespoon guar gum omit if your flour blend already contains a binder
- 1 tablespoon baking powder
- 3/4 teaspoon baking soda
- 1 teaspoon salt
For the Filling
- 2 sticks salted butter softened
- 1 cup marshmallow fluff
- 3 –4 cups powdered sugar
- 1 tablespoon vanilla extract
- 1 tablespoon heavy cream
- 1/2 teaspoon salt
For the Coating
- 24 ounces white chocolate chips
- 2 tablespoons coconut oil
- Sprinkles of choice
Instructions
For the Cake
- Preheat oven to 350°F. Grease or line rimmed sheet cake pans with parchment paper.
- In a stand mixer, cream the softened butter and sugar for 3–5 minutes until light and fluffy, scraping down the sides as needed.
- In a separate bowl, whisk together the eggs, egg whites, sour cream, milk, and vanilla.
- In another bowl, whisk together the gluten-free flour, baking powder, baking soda, potato starch, guar gum, and salt.
- With the mixer on low, alternate adding the wet and dry ingredients to the butter mixture, beginning and ending with the wet ingredients. Mix just until combined.
- Divide the batter between the prepared pans and use an angled spatula to spread into an even layer.
- Bake for 20–25 minutes, or until lightly golden and a toothpick inserted in the center comes out with a few moist crumbs.
- Cool in the pans for 30 minutes. Use Christmas tree cookie cutters to cut out an even number of trees, then carefully transfer to a cooling rack.
- Allow the cakes to cool completely before assembling.
For the Frosting
- In a stand mixer fitted with the paddle attachment, beat the softened butter for 2 minutes until creamy. Add the marshmallow fluff and mix until combined.
- Gradually add the powdered sugar, 1 cup at a time, mixing on low and scraping down the sides as needed.
- Add the heavy cream, vanilla, and salt. Mix until incorporated.
- Increase the speed to medium-high and beat for approximately 5 minutes until light and fluffy.
- Adjust consistency with additional cream if too thick or powdered sugar if too soft.
- Transfer the frosting to a piping bag fitted with your preferred tip.
For Assembly
- Pipe an even layer of buttercream onto the flat side of one Christmas tree cake. Place a second tree on top, gently pressing the layers together.
- Repeat with the remaining cakes until all trees are assembled.
- Place the trees on a cooling rack over a parchment-lined baking sheet. Freeze for approximately 45 minutes, or until the frosting is firm.
- For the White Chocolate Coating
- Combine the white chocolate and coconut oil in a microwave-safe bowl. Microwave in 30-second increments, stirring between each, until completely melted and smooth. Alternatively, melt together using a double boiler.
- Pour the melted chocolate into a shallow bowl for easier dipping.
Dip and Decorate
- Remove the Christmas trees from the freezer and let sit for approximately 10 minutes before dipping.
- Carefully dip each tree into the melted white chocolate, making sure the top and sides are completely coated. Use two forks or a dipping tool to lift the cakes out, allowing excess chocolate to drip off.
- Immediately add your favorite holiday sprinkles while the chocolate is still wet.
- Transfer to parchment paper and allow the chocolate to harden. Refrigerate for 10–15 minutes to speed up setting.
- Store in an airtight container in the refrigerator. Let sit at room temperature for 15–20 minutes before serving.


