Gluten Free Pizza Dough Recipe with Bread Flour
Perfect Gluten-Free Pizza Dough Recipe
This recipe is everything pizza dough should be—perfectly soft with a hint of crunch and a delightfully yeasty flavor. It’s easy to work with and makes for a fantastic family pizza night!

The Journey to Perfect Gluten-Free Pizza Dough
I’ve always wanted to make homemade pizza dough to turn pizza making into a fun family activity where everyone gets involved in decorating their own pizzas. However, having Celiac Disease made that aspiration a bit tricky. Store-bought gluten-free pizza crusts often left much to be desired—dry, bland, and lacking in that authentic pizza dough experience.
Not one to be easily deterred, I decided to turn my kitchen into a bit of a science lab. The all-purpose gluten-free flours I had tried for yeast baking never yielded the results I wanted. It became clear that to achieve the right texture and flavor, I needed to rethink my approach. Then, an epiphany struck—gluten-free bread flour! After researching the right ratio of starches and flours to create a blend that would support the elasticity of a rising dough, I found the perfect combination. Ever since, I’ve been experimenting with various yeast breads—sandwich bread, artisan loaves, buns, cinnamon rolls, and yes, pizza dough. The results have been exactly what I was looking for!
Many gluten-free bread flours now include gluten-free wheat starch, but I prefer a more natural approach to my ingredients. If it involves extensive processing or extracting gluten through laboratory methods, I tend to shy away. The same goes for xanthan gum, which I avoid in favor of more wholesome ingredients.
I’m incredibly proud of my gluten-free flour blend, which is FREE FROM:
- Rice Flour
- Xanthan Gum
- Gluten-Free Wheat Starch
Instead, it contains the following nutritious flours:
- Tapioca Flour
- Millet Flour
- Sorghum Flour
This blend not only provides the right texture and flavor but also makes me feel good about what I’m serving my family. Now, let’s dive into the recipe for creating the perfect gluten-free pizza dough.

Ingredients You’ll Need for This Recipe:
For the Dough:
- Gluten-Free Bread Flour Blend: My special blend of all-purpose flour.
- Psyllium Husk: Provides structure and elasticity.
- Salt: Essential for seasoning.
- Baking Powder: Helps the dough rise.
- Warm Water: Activates the yeast.
- Sugar: Feeds the yeast.
- Active Dry Yeast: For leavening the dough.
- Eggs: Room temperature for better mixing.
- Apple Cider Vinegar: Adds a bit of tang and helps with the dough’s texture.
For the Crust:
- Olive Oil: Adds richness and helps the dough crisp up.
- Parchment Paper: To prevent sticking and make transferring the dough easier.
What You’ll Love About This Recipe:
- Simple Ingredients: Made with basic, easy-to-find ingredients.
- No Rice Flour or Xanthan Gum: Keeps the dough natural and wholesome.
- Feeds a Crowd: Perfect for family dinners or gatherings.
- Reheats Nicely: Stays crunchy and delicious even when reheated.
Helpful Tips:
- Keep the Dough Covered: As you work with each disc of dough, keep the rest covered with a damp towel to prevent drying out.
- Storage: Store any leftover pizza in an airtight container and consume within 4 days.
- Reheating: Leftover pizza reheats beautifully! For the best results, reheat in the oven or toaster oven to maintain that crispy crust.
- Flour Blend: I haven’t tested this recipe with other flour blends, so I can’t guarantee the same results if you use a different one.
- Kitchen Scale: It is best to have a kitchen scale on hand because it ensures the accuracy of the recipe.
Steps to Perfectly Crisp and Soft Pizza Dough:
- Mix Dry Ingredients: Using a stand mixer, combine the gluten-free flour blend, psyllium husk, and salt with a paddle attachment. Mix well.
- Activate the Yeast: In a separate bowl, whisk together the warm water, sugar, and active dry yeast. Cover with a damp towel and set aside for about 5-10 minutes, or until the yeast is frothy and activated. You can use instant yeast, simply add the yeast to the dry ingredients and skip this previous step. However, I prefer dry activated yeast.
- Combine Wet and Dry Ingredients: Once the yeast is ready, add the yeast mixture to the flour mixture to a large mixing bowl using the stand mixer. Mix on medium-low speed until the ingredients are combined.
- Add Olive Oil and Vinegar: Pour in the olive oil and apple cider vinegar. Continue mixing on medium speed for about 3-5 minutes until the dough is smooth and well combined. Stop halfway to scrape down the sides of the bowl. You could use a dough hook for this, but I prefer using the paddle attachment.
- Prepare the Dough for Proofing: Cover the large bowl with a damp tea towel and let the dough proof for 1 hour in a warm place. The dough should puff up and become slightly airy.
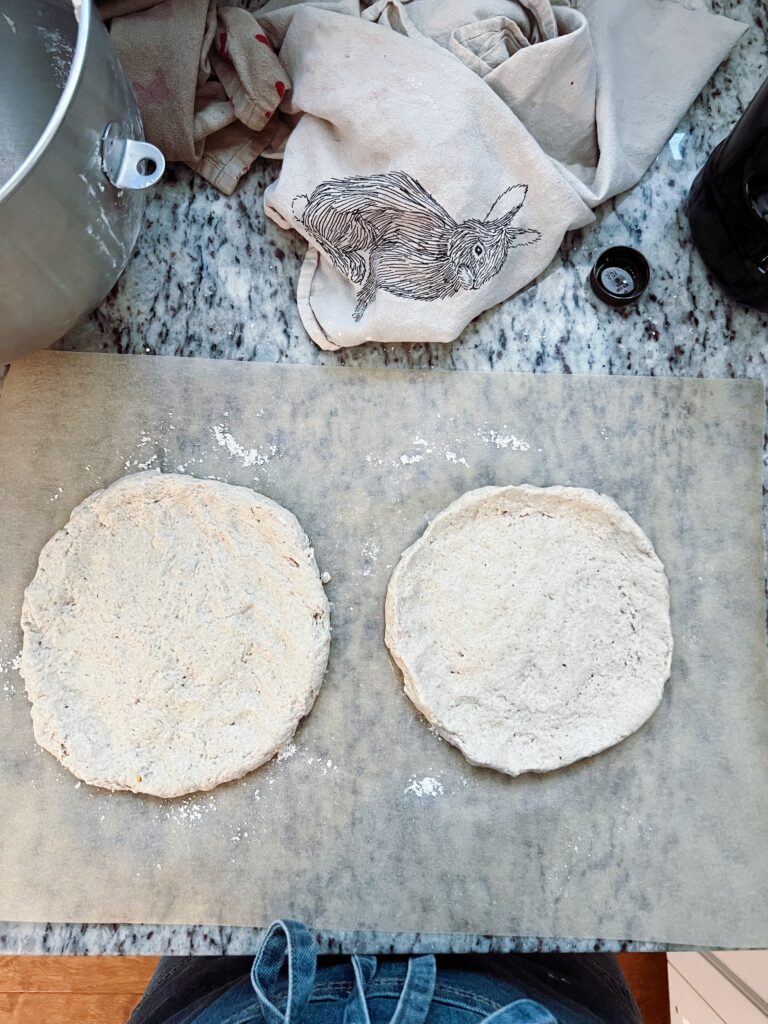
- Shape the Dough: On a flat surface, lightly flour a piece of parchment paper that’s large enough to cover your baking sheet. If you’re using a pizza stone, prepare one pizza at a time. Using a 1-cup measuring cup, scoop dough onto the parchment paper. Keep the remaining dough covered with a damp towel to prevent it from drying out. It will yield sticky dough compared to that of traditional dough, so coat your fingers with olive oil and it will work beautifully! Don’t add more flour (other than the surface) because it will mess with the water content. On the floured surface, gently work the dough balls into a 6-8 inch diameter circle, pressing the edges into a thicker layer to form the crust.
- Preheat the Oven: Preheat your oven to 475°F. Allow it to preheat for a good 25-30 minutes with the baking sheet/sheet pan or pizza stone inside. This ensures a hot and even baking surface.
- Top Your Pizza: Once the dough has proofed, add your desired pizza toppings. Be creative! From traditional red sauce and pepperoni to more gourmet options like prosciutto and arugula, the choice is yours. Using about a teaspoon of olive oil, brush the crusts of the pizzas before popping into the oven.
- Bake the Pizza: Carefully pull the baking sheet or pizza stone from the oven. Quickly and carefully slide the parchment paper with the topped pizza(s) onto the hot baking sheet or pizza stone. Bake in the preheated oven for 15 minutes or until the crust is golden and the cheese is bubbly.
- Cool and Serve: Let the pizzas cool for about 10 minutes before slicing and serving. This allows the cheese to set and makes for easier cutting.

The Perfect Accompaniments:
Here are a few ideas for topping your gluten-free pizza:
- Traditional Red Sauce and Pepperoni: A classic choice that never fails.
- Prosciutto, Arugula, and Olive Oil Garlic Glaze: A sophisticated and flavorful combination.
- Hawaiian Style: Ham and pineapple pieces for a sweet and savory twist.
- Classic Combo: Pepperoni, sausage, green bell pepper, olives, and mushrooms for a hearty, well-rounded pizza.
Storing and Reheating:
If you find yourself with leftovers (though I doubt you will because this pizza is that good!), proper storage will help maintain its deliciousness. Place the cooled pizza in an airtight container and keep it in the refrigerator. It will stay good for up to 4 days. When you’re ready to enjoy the leftovers, reheat the pizza in the oven or toaster oven to keep the crust crispy.
Additional Tips for Pizza Perfection:
- Use High-Quality Ingredients: For the best flavor, use high-quality cheeses, fresh vegetables, and premium meats.
- Experiment with Toppings: Don’t be afraid to try new combinations. From classic toppings to unique flavor profiles, the sky’s the limit.
- Dough Consistency: If your dough seems too sticky or too dry, you can adjust the consistency by adding a little more flour or a splash of water as needed.
Conclusion:
Making gluten-free pizza dough that’s both soft and crispy is a game-changer for anyone with dietary restrictions. This recipe, with its natural ingredients and simple process, ensures a delightful pizza experience for the whole family. From creating fun family dinners to enjoying leftovers, this dough will become a staple in your gluten-free cooking repertoire. So roll up your sleeves, gather your ingredients, and get ready to enjoy the perfect homemade gluten-free pizza!
Happy baking, and enjoy every delicious, crispy bite! Check out the recipe card below!

Gluten Free Pizza Dough Recipe with Bread Flour
Ingredients
- 740 grams gluten-free bread flour I used my recipe
- 7 tbsp psyllium husk
- 3 tsp salt
- 3 1/2 cups warm water 115 degrees
- 2 tbsp sugar
- 4 1/2 tsp dry active yeast
- 4 tsp olive oil
- 3 tsp apple cider vinegar
Instructions
- Mix Dry Ingredients: Using a stand mixer, combine the gluten-free flour blend, psyllium husk, and salt with a paddle attachment. Mix well.
- Activate the Yeast: In a separate bowl, whisk together the warm water, sugar, and active dry yeast. Cover with a damp towel and set aside for about 5-10 minutes, or until the yeast is frothy and activated. You can use instant yeast, simply add the yeast to the dry ingredients and skip this previous step. However, I prefer dry activated yeast.
- Combine Wet and Dry Ingredients: Once the yeast is ready, add the yeast mixture to the flour mixture to a large mixing bowl using the stand mixer. Mix on medium-low speed until the ingredients are combined.
- Add Olive Oil and Vinegar: Pour in the olive oil and apple cider vinegar. Continue mixing on medium speed for about 3-5 minutes until the dough is smooth and well combined. Stop halfway to scrape down the sides of the bowl. You could use a dough hook for this, but I prefer using the paddle attachment.
- Prepare the Dough for Proofing: Cover the large bowl with a damp tea towel and let the dough proof for 1 hour in a warm place. The dough should puff up and become slightly airy.
- Shape the Dough: On a flat surface, lightly flour a piece of parchment paper that’s large enough to cover your baking sheet. If you’re using a pizza stone, prepare one pizza at a time. Using a 1-cup measuring cup, scoop dough onto the parchment paper. Keep the remaining dough covered with a damp towel to prevent it from drying out. It will yield sticky dough compared to that of traditional dough, so coat your fingers with olive oil and it will work beautifully! Don’t add more flour (other than the surface) because it will mess with the water content.
- On the floured surface, gently work the dough balls into a 6-8 inch diameter circle, pressing the edges into a thicker layer to form the crust.
- Preheat the Oven: Preheat your oven to 475°F. Allow it to preheat for a good 25-30 minutes with the baking sheet/sheet pan or pizza stone inside. This ensures a hot and even baking surface.
- Top Your Pizza: Add your desired pizza toppings. Be creative! From traditional red sauce and pepperoni to more gourmet options like prosciutto and arugula, the choice is yours. Using about a teaspoon of olive oil, brush the crusts of the pizzas before popping into the oven.
- Bake the Pizza: Carefully pull the baking sheet or pizza stone from the oven. Quickly and carefully slide the parchment paper with the topped pizza(s) onto the hot baking sheet or pizza stone. Bake in the preheated oven for 15 minutes or until the crust is golden and the cheese is bubbly.
- Cool and Serve: Let the pizzas cool for about 10 minutes before slicing and serving. This allows the cheese to set and makes for easier cutting.
Perfecting Your Pizza Night Experience
For a truly memorable pizza night, consider setting up a topping bar where everyone can customize their own pizzas. Arrange bowls of different toppings, from various cheeses to a colorful array of vegetables, meats, and even some unique options like figs or caramelized onions. This not only adds an element of fun but also caters to individual preferences and dietary needs.
Pair your pizzas with a fresh salad and perhaps a gluten-free dessert to round out the meal. And don’t forget to involve everyone in the process, from mixing the dough to selecting toppings. It’s a wonderful way to spend time together and create delicious memories and enjoy the best gluten-free pizza crust EVER! Enjoy your pizza night to the fullest!