Homemade, Gluten Free Ciabatta Bread Rolls Recipe
This blog may contain affiliate links from which I earn a small commission.
In the summer I always take a break from bread baking. It’s a hot sauna in the south and I cannot welcome any heat into our little abode. However, when the air turns crisp, everything turns into cozy vibes and I am ready to make soups and stews, bake all the glute-free bread recipes, buy all the pumpkins and mums, and snuggle under all the blankets.
?This past weekend we had just returned from a camping trip to Tennessee and we returned to autumn weather. So obviously I whipped up a batch of this delicious gluten-free beef stew and I wanted bread to go with it. But a quick yeast bread, so we landed on a gluten-free ciabatta bread. This came together so easily and quickly and it works so beautifully with my homemade gluten-free bread flour blend, which is always my goal. I want one bread flour that works with any of my gluten-free bread recipes.
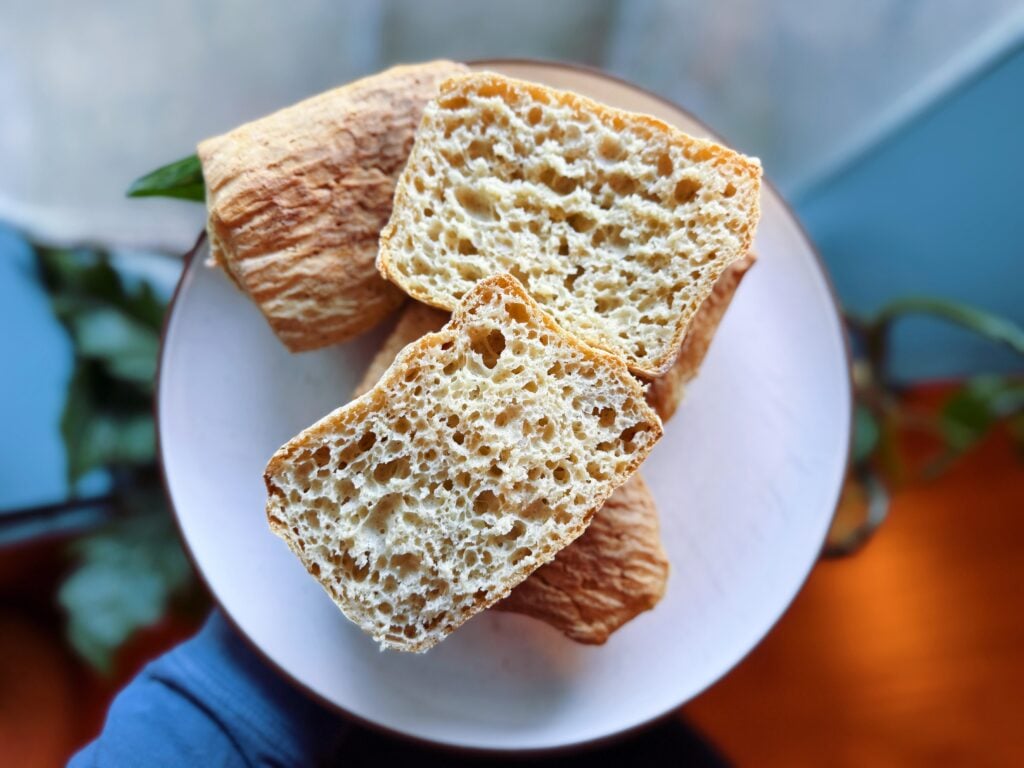
So if you are looking for a rustic bread to pair with soup this season, or an easy bread recipe for sandwiches, OR a quick yeast bread recipe to serve, this gluten-free ciabatta recipe will do the trick! This recipe yields a beautifully crusty airy ciabatta bread that just so happens to be gluten-free!
Why You Will Love This Recipe:
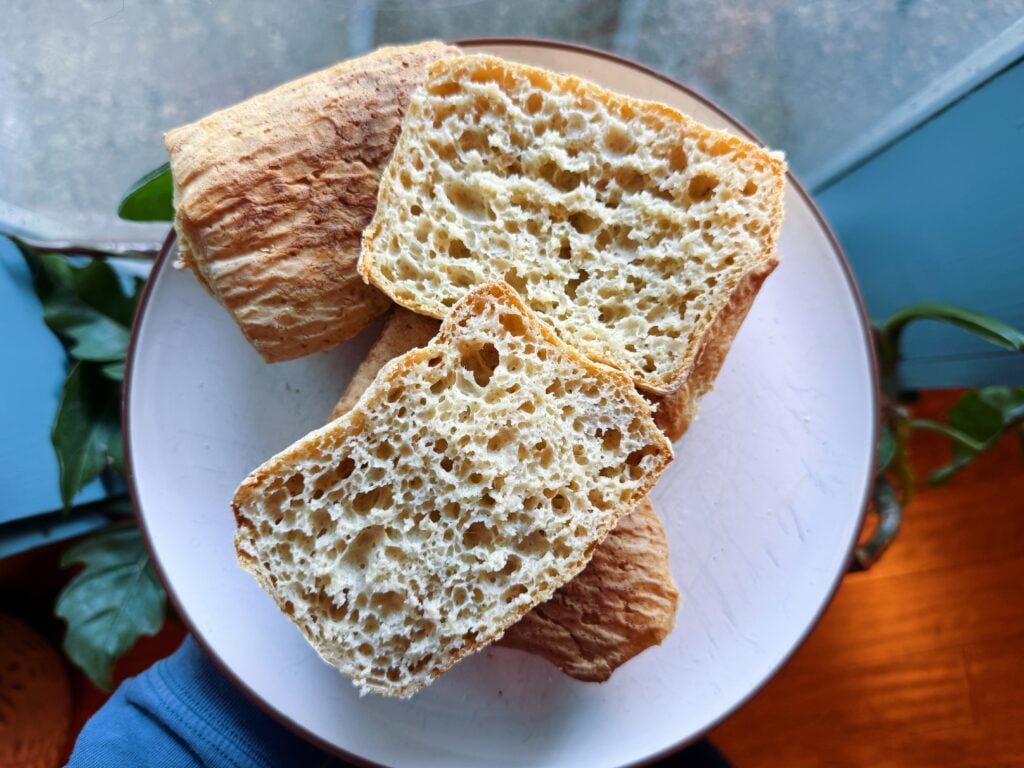
- Chewy inside with a crispy crust. These gluten-free ciabatta rolls have a golden, crisp exterior and a soft, chewy center that makes them perfect for sandwiches, dipping, or serving alongside your favorite meals.
- Completely gluten-free. Made with a gluten-free bread flour blend and psyllium husk, these rolls are a delicious option for anyone avoiding gluten without sacrificing the texture of traditional ciabatta.
- Perfect for sandwiches. Slice these rolls in half and fill them with deli meats, grilled chicken, fresh vegetables, or your favorite sandwich toppings. Their sturdy texture makes them ideal for both hot and cold sandwiches.
- Simple ingredients. You don’t need complicated ingredients to make delicious homemade gluten-free bread. Psyllium husk helps provide structure, while olive oil and apple cider vinegar contribute to the flavor and texture.
- A bakery-style bread at home. Baking at a high temperature and creating steam in the oven helps develop the signature crust that makes ciabatta so delicious.
- Great for meal prep. Make a batch to enjoy throughout the week or freeze the extras for quick lunches, easy dinners, and last-minute sides.
- No Gums. This recipe gets all of it’s structure from the psyllium husk, requiring no xanthan gum.
Ingredients:
- 3 tablespoons whole psyllium husk (not powdered) — helps create structure, elasticity, and a chewy texture in gluten-free ciabatta rolls. Psyllium absorbs water to form a gel that helps bind the dough, mimicking some of the properties of gluten and making the rolls easier to shape. Make sure to use whole psyllium husks and not powdered psyllium.
- ½ cup warm water — combines with the psyllium husk to create a thick gel before mixing the dough. This step is essential for helping the rolls hold their shape and develop a soft, chewy interior.
- 315 grams gluten-free bread flour blend — provides the foundation for the rolls. I used my gluten-free bread flour blend, which is a blend of sorghum flour, millet flour and tapioca flour. Or use a gluten-free bread flour blend designed for yeast baking for the best texture and rise. Weighing the flour in grams helps ensure consistent results, as different gluten-free flour blends can vary in density.
- 2½ teaspoons instant yeast — helps the dough rise, creating light, airy rolls with the characteristic open crumb of ciabatta. Instant yeast can be mixed directly into the dry ingredients without needing to be activated separately.
- 1 teaspoon salt — enhances the flavor of the bread and balances the other ingredients. Salt also helps regulate yeast activity, supporting a more controlled rise and better-tasting rolls.
- 1 tablespoon sugar — adds a subtle sweetness and provides readily available food for the yeast. It also helps encourage browning, giving the baked rolls a lightly golden crust.
- 1 cup warm water (about 115°F) — hydrates the flour and brings the dough together. The water helps activate the yeast and creates the moist, slightly sticky consistency needed for ciabatta rolls. Use a thermometer to avoid overheating the water, which can damage the yeast.
- 2 tablespoons olive oil — adds moisture and a mild, fruity flavor while helping create a tender interior. It also makes the dough easier to handle and contributes to a softer texture once the rolls are baked.
- 2 teaspoons apple cider vinegar — adds a subtle tang that complements the flavor of traditional ciabatta. The acidity can also help improve the flavor and texture of gluten-free bread, balancing the starchiness of the flour blend.
Instructions:
1. Prepare the psyllium gel.In a small bowl, combine the whole psyllium husk and ½ cup warm water. Stir well and let the mixture rest for 5–10 minutes, or until it thickens into a gel. This helps bind the dough and gives the rolls a chewy, bread-like texture.
2. Combine the dry ingredients. In the bowl of a stand mixer fitted with the paddle attachment, combine the gluten-free bread flour, instant yeast, and salt. Mix on low speed until evenly distributed.
3. Warm the water and sugar. In a small saucepan over the stove, gently warm the remaining 1 cup of water with the sugar until the sugar dissolves and the mixture reaches approximately 115°F. Avoid overheating the water, as excessive heat can damage the yeast.
4. Add the liquid ingredients. With the mixer running on low speed, slowly pour the warm sugar water into the dry ingredients. Add the prepared psyllium gel, olive oil, and apple cider vinegar.
5. Mix the dough. Increase the mixer to medium speed and mix for 2–3 minutes, scraping down the sides of the bowl as needed. The dough should be thick, sticky, and moist rather than firm like traditional wheat bread dough. This consistency is normal for gluten-free ciabatta.
6. Shape the rolls. Turn the dough onto a lightly floured surface using gluten-free flour, or lightly oil your work surface to prevent sticking. Gently shape the dough into a rectangle approximately 10 × 8 inches. Try not to add too much extra flour, as this can make the rolls dry.
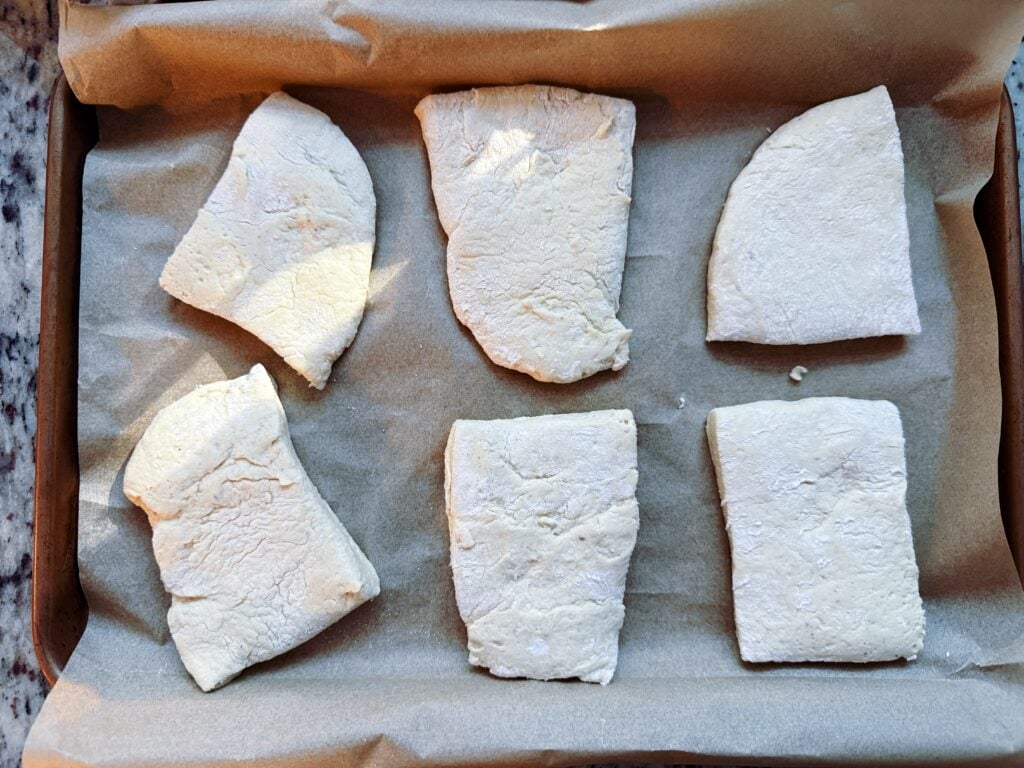
7. Divide and proof. Using a sharp knife or bench scraper, divide the dough into 6 roughly equal pieces. Line a baking sheet with a piece of parchment paper and transfer the rolls to the pan, leaving space between each roll. Cover loosely with plastic wrap or a damp kitchen towel and let rise for 1 hour in a warm place. I prefer my oven with the light on. The rolls should look slightly puffed.
8. Preheat the oven and prepare for steam. With 15 minutes remaining in the rise, place an inverted baking sheet or baking steel on the middle rack and a cast-iron pan on the bottom rack. Preheat the oven to 500°F. Allow the baking surface to heat thoroughly so the rolls begin baking immediately when transferred.
9. Transfer the rolls and create steam. Carefully slide the parchment paper with the ciabatta dough rolls onto the preheated sheet pan or steel. Add 4–5 ice cubes to the preheated cast-iron pan to create steam, then close the oven door promptly. The steam helps the rolls develop a crisp crust while allowing them to expand during the initial stage of baking. Use caution when adding ice to a hot pan, as steam can cause burns.
10. Bake at high heat. Bake the rolls at 500°F for 15 minutes. The initial high temperature encourages oven spring and helps establish the crust.
11. Lower the temperature and finish baking. Reduce the oven temperature to 425°F and carefully remove the cast-iron pan once it is safe to handle. Continue baking for another 15 minutes, or until the rolls are golden brown and the crust feels firm. If needed, bake for a few additional minutes to ensure the centers are fully cooked.
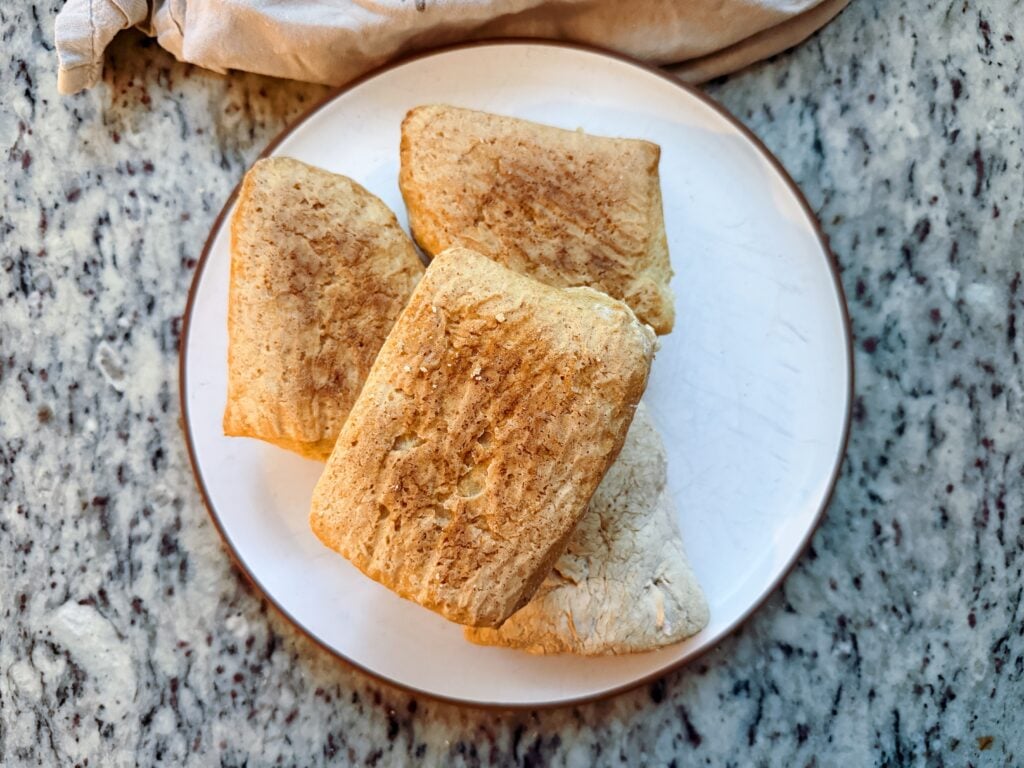
12. Cool before serving. Transfer the rolls to a wire cooling rack and let them cool for at least 20 minutes before slicing or eating. Gluten-free bread continues to set as it cools, so cutting into the rolls too soon can result in a gummy interior.
13. Store leftovers. Once completely cool, store the rolls in an airtight container or zip-top bag at room temperature for up to 2 days. For longer storage, freeze them in a freezer-safe bag for up to 3 months. Thaw at room temperature and warm briefly in the oven to refresh the crust.
Perfect Pairings:
1. Sandwiches and Paninis
Fill your gluten-free ciabatta rolls with turkey and provolone, grilled chicken, roast beef, fresh mozzarella, tomatoes, or pesto. Toast them in a panini press for a warm, crispy sandwich that’s perfect for lunch or an easy dinner.
2. Soups and Stews
Serve these crusty rolls alongside tomato basil soup, creamy baked potato soup, gluten-free chicken noodle soup, or hearty beef stew. Their chewy centers are perfect for soaking up flavorful broths and creamy sauces.
3. Olive Oil and Balsamic Vinegar
For a simple appetizer, slice the rolls and serve them with extra-virgin olive oil, balsamic vinegar, cracked black pepper, and Italian herbs. It’s an easy way to enjoy the crispy crust and soft interior.
4. Pasta Dishes
Pair your ciabatta rolls with gluten-free spaghetti and marinara, creamy tomato pasta, baked ziti, or gluten-free lasagna. The rolls are perfect for soaking up extra sauce and completing an Italian-inspired dinner.
5. Fresh Salads
Enjoy your rolls with a crisp garden salad, Caesar salad, or Mediterranean salad with cucumbers, tomatoes, olives, and feta. The fresh vegetables and tangy dressings complement the rich, chewy bread.
6. Garlic Bread
Turn your ciabatta rolls into homemade garlic bread by slicing them in half, brushing them with garlic butter, and sprinkling with fresh parsley. Toast until golden and serve alongside pasta, soup, or roasted chicken.
7. Charcuterie and Cheese Boards
Add sliced ciabatta rolls to a gluten-free charcuterie board with cheeses, cured meats, olives, fresh fruit, nuts, and gluten-free spreads. They’re wonderful for entertaining or creating an easy appetizer platter.
8. Breakfast Sandwiches
Use the rolls to make a hearty breakfast sandwich with scrambled or fried eggs, bacon or sausage, and melted cheddar cheese. You can also add avocado, spinach, or tomato for extra flavor.
9. Bruschetta and Crostini
Slice the rolls, brush lightly with olive oil, and toast until crisp. Top with diced tomatoes, fresh basil, garlic, and balsamic glaze for a delicious appetizer. You can also use them for crostini topped with whipped ricotta or goat cheese.
10. Roasted Chicken and Vegetables
Serve warm ciabatta rolls alongside roasted chicken, grilled steak, or baked fish with seasonal vegetables. They’re an easy addition to a weeknight dinner and pair well with a variety of savory main dishes.
My favorite pairing: Serve these gluten-free ciabatta rolls warm with creamy tomato pasta or a bowl of tomato basil soup. The crispy crust and chewy center make them perfect for soaking up every last bit of sauce!
Tips:
- For the best crust: Reheat the rolls in a 350°F oven for 5–8 minutes to refresh the exterior.
- For sandwiches: Let the rolls cool completely before slicing to help maintain their structure.
- For freezing: Freeze the cooled rolls individually or in a freezer-safe bag. Thaw and reheat when ready to serve.
- For gluten-free safety: Check that your flour blend and all other ingredients are certified gluten-free if needed, and prevent cross-contact with gluten-containing foods.
Summary:
These gluten-free ciabatta rolls are the perfect addition to your homemade gluten-free bread collection! With a crispy, golden-brown crust and a soft, chewy interior, they deliver the delicious texture of traditional ciabatta without the gluten. Made with a gluten-free bread flour blend, whole psyllium husk, olive oil, and a few pantry staples, these rolls are ideal for sandwiches, dipping in olive oil, or serving alongside your favorite soups and salads.
The secret to their texture is the psyllium husk gel, which helps bind the dough and gives the rolls structure and elasticity. Baking the rolls at a high temperature with steam helps create their signature crisp crust. Whether you’re preparing weekday lunches, making sandwiches for the family, or serving fresh bread with dinner, these homemade gluten-free ciabatta rolls are a versatile recipe you’ll want to make again and again.
The recipe card is below! Happy Baking!

Homemade, Gluten Free Ciabatta Bread Rolls Recipe
Ingredients
- 3 tablespoons whole psyllium husk not powdered
- ½ cup warm water
- 315 grams gluten-free bread flour blend I use my gluten-free bread flour blend which is a blend of sorghum flour, millet flour and tapioca flour.
- 2½ teaspoons instant yeast
- 1 teaspoon salt
- 1 tablespoon sugar
- 1 cup warm water about 115°F
- 2 tablespoons olive oil
- 2 teaspoons apple cider vinegar
Instructions
- Prepare the psyllium gel.In a small bowl, combine the whole psyllium husk and ½ cup warm water. Stir well and let the mixture rest for 5–10 minutes, or until it thickens into a gel. This helps bind the dough and gives the rolls a chewy, bread-like texture.
- Combine the dry ingredients. In the bowl of a stand mixer fitted with the paddle attachment, combine the gluten-free bread flour, instant yeast, and salt. Mix on low speed until evenly distributed.
- Warm the water and sugar. In a small saucepan over the stove, gently warm the remaining 1 cup of water with the sugar until the sugar dissolves and the mixture reaches approximately 115°F. Avoid overheating the water, as excessive heat can damage the yeast.
- Add the liquid ingredients. With the mixer running on low speed, slowly pour the warm sugar water into the dry ingredients. Add the prepared psyllium gel, olive oil, and apple cider vinegar.
- Mix the dough. Increase the mixer to medium speed and mix for 2–3 minutes, scraping down the sides of the bowl as needed. The dough should be thick, sticky, and moist rather than firm like traditional wheat bread dough. This consistency is normal for gluten-free ciabatta.
- Shape the rolls. Turn the dough onto a lightly floured surface using gluten-free flour, or lightly oil your work surface to prevent sticking. Gently shape the dough into a rectangle approximately 10 × 8 inches. Try not to add too much extra flour, as this can make the rolls dry.
- Divide and proof. Using a sharp knife or bench scraper, divide the dough into 6 roughly equal pieces. Line a baking sheet with a piece of parchment paper and transfer the rolls to the pan, leaving space between each roll. Cover loosely with plastic wrap or a damp kitchen towel and let rise for 1 hour in a warm place. I prefer my oven with the light on. The rolls should look slightly puffed.
- Preheat the oven and prepare for steam. With 15 minutes remaining in the rise, place an inverted baking sheet or baking steel on the middle rack and a cast-iron pan on the bottom rack. Preheat the oven to 500°F. Allow the baking surface to heat thoroughly so the rolls begin baking immediately when transferred.
- Transfer the rolls and create steam. Carefully slide the parchment paper with the ciabatta dough rolls onto the preheated sheet pan or steel. Add 4–5 ice cubes to the preheated cast-iron pan to create steam, then close the oven door promptly. The steam helps the rolls develop a crisp crust while allowing them to expand during the initial stage of baking. Use caution when adding ice to a hot pan, as steam can cause burns.
- Bake at high heat. Bake the rolls at 500°F for 15 minutes. The initial high temperature encourages oven spring and helps establish the crust.
- Lower the temperature and finish baking. Reduce the oven temperature to 425°F and carefully remove the cast-iron pan once it is safe to handle. Continue baking for another 15 minutes, or until the rolls are golden brown and the crust feels firm. If needed, bake for a few additional minutes to ensure the centers are fully cooked.
- Cool before serving. Transfer the rolls to a wire cooling rack and let them cool for at least 20 minutes before slicing or eating. Gluten-free bread continues to set as it cools, so cutting into the rolls too soon can result in a gummy interior.
- Store leftovers. Once completely cool, store the rolls in an airtight container or zip-top bag at room temperature for up to 2 days. For longer storage, freeze them in a freezer-safe bag for up to 3 months. Thaw at room temperature and warm briefly in the oven to refresh the crust.