The Best Gluten-Free Cinnamon Raisin Bread Recipe
This blog may contain affiliate links from which I earn a small commission.
Both of my parents were in education and once they made it through finals and grading and Christmas plays, they were all in on the Christmas traditions within our home. This of course meant a plethora of baking, and almost always they would make baked gifts to give, which always included mini loaves of cinnamon raisin bread.
And honestly I wish that was the way things still were. Gifts more simple like an orange or a book and a jar of homemade spiced nuts. That kind of living and appreciation for the beautiful little things seems like such a lost art. The appreciation of beautiful little things, that made space to cherish the moments shared, more than the gifts received.
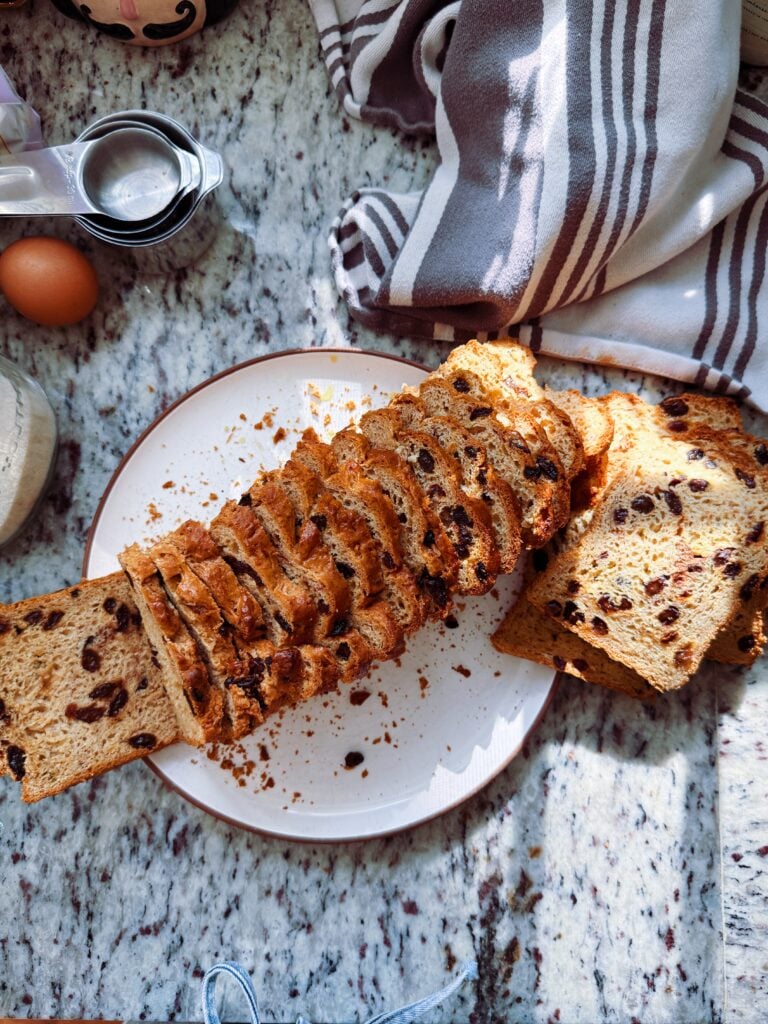
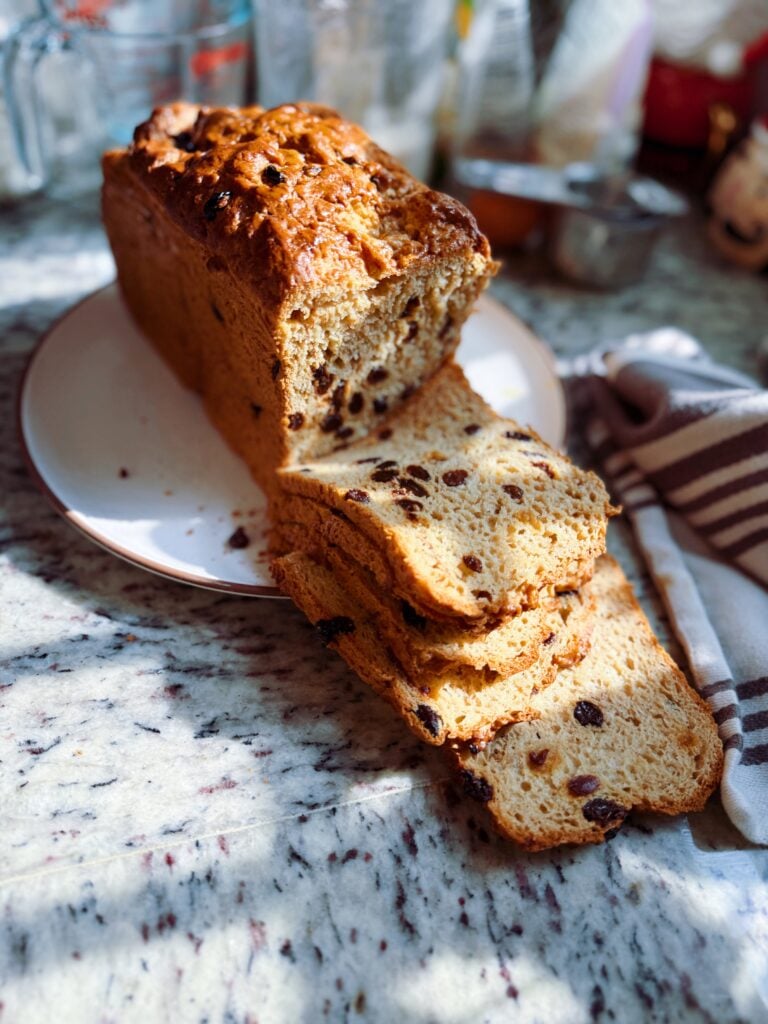
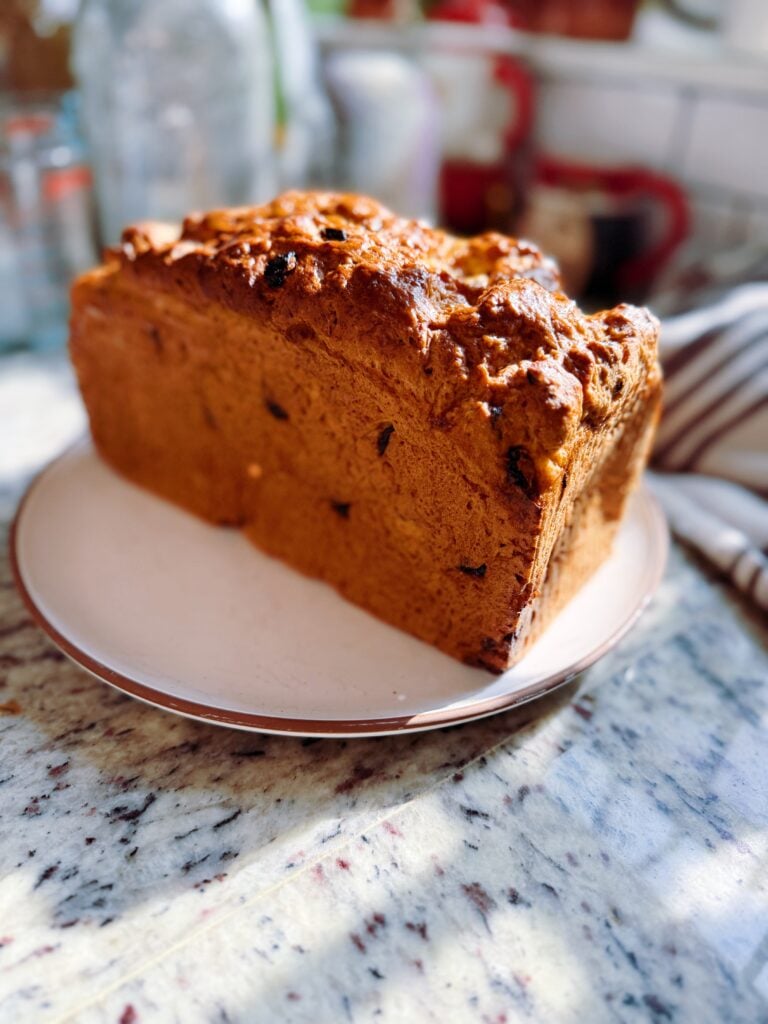
The smell of cinnamon raisin bread baking is one that brings me right back to my childhood home in the thick of the holiday season, with mom and dad dancing in the kitchen, baking together the gifts they would give. Naturally, I wanted to recreate this moment by creating the most delicious gluten free cinnamon raisin bread, and we have! I’ve taken my already perfect gluten free sandwich bread and adapted it with cinnamon and brown sugar and raisin, both mixed in and rolled in. The texture is just lovely and soft and the flavor is everything you would want it to be.
Why You Will Love This Recipe:
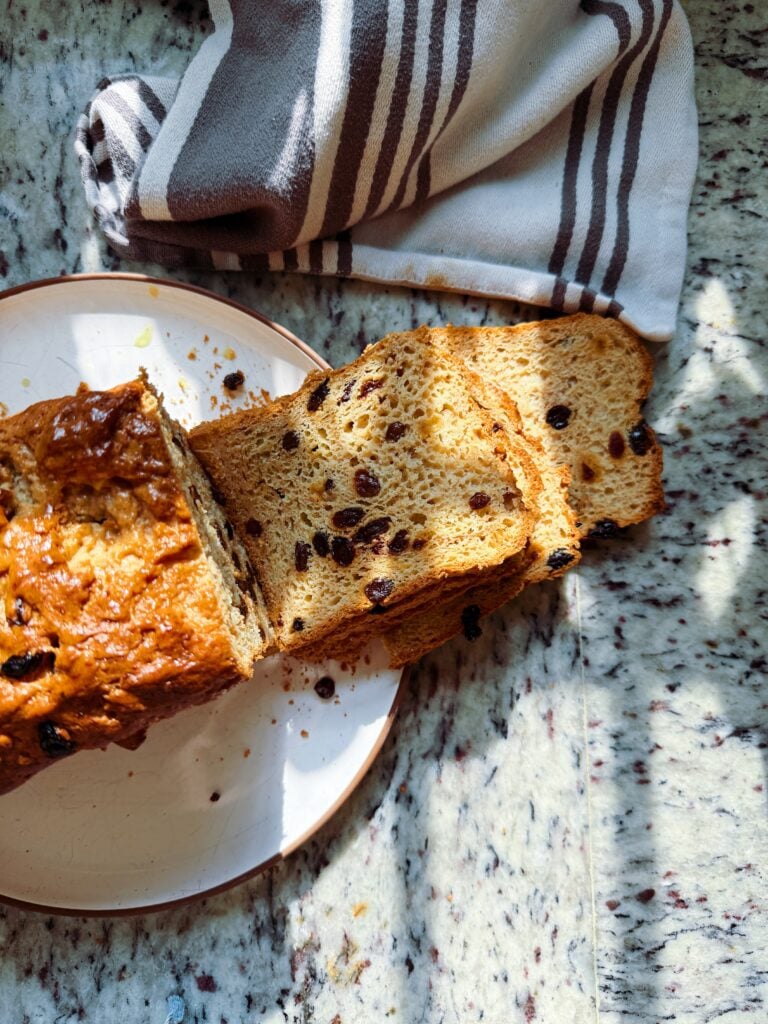
- Soft and fluffy texture: This bread has a tender, light crumb that is everything you want in homemade cinnamon raisin bread.
- Warm cinnamon flavor: Every bite is filled with cozy cinnamon flavor and sweet, plump raisins.
- Completely gluten-free: Made with my homemade gluten-free bread flour blend, this recipe delivers delicious homemade bread without the gluten.
- Perfect for breakfast: Enjoy it toasted with butter, cream cheese, or your favorite jam.
- Made with simple ingredients: No complicated ingredients or special techniques are needed, just a little patience while the dough rises!
- Freezer-friendly: Slice the loaf and freeze individual pieces so you can enjoy fresh-tasting cinnamon raisin bread whenever a craving strikes.
- A family favorite: There is something special about homemade bread, especially when it brings back memories of baking in the kitchen with family.
Ingredients:
Bread Dough
- 350 grams gluten-free bread flour blend: Use a high-quality gluten-free bread flour blend for the best structure, texture, and rise. I recommend using my homemade gluten-free bread flour blend, which is specially formulated for yeast breads and helps create a soft, fluffy texture. It’s a blend of tapioca flour, whole grain sorghum flour and millet flour.
- 2 3/4 teaspoons instant yeast: Instant yeast helps the dough rise and develop its light, airy texture. It can be mixed directly into the dry ingredients without needing to be activated first.
- 2 teaspoons xanthan gum: Xanthan gum provides structure and elasticity in gluten-free baking, helping hold the dough together. You can substitute 1 flax egg or 3 additional tablespoons of psyllium husk if preferred.
- 2 teaspoons baking powder: Baking powder gives the dough an additional lift, helping create a lighter texture and a softer crumb.
- 1 teaspoon salt: Salt enhances the flavor of the bread and balances the sweetness while also helping regulate yeast activity.
- 2/3 cup warm water: Water hydrates the psyllium husk, creating a gel that helps bind the ingredients together. Use warm water rather than hot water to avoid affecting the yeast.
- 3 tablespoons whole psyllium husk: Whole psyllium husk is an important ingredient in gluten-free yeast baking. When combined with water, it forms a gel that mimics some of the elasticity of gluten, giving the dough structure and helping prevent a dry, crumbly texture. I recommend whole psyllium husks rather than psyllium powder.
- 1 cup whole milk (115°F): Warm milk adds moisture, richness, and tenderness to the dough. Heating it to approximately 115°F also helps create the ideal environment for the yeast to activate
- 1/3 cup granulated sugar: Sugar adds a touch of sweetness, helps feed the yeast, and contributes to browning as the bread bakes
- 1 large eggs (room temperature): Eggs provide structure, moisture, and richness. Bringing them to room temperature helps them incorporate more evenly into the dough
- 1/8 cup softened butter: Butter adds richness, flavor, and tenderness to the bread. Make sure it is softened to room temperature so it mixes smoothly into the dough
- 1 teaspoon apple cider vinegar: Apple cider vinegar helps improve the texture and structure of gluten-free bread. Its acidity works alongside the other ingredients to create a softer, more tender crumb.
- A little gluten-free baking tip: For the best results, measure your bread flour by weight using a kitchen scale. Gluten-free yeast doughs are sensitive to ingredient ratios, and weighing the flour helps ensure consistent results.
- 1 large egg mixed with 1 tablespoon water, for egg wash — The egg wash gives the loaf a beautiful golden-brown finish and a slight sheen. Whisk the egg and water until smooth, then gently brush it over the shaped loaf just before baking.
Brown Sugar Cinnamon Filling
- ½ cup light brown sugar — Brown sugar adds sweetness and a warm, caramel-like flavor to the filling. Its moisture helps create a delicious cinnamon swirl throughout the bread. You can omit this ingredient if wanted. (You can omit this ingredient)
- 4 teaspoons ground cinnamon — Cinnamon gives the bread its signature warm, sweet spice. Mix it thoroughly with the brown sugar to distribute the flavor evenly throughout the filling.
- 1 cup raisins — Raisins add natural sweetness, chewy texture, and bursts of fruity flavor in every slice. If your raisins are dry, soak them in warm water for about 10 minutes, then drain and pat them completely dry before adding them to the filling. This helps keep them plump without introducing excess moisture into the dough.
Instructions:
1. Combine the dry ingredients. In the bowl of a stand mixer, combine the gluten-free bread flour blend, instant yeast, xanthan gum, baking powder, and salt. Using the paddle attachment, mix until everything is evenly incorporated. You can also do this by hand in a large mixing bowl with a whisk.
2. Prepare the psyllium gel. In a small bowl, combine the whole psyllium husk and warm water. Stir well and let it sit for approximately 5 minutes until it forms a thick, gel-like consistency. This step is important because the psyllium helps bind the dough and provides the elasticity needed for gluten-free bread.
3. Warm the milk and sugar. In a small saucepan over low heat, warm the milk and sugar (or honey) to approximately 115–120°F. Stir occasionally to help dissolve the sugar. Be careful not to overheat the milk, as temperatures that are too high can damage the yeast. Pour the warm milk mixture into the dry ingredients.
4. Add the remaining wet ingredients. Add the prepared psyllium gel, room-temperature eggs, softened butter or oil, and apple cider vinegar to the mixing bowl. Mix until all the ingredients are incorporated and a thick, sticky dough forms.
5. Beat the dough. Increase the mixer speed to medium-high and beat the dough for approximately 5 minutes. Unlike traditional bread dough, gluten-free bread dough does not need to be kneaded. This mixing time helps hydrate the flour, develop the psyllium structure, and create a smooth, cohesive dough.
6. Prepare the cinnamon sugar mixture. In a small bowl, combine the cinnamon and raisins, tossing until the raisins are lightly coated. Add half of the raisin mix to the blender and slowly incorporate. Sprinkle four onto your work surface. Using a rubber spatula coop the dough out onto the surface and knead a few times, then flatten the dough into a 6×6 square. Sprinkle over top the remaining filling. Gently roll and fold the fix ins into the dough as you roll the dough into a rectangular log. This will help to create that cinnamon sugar swirl.
7. Transfer to the loaf pan. Lightly grease a standard loaf pan. Transfer the dough into the prepared bread pan, using your oiled hands. Smooth the top with a damp spatula or lightly oiled hands to create an even surface. Gluten-free dough is typically thicker and stickier than traditional bread dough, so don’t worry if it doesn’t look like a conventional bread dough.
8. Cover and let rise in a warm place. Cover the loaf pan loosely with plastic wrap or a damp kitchen towel. Place it in a warm, draft-free location to rise. I always place mine in the oven with the oven light on! Let the bread rise for approximately 30–60 minutes, or until it has noticeably increased in size and is approaching the top of the loaf pan. Watch it closely because gluten-free bread can overproof. You want a nice rise without allowing the dough to collapse.
9. Preheat the oven. I like to start preheating my oven about 15 minutes into the rising process so it is fully heated when the bread is ready. Place a cast-iron skillet on the bottom rack of the oven and preheat to 400°F. The skillet will be used to create steam during baking.
10. Create steam and bake. Once the bread has risen, brush on the egg wash. Carefully toss a handful of ice cubes into the preheated cast-iron skillet to create steam. Immediately place the loaf on the center rack and bake for 15 minute. Then lower the temperature to 350 and bake for another 40–50 minutes, or until the internal temperature reaches approximately 205°F. The steam helps create a beautiful crust while keeping the inside of the loaf soft and tender. Be careful when adding the ice, as the steam will be very hot.
11. Brush with butter. My mama always slathered butter over the top of a freshly baked loaf, so I follow suit! As soon as the bread comes out of the oven, brush the top generously with softened or melted butter. It adds a little extra flavor and helps keep the crust soft.
12. Cool the bread. Allow the loaf to cool in the pan for about 5 minutes before carefully turning it out onto a wire cooling rack. Let it cool completely on wire rack before slicing.
13. The hardest part—WAIT! You must wait at least 2 hours before slicing into your bread. I know, I know, it is so hard! However, gluten-free bread needs plenty of time to cool and finish setting. If you cut into it while it is still warm, the center can become gummy or appear underbaked. Trust me, the wait is worth it!
14. Store and freeze. Store the completely cooled loaf in a gallon-sized zip-top bag, squeezing out as much excess air as possible. Enjoy within 4–5 days for the best freshness. To freeze, slice the bread and place the slices in a freezer-safe bag with small pieces of parchment paper between each slice. This makes it easy to grab individual slices whenever you need them.
A few important baking tips:
- Use a kitchen scale to measure the gluten-free bread flour. Too much flour can make the rolls dense and dry.
- Don’t skip the 30-minute refrigeration step. It makes the dough much easier to work with.
- Use parchment paper when rolling the dough. This makes shaping and rolling the cinnamon rolls much easier.
- Make sure the rolls have enough time to rise before baking. They should look puffy and expanded.
- For the softest cinnamon rolls, frost them while they are still slightly warm.
- This is a great recipe to double and make into 4 mini loaves for Christmas gifts or for small gift anytime of the year.
Perfect Pairings:
This cinnamon raisin bread is delicious on its own, but there are so many ways to enjoy it!
Breakfast & Brunch
- Scrambled eggs and crispy bacon for a sweet and savory breakfast.
- Greek yogurt topped with fresh berries and honey.
- A fresh fruit salad with strawberries, blueberries, and orange slices.
- Breakfast sausage and fried eggs for a hearty morning meal.
Spreads & Toppings
- Salted butter spread over a warm, toasted slice.
- Whipped honey butter for a little extra sweetness.
- Cream cheese or homemade cinnamon honey cream cheese.
- Strawberry, raspberry, or apricot preserves.
- Almond butter or peanut butter with a drizzle of honey.
Make Something Special
- Cinnamon Raisin French Toast: Dip thick slices into an egg, milk, cinnamon, and vanilla mixture, then cook in butter until golden brown.
- French Toast Casserole: Cube the bread and bake it with an egg custard, cinnamon, and brown sugar for a delicious breakfast casserole.
- Cinnamon Raisin Bread Pudding: Use leftover bread to make a warm bread pudding with vanilla custard.
- Breakfast Sandwich: Pair a toasted slice with peanut butter and sliced bananas for a quick, filling breakfast.
Drinks
- A hot cup of coffee or homemade vanilla latte.
- Chai tea with warm spices.
- A cinnamon dolce latte.
- Hot chocolate with whipped cream.
My favorite way to enjoy this bread: Toast a thick slice, spread a generous amount of salted butter over the top, and let it melt into all those little cinnamon raisin pockets. Simple, nostalgic, and absolutely delicious!
Summary:
This homemade gluten-free cinnamon raisin bread is soft, fluffy, slightly sweet, and filled with juicy raisins and warm cinnamon flavor. Made with my homemade gluten-free bread flour blend, whole psyllium husk, and a few simple pantry ingredients, this yeast bread has a great texture and a beautiful golden crust. Whether you enjoy it toasted with butter for breakfast, turn it into French toast for a weekend brunch, or enjoy a slice as an afternoon snack, this gluten-free cinnamon raisin bread is a recipe you’ll want to make again and again. Best of all, it freezes beautifully, so you can always have a homemade loaf ready to enjoy!
Check out the recipe card below to make this delicious gluten-free cinnamon raisin bread!
The Best Gluten-Free Cinnamon Raisin Bread Recipe
Ingredients
Gluten-Free Bread
- 350 grams gluten-free bread flour blend: I recommend my homemade gluten-free bread flour blend. Weigh flour for best results.
- 2 3/4 teaspoons instant yeast
- 2 teaspoons xanthan gum: Can substitute 1 flax egg or 3 tablespoons additional psyllium husk.
- 2 teaspoons baking powder
- 1 teaspoon salt
- 2/3 cup warm water
- 3 tablespoons whole psyllium husk: Use whole husks not powder.
- 1 cup whole milk warmed to 115°F
- 1/3 cup granulated sugar
- 1 large egg room temperature
- 1/8 cup softened butter
- 1 teaspoon apple cider vinegar
Egg Wash
- 1 egg
- 1 tbsp water
Cinnamon Raisin Filling
- 1/2 cup light brown sugar: Optional.
- 4 teaspoons ground cinnamon
- 1 cup raisins: Soak in warm water for 10 minutes if dry. Drain and pat dry before using.
Instructions
- Mix dry ingredients: In a stand mixer fitted with a paddle attachment, combine the bread flour, yeast, xanthan gum, baking powder, and salt.
- Make psyllium gel: Combine psyllium husk and warm water in a small bowl. Let sit for 5 minutes until thickened.
- Warm milk: Heat milk and sugar in a saucepan to 115–120°F. Pour into the dry ingredients.
- Add wet ingredients: Add the psyllium gel, egg, softened butter, and apple cider vinegar. Mix until combined.
- Beat dough: Increase mixer speed to medium-high and beat for 5 minutes until smooth and cohesive.
- Prepare filling: Mix brown sugar and cinnamon in a small bowl. Toss in the raisins. Reserve half of the filling for layering.
- Shape the dough: Gently mix half of the raisin filling into the dough. Sprinkle flour onto your work surface and scoop out the dough. Gently knead a few times, then flatten into a 6×6-inch square. Sprinkle the remaining filling over the dough. Roll and fold the dough into a rectangular loaf, creating layers of cinnamon and raisins.
- Transfer to pan: Place the dough into a greased loaf pan. Smooth the top with lightly oiled hands or a damp spatula.
- Let rise: Cover with plastic wrap or a damp towel. Let rise in a warm place for 30–60 minutes, or until noticeably increased in size. Avoid overproofing.
- Preheat oven: Place a cast-iron skillet on the bottom rack and preheat the oven to 400°F.
- Egg wash and bake: Whisk together the egg and water. Brush over the loaf. Add a handful of ice cubes to the hot cast-iron skillet to create steam. Bake for 15 minutes at 400°F, then reduce the temperature to 350°F and bake another 40–50 minutes, until the internal temperature reaches 205°F.
- Brush with butter: Remove from the oven and generously brush the top with melted butter.
- Cool: Let cool in the pan for 5 minutes before transferring to a wire rack. Allow to cool completely for at least 2 hours before slicing. This is important to prevent a gummy center!
- Store: Store in an airtight zip-top bag for 4–5 days. To freeze, slice the loaf and place parchment paper between slices in a freezer-safe bag.