Chocolate Peanut Butter Cups | Gluten & Refined Sugar Free
This blog may contain affiliate links that I receive commission from.
I have always loved baking and lean more towards bring a “sweet tooth” rather than a “savory soul”. And I always like a sweet treat post dinner but indulging in something that is sweet, but that is good for you, is my new goal for the year! I turn 37 this year and I am making choices that support my blood sugars and hormones.
These Healthy Chocolate Peanut Butter Cups are free from refined sugars, they are gluten free, and they even have some added protein in them! My kids love them for an after school treat (they taste like Reese’s Peanut Butter Cups) and they make the perfect after dinner treat without the blood sugar spike. This homemade version or healthier peanut butter cups will make your taste buds sing!

Why You Will Love This Recipe
- delightful treats made with simple ingredients
- easy recipe to make and can be doubled or tripled
- stored in the freezer for longevity
- NO refined sugar
- NO gluten
- healthy treat to replace the unhealthy store-bought version
- the perfect sweet treats – your kids will love them!
Ingredient List:
- Quick Oats – These add a bit of texture and fiber while keeping the cups hearty. If you’re strictly gluten-free, make sure to use certified gluten-free oats.
- Natural Creamy Peanut Butter – Creamy is preferred for a smooth filling, but crunchy works if you like extra texture. Ensure it’s just peanuts (and maybe salt) with no added sugars or oils.
- Maple Syrup – A natural sweetener that blends well with peanut butter, giving a hint of caramel-like sweetness.
- Unflavored Whey ProteinPowder – Boosts the protein content without adding unnecessary sugars or artificial flavors. This helps make the cups more satiating. I love using Just Ingredients unflavored whey protein.
- Vanilla Extract – Enhances the depth of flavor, balancing the nutty and chocolatey notes.
- Salt – A pinch helps intensify the flavors and balances the sweetness.
- Hu Chocolate – A high-quality, refined sugar-free chocolate that melts beautifully and creates a smooth, rich coating. Choose your favorite variety (rich dark chocolate, cashew butter-filled, etc.).

Instructions:
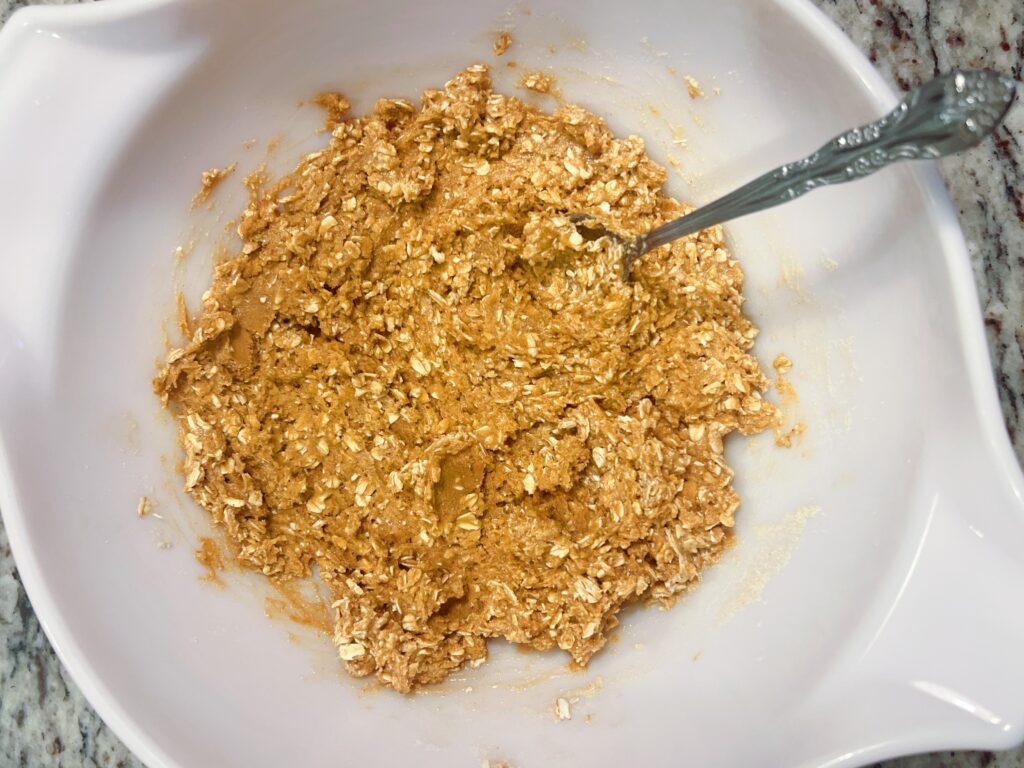
- Mix the Base: In a food processor, add the oats and pulse several times. In a medium bowl, combine the quick oats, natural peanut butter, maple syrup, unflavored whey protein, vanilla extract, and salt. Stir well until the mixture forms a thick, cohesive batter, similar in texture to oatmeal cookie dough. If the mixture feels too dry, add a tiny bit more peanut butter; if too sticky, let it rest for a minute to allow the oats to absorb some moisture.
- Prepare the Muffin Tin: Line a muffin tin with parchment muffin paper liners to prevent sticking and make removal easier. This will also help maintain the shape of the peanut butter cups. This will make 12 treats, but you could use a mini muffin pan and make 24 mini cups.
- Form the Base Layer: Using a 1-tablespoon cookie scoop, evenly portion the peanut butter mixture and drop one scoop into each lined muffin cup. Use your fingers or the back of a spoon to press the mixture down firmly, flattening it into an even layer. Ensure it’s compact so it holds its shape once set.
- Chill the Base: Place the muffin tin in the freezer for at least 10 minutes while you prepare the chocolate coating. This helps the base firm up, making it easier to spread the melted chocolate on top without mixing the layers.
- Melt the Chocolate: In a double boiler (or a heatproof bowl set over a pot of simmering water), gently melt the Hu Chocolate, stirring occasionally to ensure a smooth consistency. Avoid overheating, as chocolate can seize if it gets too hot. If needed, you can add a teaspoon of coconut oil to help the chocolate spread more smoothly.
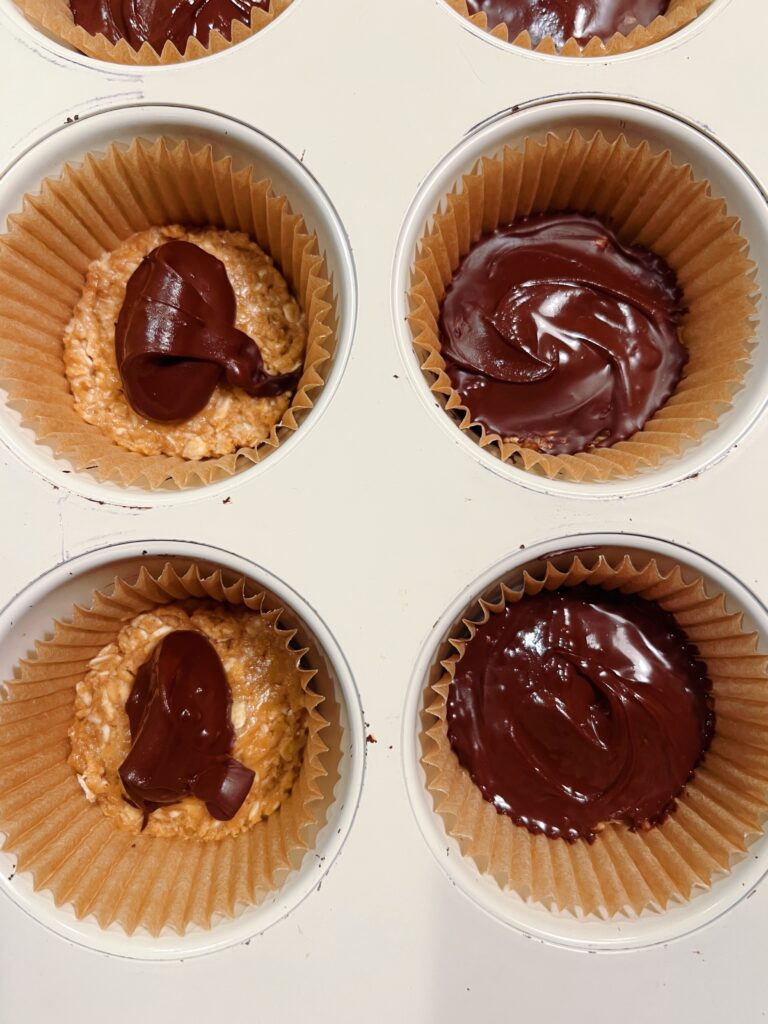
- Top with Chocolate: Remove the muffin tin from the freezer. Using a spoon, pour a small amount of melted chocolate over each peanut butter base, spreading it gently to cover the surface completely.About a teaspoon
- Final Freeze: Return the muffin tin to the freezer for another 10 minutes, or until the chocolate is fully set.
- Storage: Once set, remove the peanut butter cups from the liners and transfer them to an airtight container. Store them in the refrigerator for a firm texture or at room temperature if you prefer a slightly softer consistency. For long-term storage, keep them in the freezer and let them thaw slightly before enjoying.
Extras:
Here are some fun variations and topping ideas to customize your healthy chocolate peanut butter cups:
Crunchy Additions:
- Chopped Nuts – Sprinkle crushed peanuts, almonds, or cashews over the melted chocolate before freezing for extra crunch.
- Cacao Nibs – Adds a slightly bitter, crunchy contrast to the sweetness.
- Toasted Coconut Flakes – A tropical twist that pairs beautifully with dark chocolate.
Flavor Variations:
- Almond Butter or Cashew Butter – Swap peanut butter for a different nut butter for a unique flavor. Almond butter gives a roasted depth, while cashew butter makes them extra creamy.
- Sunflower Seed Butter – A great nut-free option!
- Espresso Powder – Mix in ½ teaspoon of espresso powder into the chocolate for a mocha-inspired treat.
- Cinnamon or Pumpkin Spice – Stir a pinch into the oat mixture for a cozy seasonal twist.
Extra Chocolate Fun:
- White or Milk Chocolate Drizzle – Melt a little white or dairy-free milk chocolate and drizzle over the tops for a decorative look.
- Flaky Sea Salt – A light sprinkle on top enhances the sweet-salty balance.
- Stuffed Peanut Butter Cups – Press a whole roasted almond, a square of dark chocolate, or a piece of dried fruit into the peanut butter layer before adding chocolate.
Check out the recipe card below for this healthy dessert recipe! The perfect sweet treat!

Chocolate Peanut Butter Cups | Gluten & Refined Sugar Free
Ingredients
Peanut Butter Filling
- 1 1/2 cups quick oats
- 1 cup creamy, natural peanut butter
- 1/2 cup maple syrup
- 1/2 cup unflavored whey protein powder (I prefer Just Ingredients)
- 1/2 tsp salt
- 1 tsp vanilla extract
Chocolate Topping
- 1 1/2 cups Hu Chocolate (You could use a a semisweet chocolate – but it may not be refined sugar free)
- 1 tbsp butter
Instructions
- Mix the Base: In a food processor, add the oats and pulse several times. In a medium bowl, combine the quick oats, natural peanut butter, maple syrup, unflavored whey protein, vanilla extract, and salt. Stir well until the mixture forms a thick, cohesive batter, similar in texture to oatmeal cookie dough. If the mixture feels too dry, add a tiny bit more peanut butter; if too sticky, let it rest for a minute to allow the oats to absorb some moisture.
- Prepare the Muffin Tin: Line a muffin tin with parchment muffin paper liners to prevent sticking and make removal easier. This will also help maintain the shape of the peanut butter cups. This will make 12 treats, but you could use a mini muffin pan and make 24 mini cups.
- Form the Base Layer: Using a 1-tablespoon cookie scoop, evenly portion the peanut butter mixture and drop one scoop into each lined muffin cup. Use your fingers or the back of a spoon to press the mixture down firmly, flattening it into an even layer. Ensure it’s compact so it holds its shape once set.
- Chill the Base: Place the muffin tin in the freezer for at least 10 minutes while you prepare the chocolate coating. This helps the base firm up, making it easier to spread the melted chocolate on top without mixing the layers.
- Melt the Chocolate: In a double boiler (or a heatproof bowl set over a pot of simmering water), gently melt the Hu Chocolate, stirring occasionally to ensure a smooth consistency. Avoid overheating, as chocolate can seize if it gets too hot. If needed, you can add a teaspoon of coconut oil to help the chocolate spread more smoothly.
- Top with Chocolate: Remove the muffin tin from the freezer. Using a spoon, pour a small amount of melted chocolate over each peanut butter base, spreading it gently to cover the surface completely.About a teaspoon
- Final Freeze: Return the muffin tin to the freezer for another 10 minutes, or until the chocolate is fully set.
- Storage: Once set, remove the peanut butter cups from the liners and transfer them to an airtight container. Store them in the refrigerator for a firm texture or at room temperature if you prefer a slightly softer consistency. For long-term storage, keep them in the freezer and let them thaw slightly before enjoying.