Flaky, Fluffy Gluten-Free Buttermilk Biscuit Recipe
This blog post may contain affiliate links from which I earn a small commission.
Every Sunday (well almost every Sunday) after church we had roast for lunch, slash ‘dinner’ if you are from the north – which I now say because I married a North Dakotan. And with the roast we always had carrots, mashed potatoes and homemade biscuits. My mom and my dad tied for first place in the kitchen cooking contest in the Brown household. They danced effortlessly in the kitchen together and I feel spoiled having had that in my childhood. So while mom typically tackled the roast, dad tackled the biscuits, and I loved it when he let me help. I try often to remember the recipe that my dad would use when you made these biscuits … I can almost remember the cookbook and the name and it just bothers me so not recalling it fully. But I think it was something like “mile high biscuits”. He left the dough extra thick to make tall biscuits and he almost always (when mom wasn’t looking) sprinkled a bit of sugar over the top of the biscuits before baking. And the slight sweet with all the savory a roast beef dinner offers, was a perfect combination.
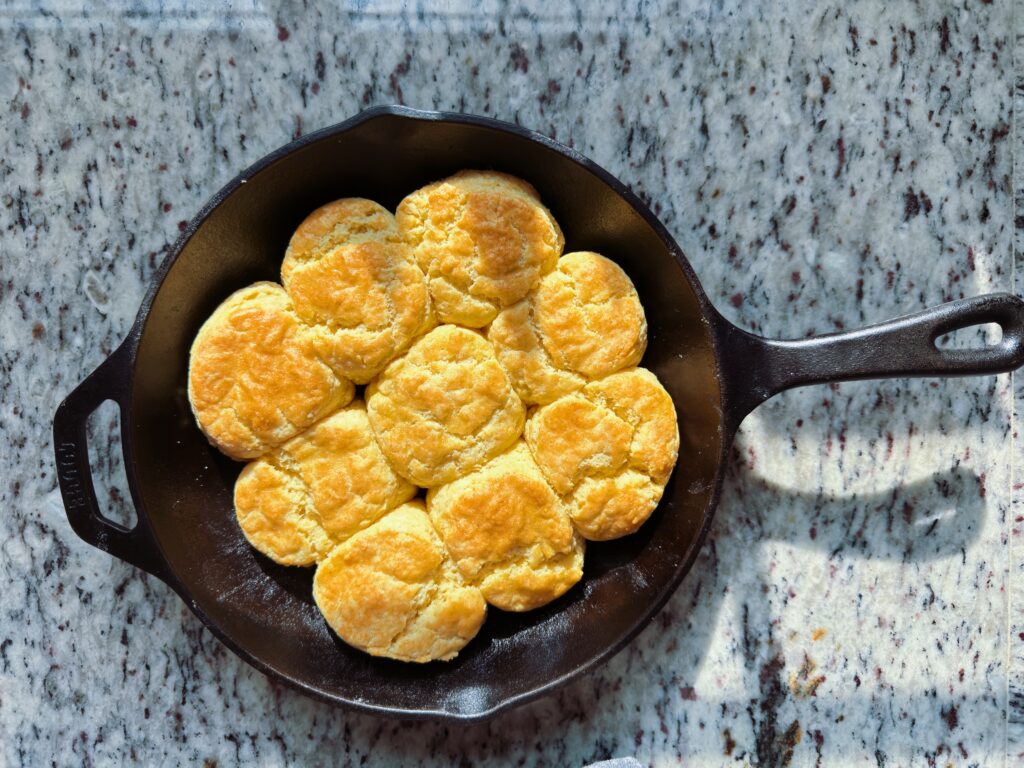
Now this recipe isn’t a “mile high biscuit” recipe, it’s a buttermilk biscuit recipe, the kind that pairs radiantly with sausage gravy or homemade jam. I have tinkered with the recipe over the years and have landed happily on my tired and true gluten-free buttermilk biscuits. Isn’t it so nice when you have tried and true go-to recipes? Okay, onward to the best gluten-free biscuits with the best texture, nostalgic taste and just all around, a glorious gluten free biscuit recipe!
Why You Will Love This Recipe:
- Flaky, buttery layers: These biscuits have tender, flaky layers with little pockets of buttery goodness throughout. Grating the cold butter helps create that classic biscuit texture.
- Soft and fluffy centers: The combination of buttermilk, baking powder, and baking soda creates biscuits that rise beautifully with soft, fluffy texture.
- Easy to make: You don’t need any special equipment or complicated techniques. A cheese grater, biscuit cutter, and cast iron skillet are all you need!
- Classic buttermilk flavor: The buttermilk adds a slight tanginess that pairs perfectly with the rich butter and flaky texture.
- Perfect for any meal: Serve them alongside breakfast, dinner, soups, or holiday meals. They’re delicious any time of day!
- Completely gluten-free: These biscuits give you all the comfort and flavor of traditional homemade buttermilk biscuits without the gluten.
Ingredients:
For the Biscuits
- 2 cups gluten free all-purpose flour: Use a high-quality gluten-free flour blend designed for baking. I like to use Arrowhead Mills Gluten-Free blend. Choose a blend that contains a binder, such as xanthan gum, to help give the biscuits structure and prevent them from crumbling.
- You could also create your own biscuit blend : 1 3/4 cup white rice flour, 1/2 cup potato starch, 1/2 cup tapioca starch, 2 1/2 tablespoons pea fiber, and 2 tsp xanthan gum.
- 1 tablespoon baking powder: Helps the biscuits rise, creating tall, fluffy layers and a soft interior.
- 1/2 teaspoon baking soda: Works with the acidity in the buttermilk to create additional lift and helps give the biscuits a tender texture.
- 1 teaspoon kosher salt: Enhances the flavor of the biscuits and balances the richness of the butter.
- 3/4 cup salted butter, cold: Use very cold butter, preferably straight from the refrigerator. Grating or cutting the butter into small cubes makes it easier to distribute throughout the flour. The cold butter creates little pockets of steam as the biscuits bake, resulting in flaky, buttery layers. You could use unsalted butter, but I don’t believe in unsalted butter.
Wet Ingredients
- 1/2 cup buttermilk, cold and shaken: Adds moisture, richness, and a slight tangy flavor. The acidity also reacts with the baking soda to help the biscuits rise. Shake the buttermilk well before measuring and keep it refrigerated until ready to use. I would use real buttermilk – not a milk and vinegar blend.
- 1 large egg, cold: Adds moisture, richness, and structure while helping bind the gluten-free ingredients together. Using a cold egg also helps keep the biscuit dough chilled.
Egg Wash
- 1 large egg: Creates a beautiful golden-brown finish on the tops of the biscuits and gives them a slight sheen when baked.
- 1 tablespoon milk or water: Whisk with the egg to thin the egg wash, making it easier to brush evenly over the biscuit tops. Milk creates a slightly richer, deeper golden finish, while water provides a lighter sheen.
Gluten-free baking tip: Keeping your butter, buttermilk, and egg cold is especially important when making biscuits. Cold butter creates flaky layers, while handling the dough as little as possible helps keep the biscuits tender instead of dense.
Instructions:
- Prepare the butter: Place the butter in the freezer for approximately 5 minutes to make sure it is very cold. Using a cheese grater, grate the butter into a large mixing bowl. Return the grated butter to the freezer while you prepare the remaining ingredients. Keeping the butter cold is key to creating flaky biscuits.
- Prepare the wet ingredients: In a medium bowl, whisk together the cold buttermilk and egg until combined. Keep refrigerated until ready to use.
- Combine the dry ingredients: In a large bowl, whisk together the gluten-free flour, baking powder, baking soda, and salt.
- Add the butter: Remove the grated butter from the freezer and gently toss it into the flour mixture until evenly distributed. Avoid overworking the butter so it stays cold.
- Add the wet ingredients: Pour the buttermilk and egg mixture into the dry ingredients. Gently stir until a soft dough forms. Be careful not to overmix. The dough should hold together but may be slightly sticky.
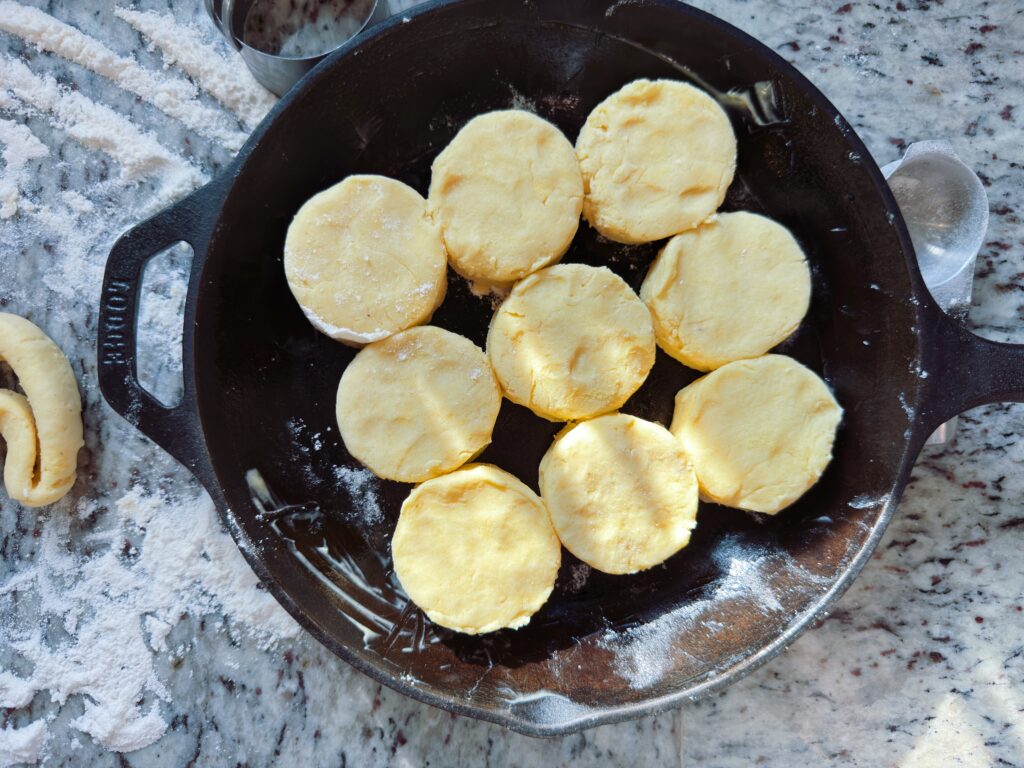
- Shape the biscuits: Lightly flour your work surface with gluten-free flour. Transfer the dough to the surface and gently pat it into an even layer, roll dough to approximately 3/4 to 1 inch thick. Fold the dough over itself a couple of times to create layers, then gently pat it back down. Use a smaller biscuit cutter to cut out your biscuits, pressing straight down without twisting. Gather any scraps and gently reshape to cut additional biscuits.
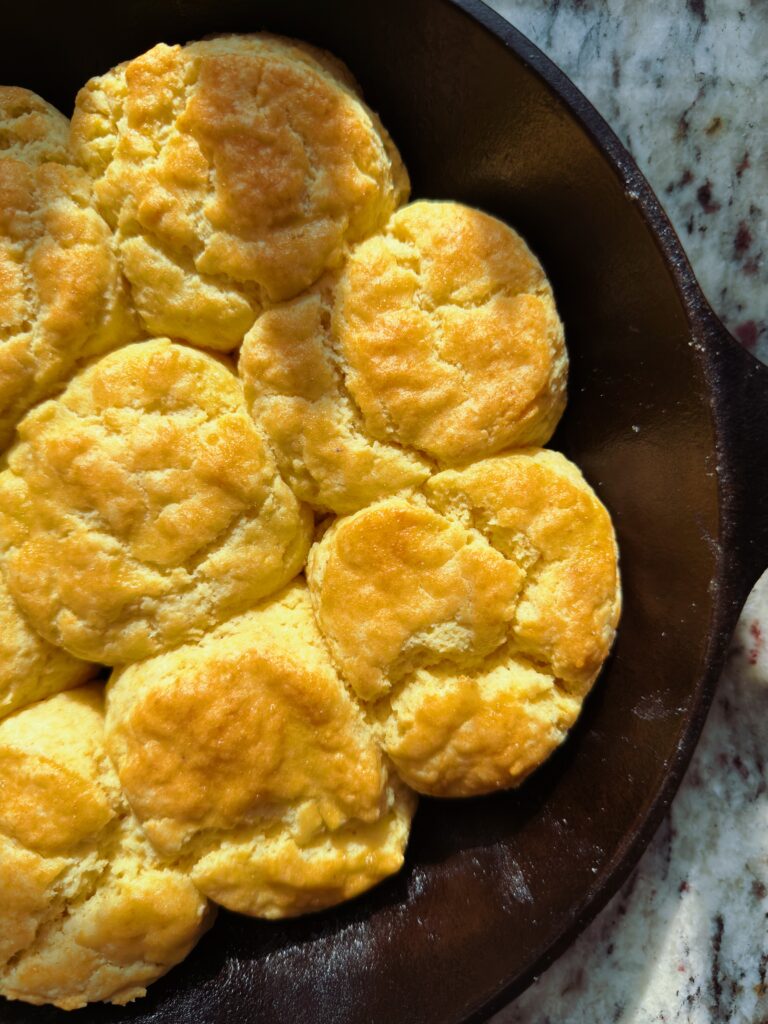
- Prepare the cast iron skillet: Lightly grease a cast iron skillet with butter. Place biscuits in the skillet, placing them close together so their sides touch. This helps the biscuits rise upward while baking and creates soft, fluffy sides. You could bake them on a baking sheet lined with parchment paper – however the cast iron is best.
- Chill the biscuits: Cover with plastic wrap and place the skillet in the freezer for approximately 5 minutes before baking. This helps firm up the butter and keeps the biscuits from spreading too quickly in the oven.
- Prepare the egg wash: In a small bowl, whisk together one egg and 1 tablespoon of milk or water. Remove the biscuits from the freezer and gently brush the tops with the egg wash. This creates a beautiful golden-brown finish.
- Bake: Preheat the oven to 400°F. Bake the biscuits for 10–15 minutes, or until they have risen and the tops are golden brown. Baking time will depend on the size of your biscuit cutter.
- Cool and serve: Remove the cast iron skillet from the oven and allow the biscuits to cool for a few minutes before serving. Enjoy hot biscuits with butter, honey, jam, or your favorite breakfast toppings! Store extra biscuits in an airtight container or a ziplock bag.
Tips and Tricks:
- Keep the butter and wet ingredients as cold as possible.
- Avoid twisting the biscuit cutter, as this can seal the edges and prevent the biscuits from rising properly.
- Don’t overwork the dough. Gluten-free biscuit dough is delicate, so handle it gently.
- Placing the biscuits close together in the cast iron skillet helps create soft sides and taller biscuits.
- For extra buttery biscuits, brush the tops with melted butter immediately after baking.
Perfect Pairings:
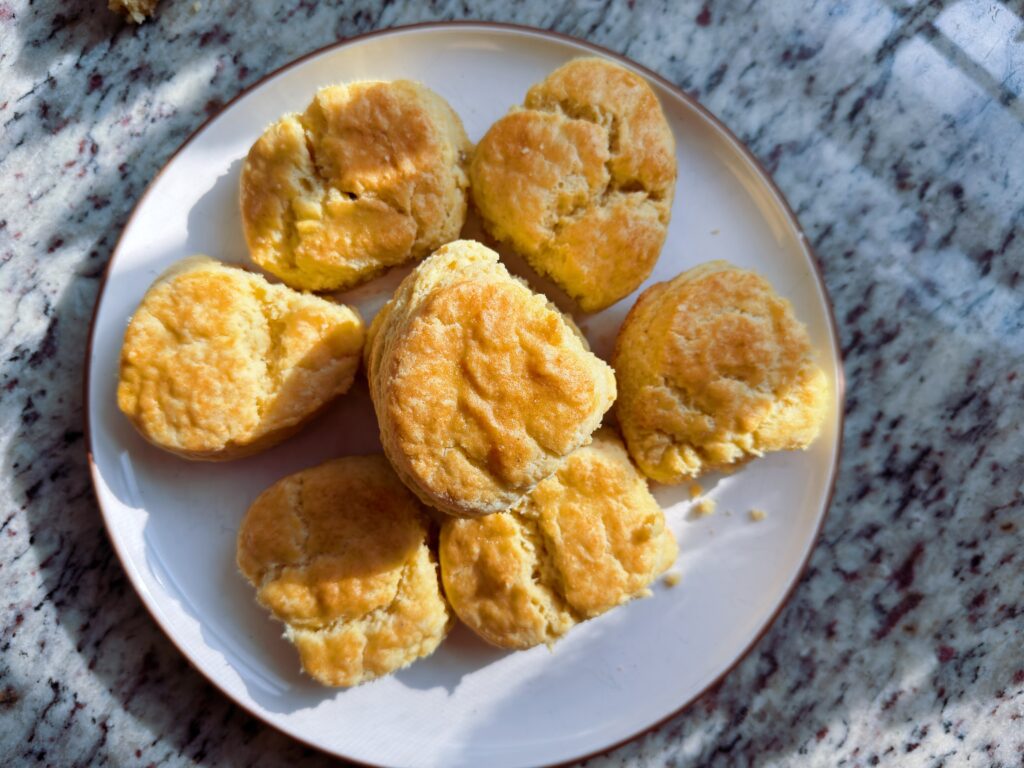
These gluten-free buttermilk biscuits are incredibly versatile. Whether you’re serving them for breakfast or alongside a comforting dinner, there are so many delicious ways to enjoy them!
Breakfast Favorites
- Scrambled eggs and crispy bacon
- Sausage gravy for homemade gluten-free biscuits and gravy
- Fried eggs with breakfast sausage
- Homemade strawberry or raspberry jam
- Honey butter or cinnamon honey butter
- Maple syrup and salted butter
- Breakfast sandwiches with eggs, cheese, and bacon
Soups and Comfort Food
- Creamy chicken and wild rice soup
- Gluten-free chicken noodle soup
- Homemade tomato soup
- Creamy potato soup topped with bacon and cheddar
- Chicken pot pie filling
- Beef stew with tender vegetables
Dinner Pairings
- Roasted garlic butter chicken
- Slow-cooked pot roast with carrots and potatoes
- Honey-glazed ham
- Oven-roasted turkey and gravy
- Southern-style green beans and bacon
- Creamy sausage and gravy
Sweet Toppings
- Whipped honey butter
- Homemade apple butter
- Peach preserves
- Fresh strawberry jam
- Cinnamon sugar butter
- Warm honey drizzled over the top
Summary:
These Gluten-Free Buttermilk Biscuits are everything you want in a homemade biscuit! They’re buttery, flaky, soft in the center, and have beautifully golden tops. Made with gluten-free all-purpose flour, cold grated butter, tangy buttermilk, and a simple egg wash, these biscuits come together with just a handful of everyday ingredients. The secret to getting those flaky layers is keeping the butter cold and giving the dough a little time to chill before baking. Baked in a cast iron skillet until golden brown, these biscuits are perfect for breakfast, Sunday dinner, holiday gatherings, or alongside a warm bowl of homemade soup. Serve them with butter and honey, make a batch of biscuits and gravy, or enjoy them straight from the skillet. You won’t even miss the gluten with these glorious gluten free biscuits!
Check out the recipe card to make this gluten-free biscuit recipe! So next time you have a hankering, make these – the best biscuits!
Happy baking!

Flaky, Fluffy Gluten-Free Buttermilk Biscuit Recipe
Equipment
Ingredients
- 2 cups gluten-free all-purpose flour I use Arrowhead Mills GF blend; see notes for homemade blend
- 1 tablespoon baking powder
- 1/2 teaspoon baking soda
- 1 teaspoon kosher salt
- 3/4 cup salted butter cold and grated
- 1/2 cup cold buttermilk shaken
- 1 large egg cold
Egg Wash
- 1 large egg
- 1 tablespoon milk or water
Instructions
- Freeze butter for 5 minutes, then grate using a cheese grater. Return to the freezer.
- Whisk together the cold buttermilk and egg. Refrigerate until ready to use.
- In a large bowl, whisk together the gluten-free flour, baking powder, baking soda, and salt.
- Add the grated butter and gently toss to distribute, pinching the dough slightly to combine.
- Pour in the buttermilk mixture and stir just until a soft dough forms. Do not overmix.
- Lightly flour your work surface and gently roll the dough 3/4–1 inch thick. Fold the dough over itself a couple of times, then pat back down. Cut with a small biscuit cutter, pressing straight down without twisting.
- Grease a cast iron skillet with butter and arrange biscuits close together. A parchment-lined baking sheet also works, but cast iron is my favorite!
- Cover with plastic wrap and freeze for 5 minutes.
- Whisk together the egg and milk or water for the egg wash. Brush over the biscuit tops.
- Bake at 400°F for 10–15 minutes, until risen and golden brown.
- Cool for a few minutes and serve warm with butter, honey, or jam. Store leftovers in an airtight container.
Notes
- 1 3/4 cups white rice flour
- 1/2 cup potato starch
- 1/2 cup tapioca starch
- 2 1/2 tablespoons pea fiber
- 2 teaspoons xanthan gum
- Keep the butter, buttermilk, and egg cold for the flakiest biscuits.
- Use real buttermilk rather than a milk-and-vinegar substitute.
- If using a gluten-free flour blend that already contains xanthan gum or another binder, no additional binder is needed.
- Handle the dough gently to keep the biscuits tender and fluffy.